Organizations often want the same desktop shortcuts (apps, web links, or web apps) on every PC. You can deploy and update them with Microsoft Intune by packaging a PowerShell script as a Win32 app. The script creates shortcuts on the Public Desktop so all users see them; you can use predefined .lnk files, a CSV list (name, link, icon), or both. A detection script checks a version file so Intune knows when the package is installed and when to re-run after you bump the version. This guide walks through preparing the package, the install and detection logic, and adding the Win32 app in Intune.
What This Approach Does
You maintain a source folder with an install script (install.ps1) that: creates local folders for shortcuts and icons, removes old shortcuts from a previous version, copies predefined shortcuts (and optional icons) from the package, creates additional shortcuts from a CSV (name, link, icon), then copies everything to C:\Users\Public\Desktop. A validation file (e.g. under $Env:ProgramFiles\MEM\Validation) stores the package version so the detection script can report success. When you update the CSV or predefined shortcuts, you bump the version, repackage, and re-deploy; Intune will re-run the install and refresh the desktop.
Prepare the Package
Create a folder that will become your Win32 app source:
- Desktop . Optional. Put predefined
.lnkfiles here; they will be copied to the Public Desktop. If shortcuts use custom icons, either embed the icons in the package (e.g. in an icons folder) and reference them by path in the script, or use icons that already exist on the target (e.g.C:\Windows\System32\...). - icons . Optional. Place
.ico(or other) icon files here; the script copies them to a local folder and uses them when creating shortcuts from the CSV. - link-list.csv . Optional. CSV with columns such as name, link, icon. Each row becomes a shortcut: name (e.g.
My App) becomesMy App.lnk, link is the target path or URL, icon is the filename in the icons folder (or full path if using system icons). - install.ps1 . The main script (see below).
- uninstall.ps1 . Optional. Removes the shortcuts and validation file.
- check.ps1 . Detection script; reads the validation file and compares version.
Install Script Overview
The install script can: (1) set a package name and version and start a transcript for logging; (2) define and create paths (e.g. $Env:ProgramFiles\MEM\Data\Desktop\PackageName, ...\Data\icons\PackageName, and C:\Users\Public\Desktop); (3) remove old shortcuts from the Public Desktop that belong to this package and clear the local Desktop/icons folders; (4) copy predefined shortcuts and icons from .\Desktop and .\icons into the local folders; (5) if you use a CSV, import it and create shortcuts with WScript.Shell (CreateShortcut, set TargetPath and IconLocation, Save); (6) copy all shortcuts from the local Desktop folder to C:\Users\Public\Desktop; (7) write the version to a validation file (e.g. $Env:ProgramFiles\MEM\Validation\PackageName) and stop the transcript. Use the same package name and version in the detection script.
Detection Script
The detection script (check.ps1) must use the same package name and version as the install script. It reads the validation file (e.g. $Env:ProgramFiles\MEM\Validation\PackageName) and compares its content to the expected version. If they match, exit 0 so Intune considers the app installed; otherwise exit 1. Example:
$PackageName = "DesktopShortcuts"
$Version = "1"
$ValidationPath = "$Env:ProgramFiles\MEM\Validation\$PackageName"
if (Test-Path $ValidationPath) {
    $Current = Get-Content $ValidationPath -Raw
    if ($Current -eq $Version) { exit 0 }
}
exit 1
When you update shortcuts or the CSV, increment $Version in both install.ps1 and check.ps1, repackage, and upload the new Win32 app so Intune re-detects and re-runs the install.
Package as Win32 App and Add to Intune
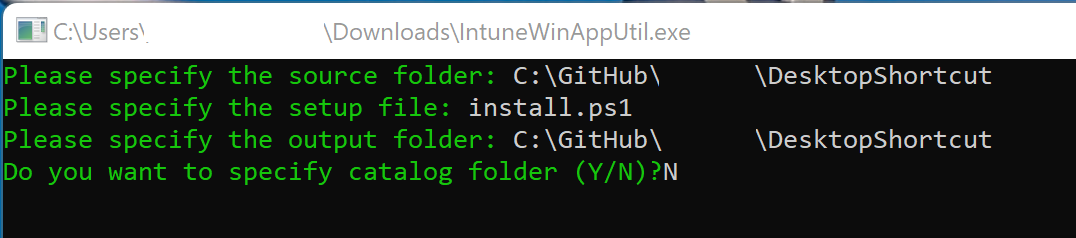
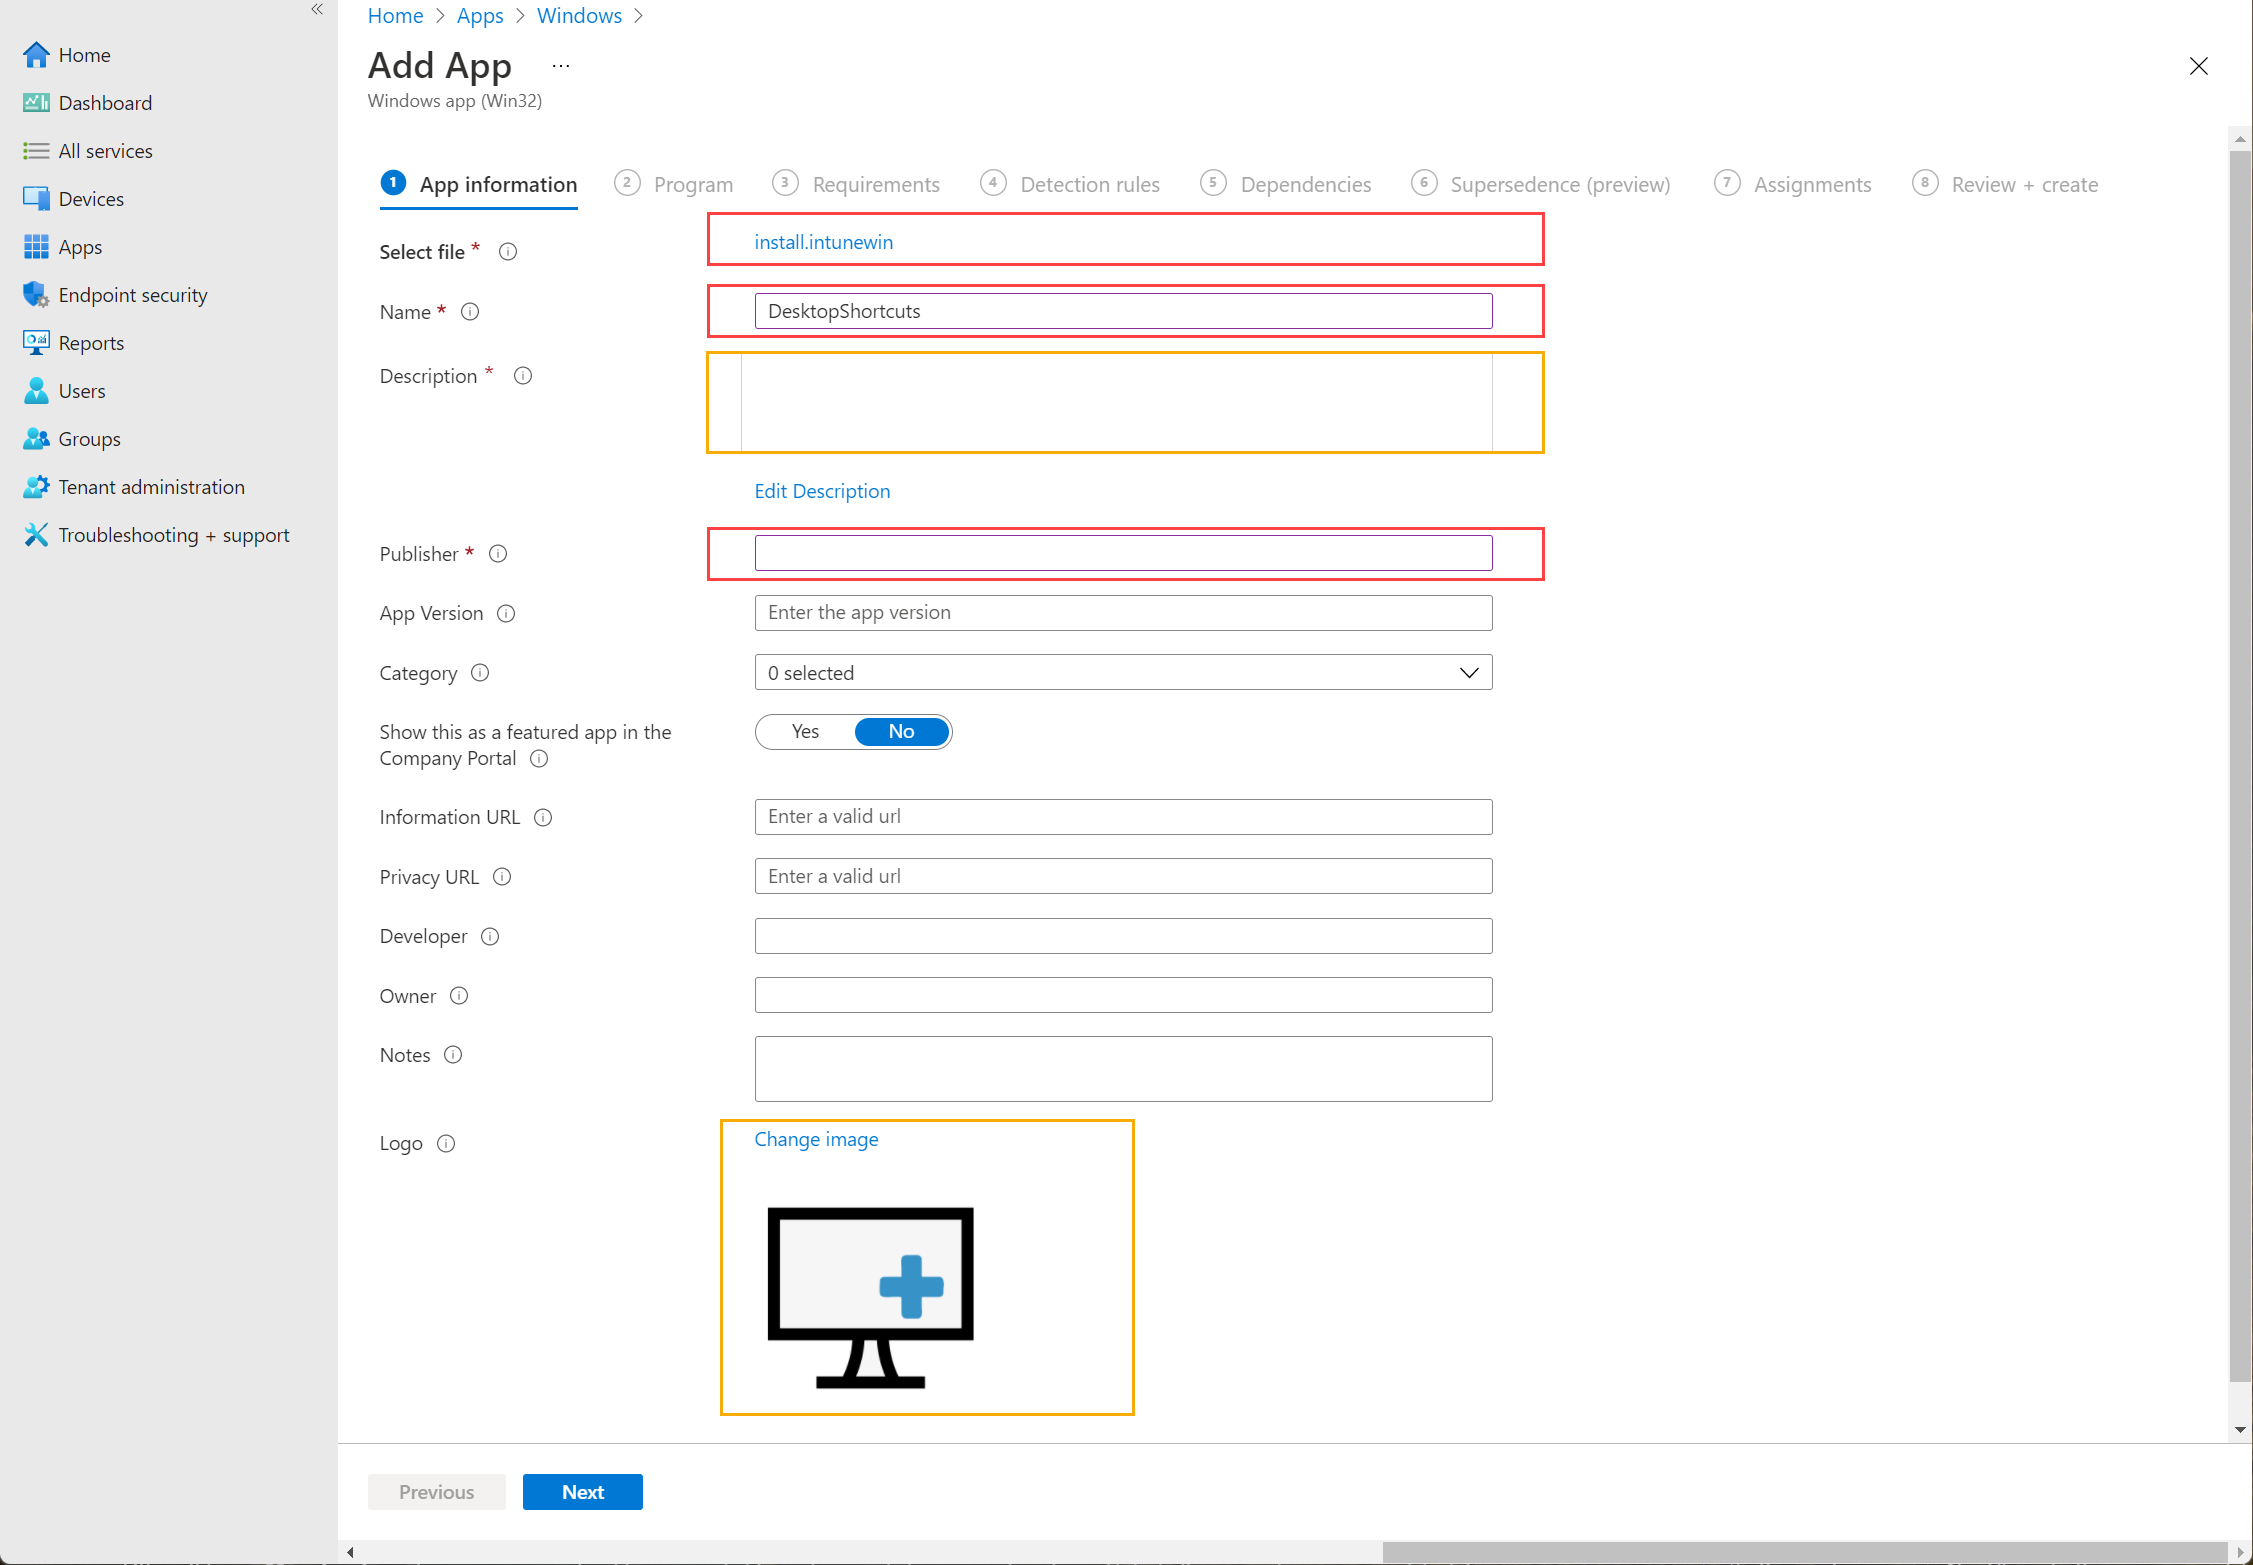
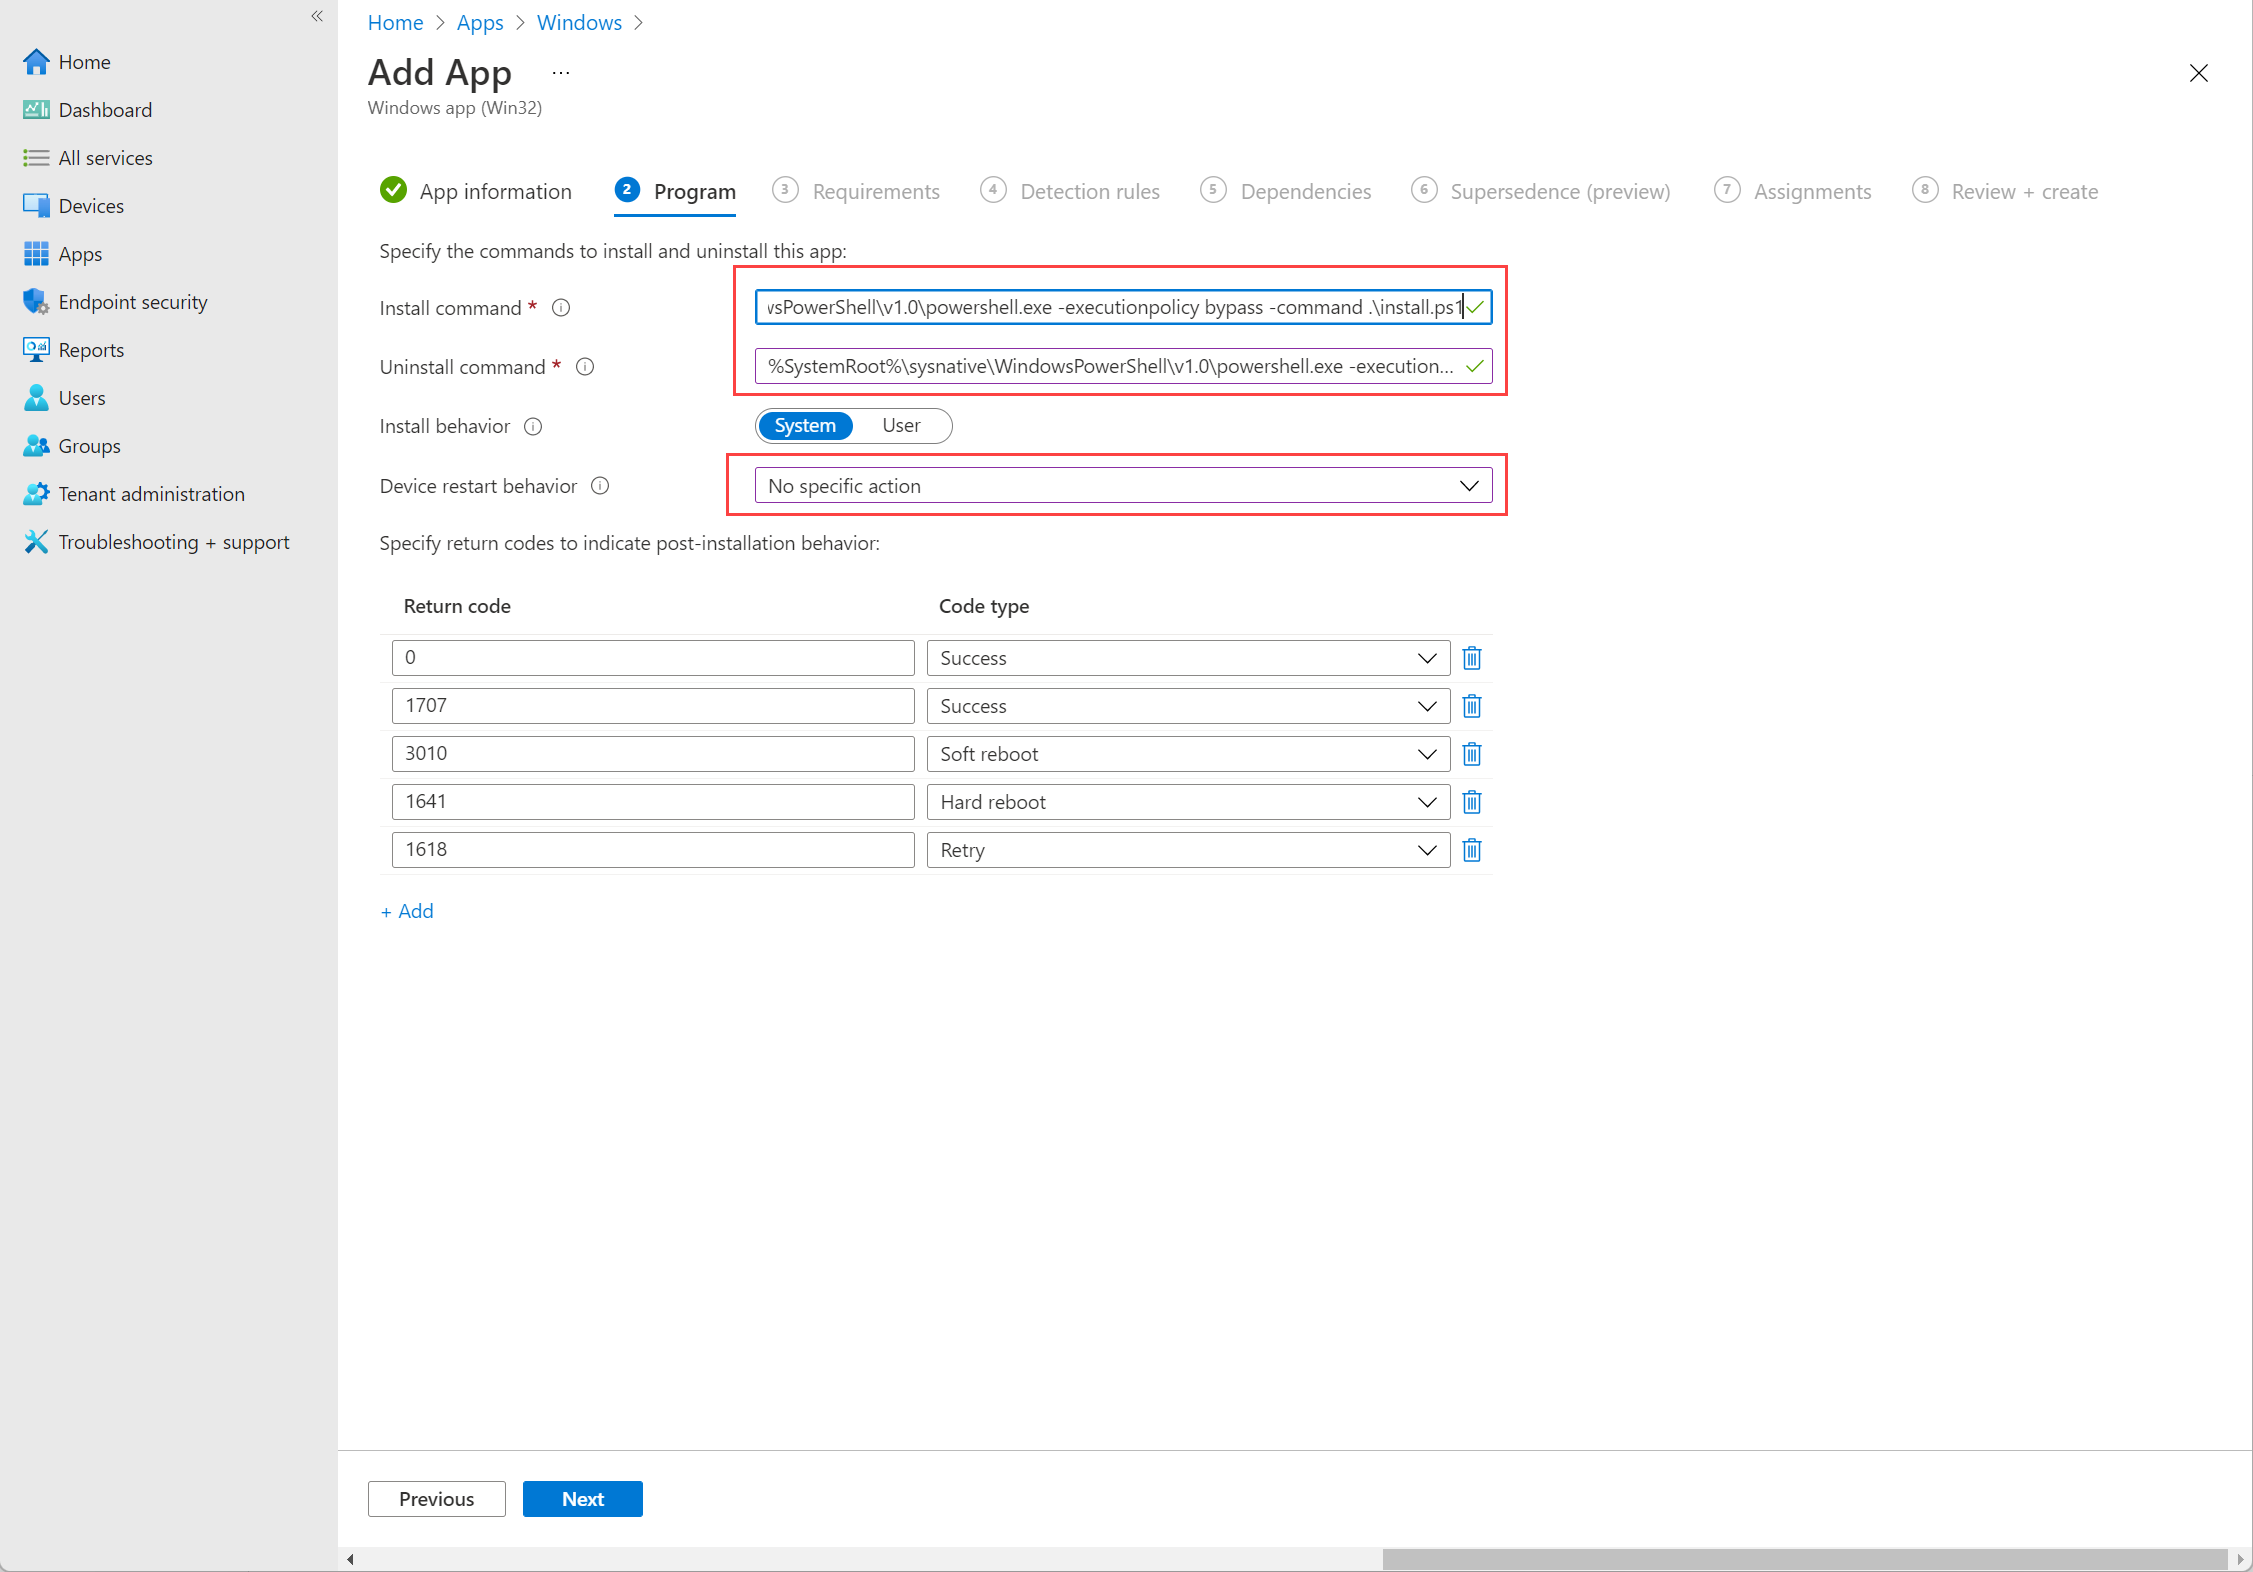
Use the Microsoft Win32 Content Prep Tool to pack your source folder (with install.ps1 as the setup file) into a .intunewin file. In the Microsoft Intune admin center, go to Apps → Windows → Apps → Add → Windows app (Win32). Upload the .intunewin file. Set Name, Description, Publisher, and optionally an Icon. Set the Install command to run the install script, e.g.:
%SystemRoot%\sysnative\WindowsPowerShell\v1.0\powershell.exe -ExecutionPolicy Bypass -File .\install.ps1
Set the Uninstall command if you have uninstall.ps1, e.g.:
%SystemRoot%\sysnative\WindowsPowerShell\v1.0\powershell.exe -ExecutionPolicy Bypass -File .\uninstall.ps1
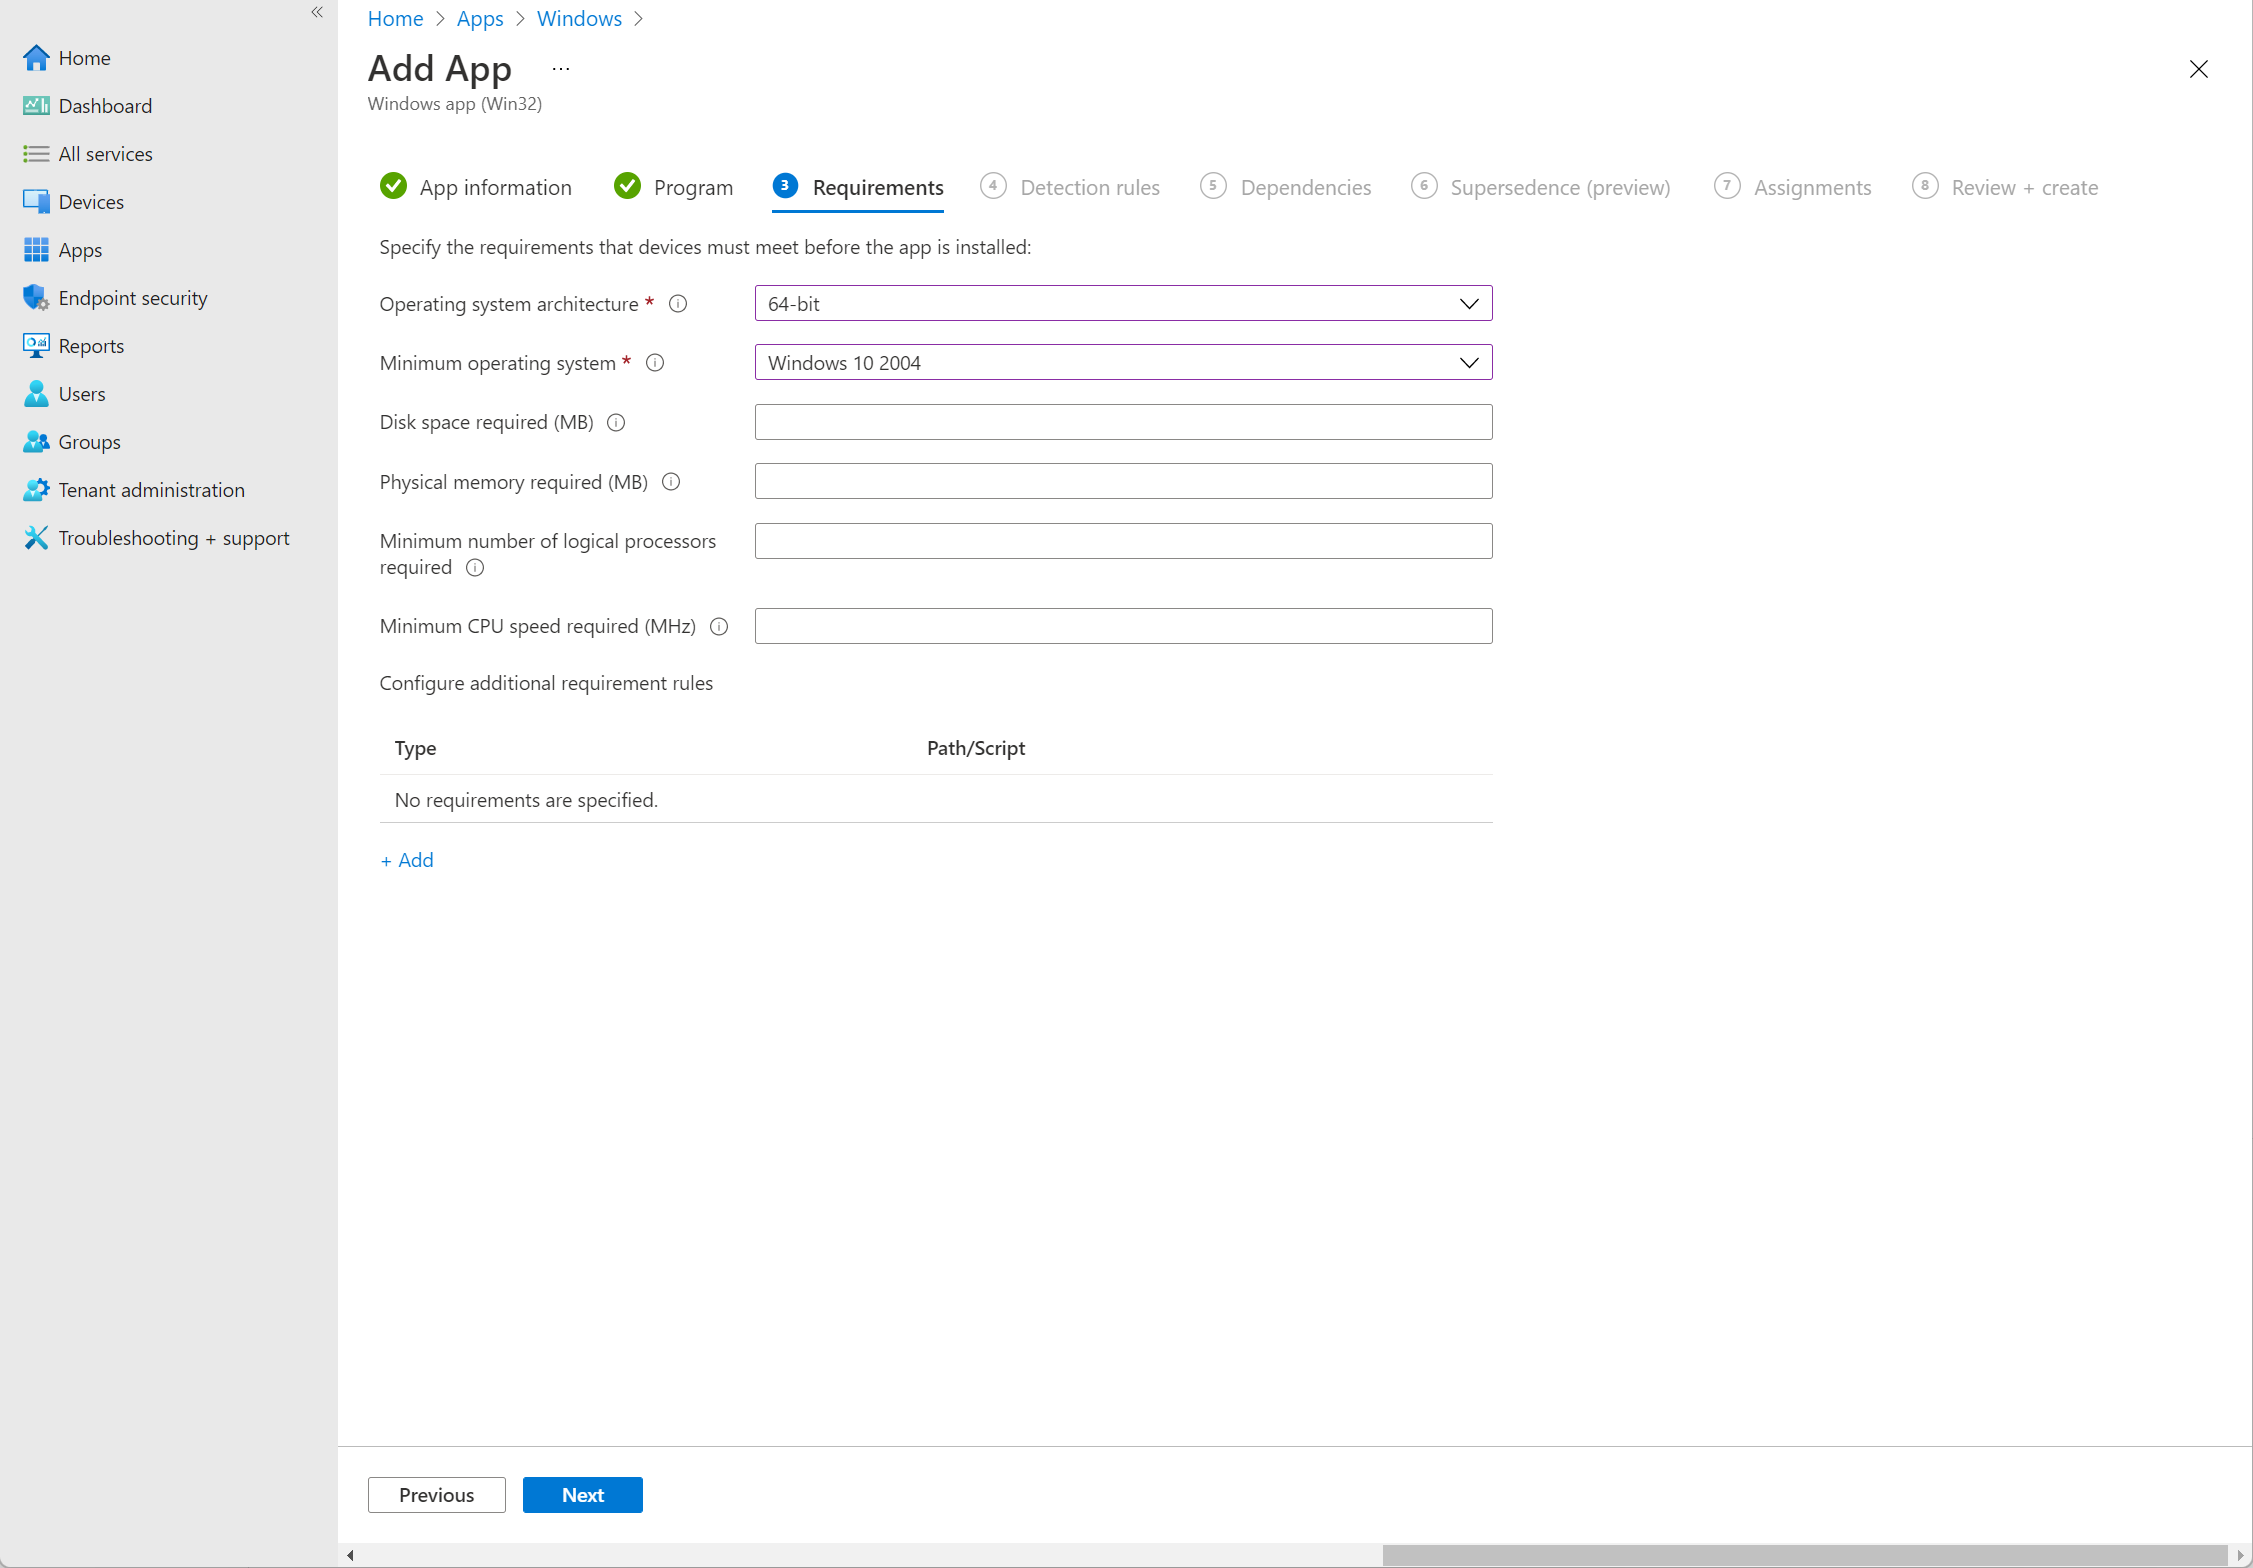
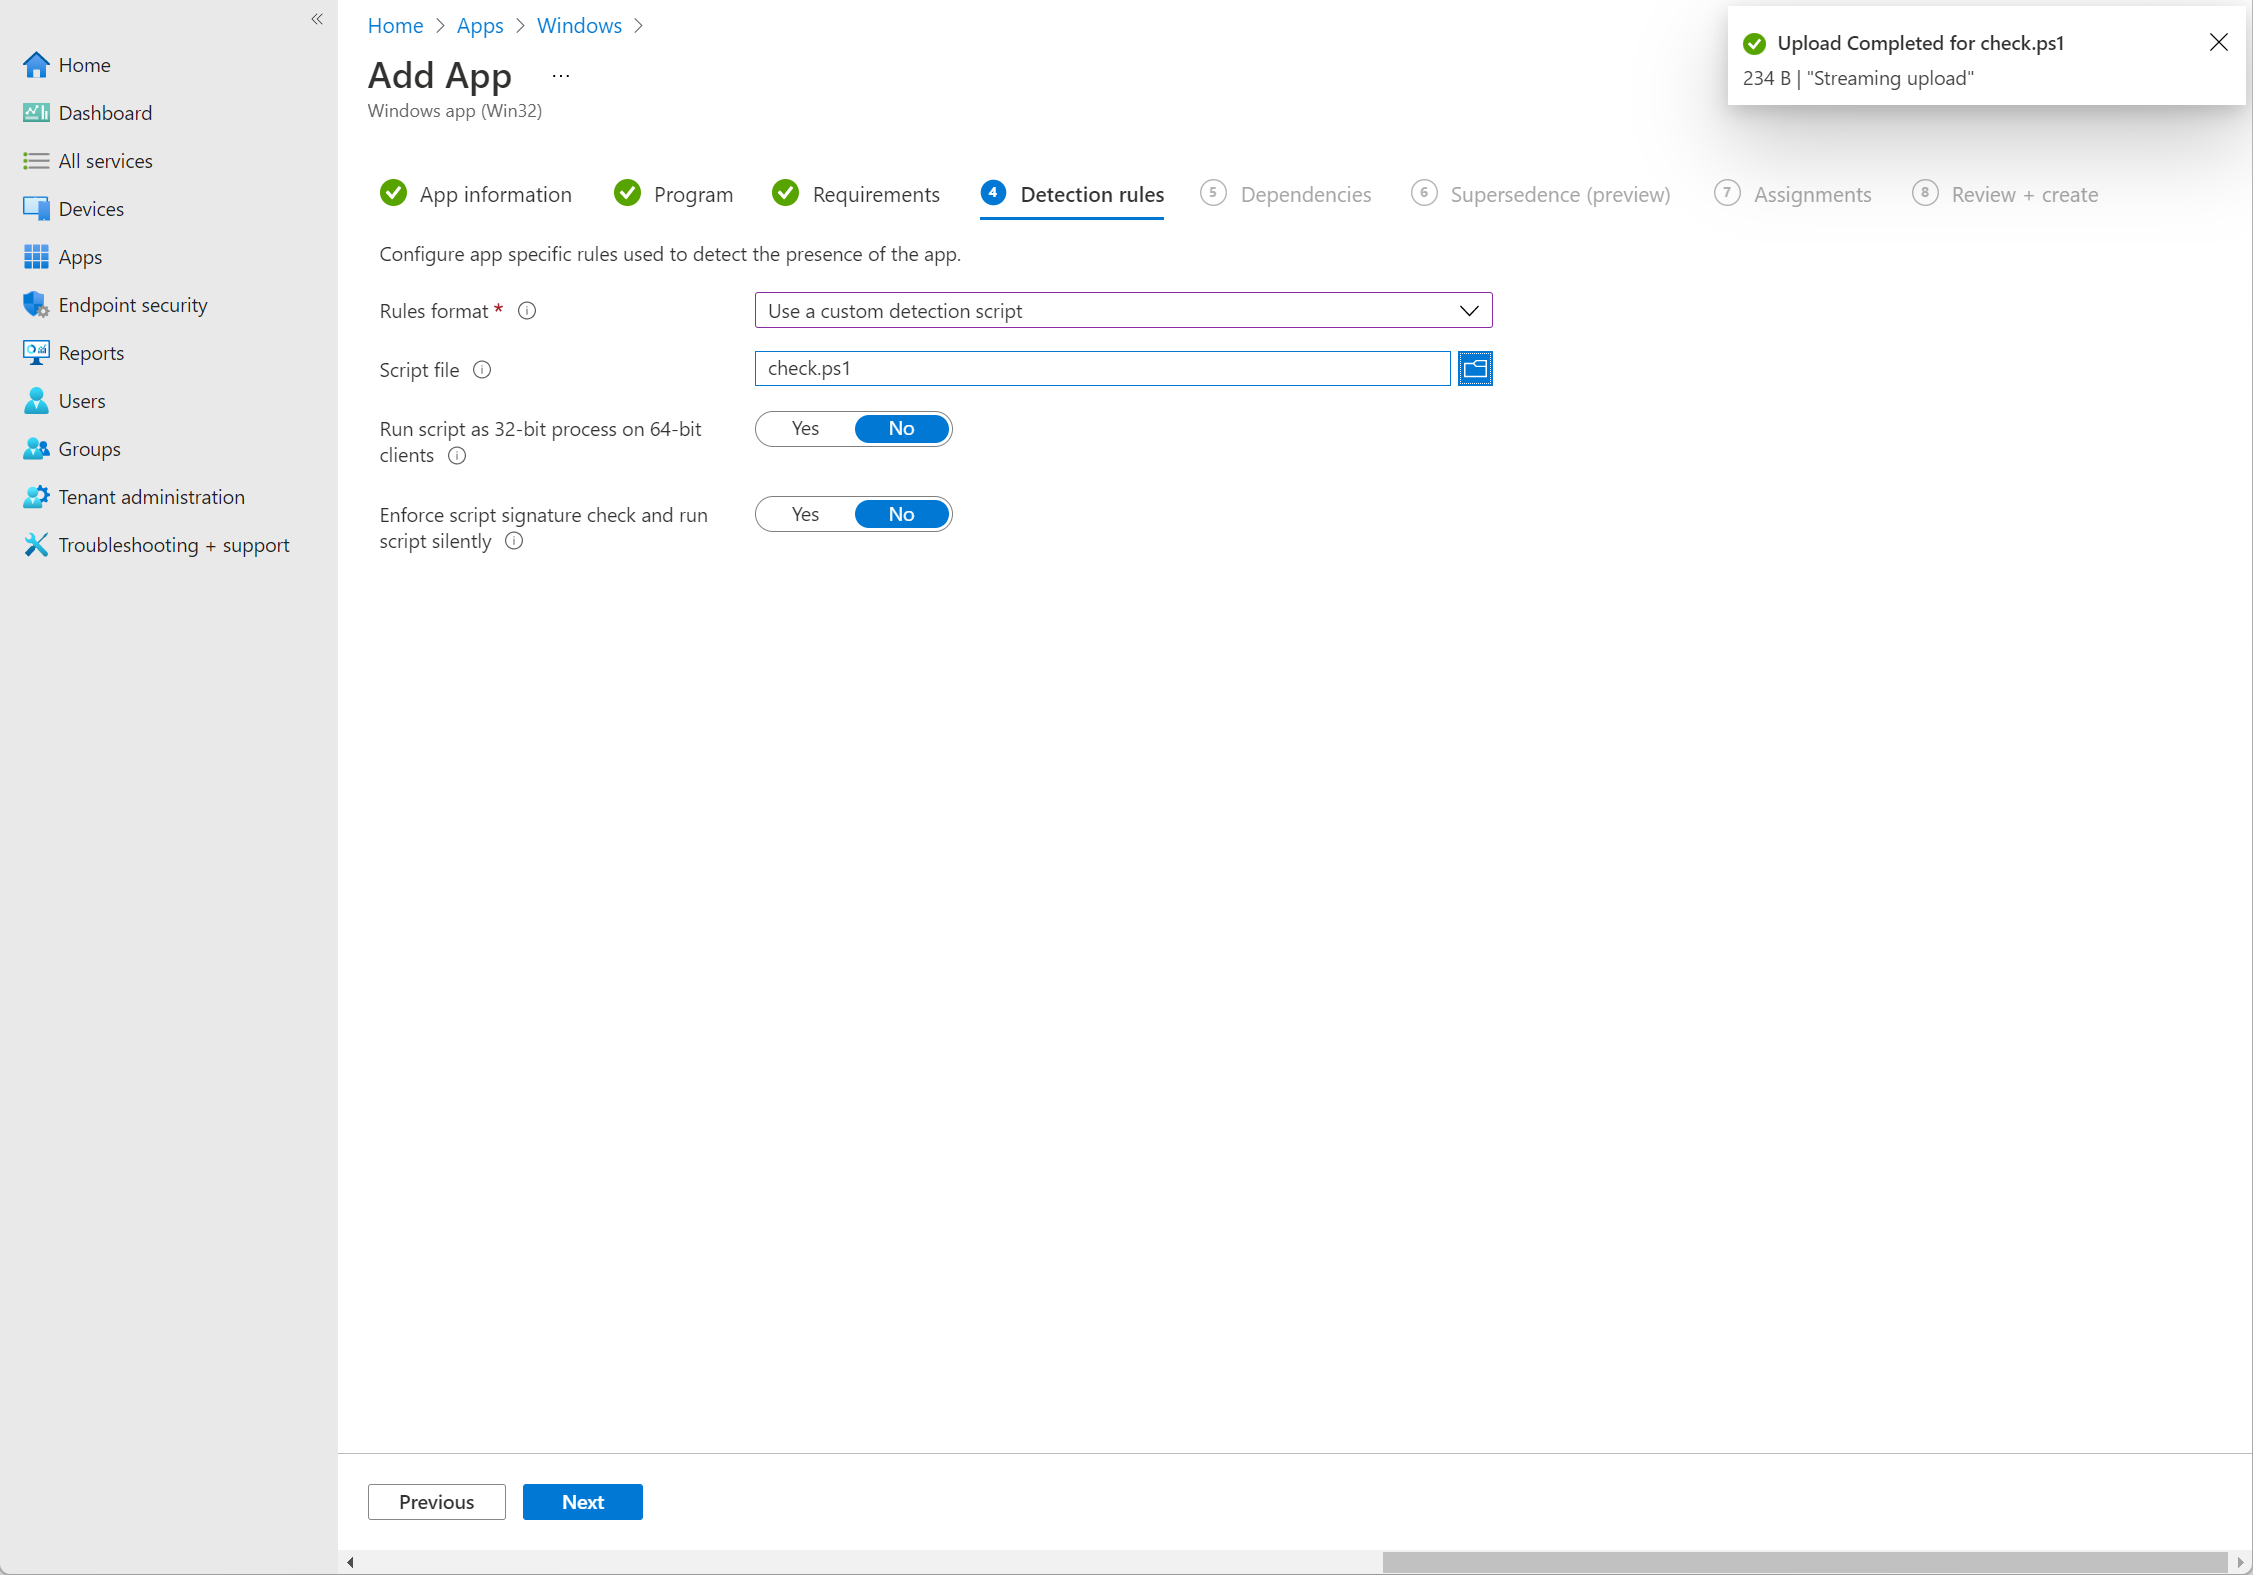
Under Requirements, set the OS (e.g. Windows 10/11 64-bit, version 2004 or later). Under Detection rules, choose Use a custom detection script and upload check.ps1. Assign the app to the desired user or device groups. After sync, the install script runs and places shortcuts on the Public Desktop; when you update the package and version, Intune will run the install again and refresh the shortcuts.
Summary
To manage desktop shortcuts with Microsoft Intune: prepare a folder with install.ps1 (and optionally link-list.csv, predefined shortcuts in Desktop, and icons in icons). The install script creates paths, removes old shortcuts from this package, copies predefined shortcuts and icons, creates shortcuts from the CSV using WScript.Shell, copies everything to C:\Users\Public\Desktop, and writes a versioned validation file. Use a detection script (check.ps1) that reads that file and exits 0 when the version matches. Package the folder as a .intunewin with the Win32 Content Prep Tool, add it in Intune as a Win32 app with install (and optional uninstall) commands and custom detection script, set requirements and assignments, then deploy. Bump the version and repackage when you change shortcuts so Intune re-runs the install. For more on Win32 apps, see Win32 app management on Microsoft Learn.