Enrollment notifications in Microsoft Intune tell users when a new device is enrolled using their credentials. That gives you better visibility over who is enrolling what, and it gives users a chance to spot enrollments they did not do. So they can report them. Notifications can be sent by email and, on Android, iOS/iPadOS, and macOS, by push in the Company Portal (or Intune) app. On Windows, push notifications in Company Portal are not supported; only email is available. Notifications apply only to user-driven enrollment (e.g. user enrolls their own device); they do not apply to bulk or device-only enrollment. This post walks through enabling and configuring enrollment notifications per platform, what to set for push and email, and what users see. Configure tenant branding and customization (Tenant administration → Customization) first so your logo, company name, and contact info can be used in the emails.
Why Use Enrollment Notifications
Users see exactly when a device is added with their account, so they can quickly flag unexpected enrollments. That improves security and helps with audit and compliance. Notifications also work as a welcome: new employees get a clear message that their device is set up and managed. Tell users to contact IT if they get a notification for a device they did not enroll.
Configuring Enrollment Notifications
You configure notifications per platform: Windows, Android, and Apple (iOS/iPadOS and macOS separately). The flow is the same; only the starting blade differs. In the Microsoft Intune admin center, go to Devices → Enroll devices. Then open Windows devices, Android devices, or Apple devices depending on the platform. Under that blade you will see an option to create notifications (e.g. Create notifications or platform-specific notification types such as iOS Notifications, macOS Notifications, Android Enterprise Notifications, or Android device administrator Notifications). Choose the right one and click through to create a new notification profile.
Basics and Notification Settings
On Basics, give the profile a name and optionally a description. On Notification settings you configure:
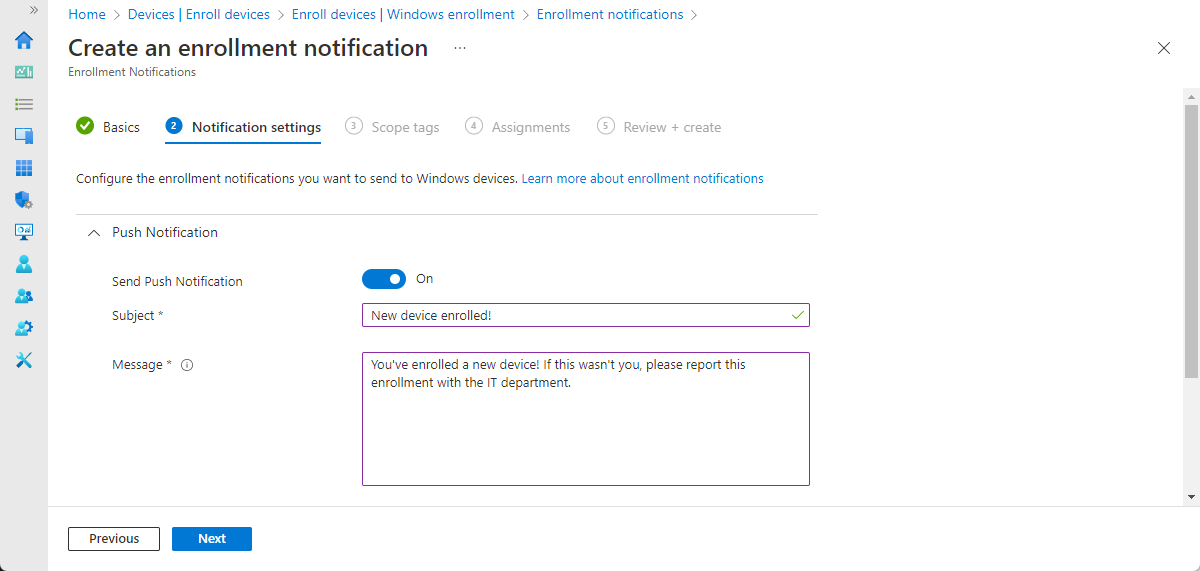
Push notifications (where supported. Not Windows): Turn Send Push Notification to On. Set a Subject and a Message (up to 2000 characters). The message is shown in the Company Portal or Intune app when a new device is enrolled. On Android and Apple devices, users who already have the app installed will get this push; they can also find it later under Notifications → Updates from your organization.
The screenshot below shows the Intune enrollment notification push notification settings.
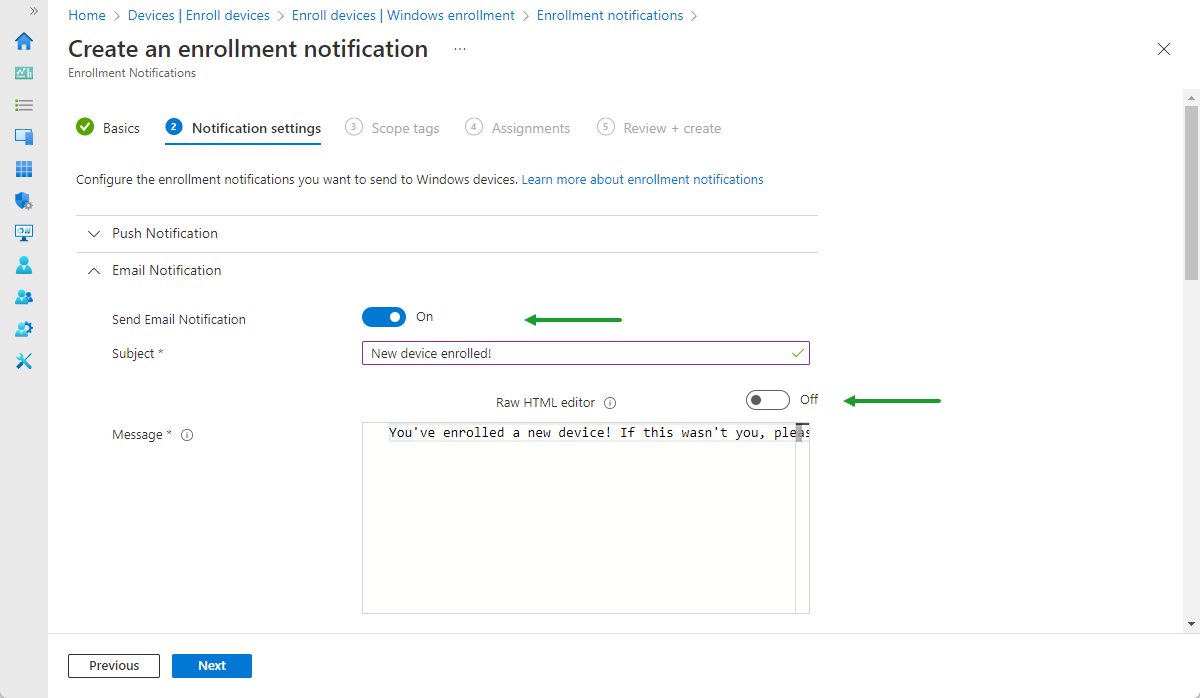
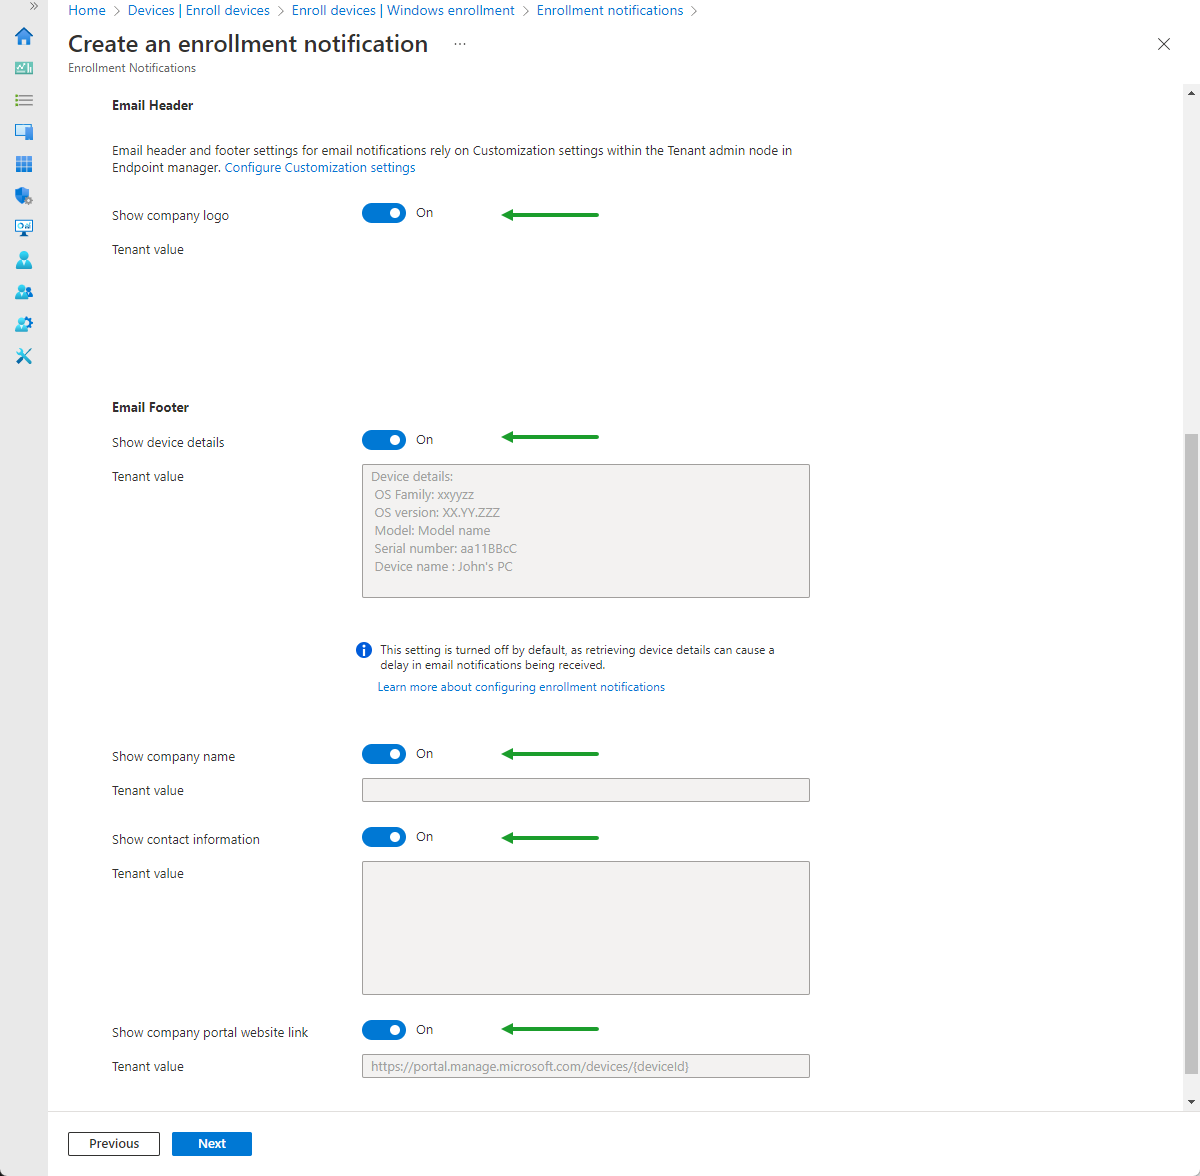
Email notifications: Turn Send Email Notification to On. Set Subject and Message (up to 2000 characters). You can turn on Raw HTML editor to format the message. Under header and footer options you can enable: Show company logo (from tenant customization), Show device details (enrolled device info in the footer. Can delay delivery while details are retrieved), Show company name, Show contact information, and Show Company Portal website link. Header and footer content comes from tenant branding and customization; set those first so the email looks correct.
Assignments and Priorities
On Scope tags, add any required tags. On Assignments, assign the notification profile to the user groups that should receive it (e.g. all users or a pilot group). If you create more than one notification for the same platform, set priorities so Intune knows which one to use when a user is in multiple assigned groups. Review and create the profile.
What Users See
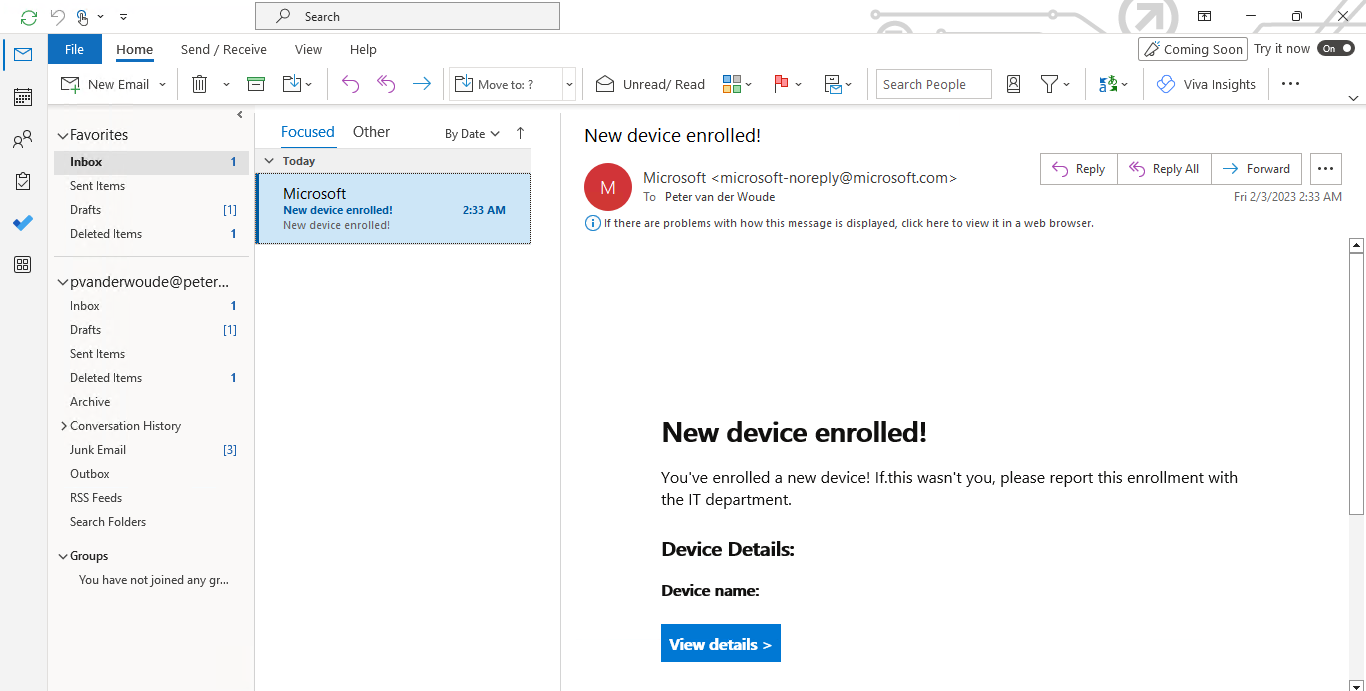
After a user enrolls a device with a user-driven method, they receive the notifications you enabled. Push (Android, iOS/iPadOS, macOS only): a notification in the Company Portal or Intune app; they can open it and later find it under Notifications. Email: an email to their work account (e.g. in Outlook on Windows or any device with company mail). The email can include device details, company name, contact info, and a link to Company Portal if you enabled those options.
Below: the user experience when the enrollment notification email appears in Outlook on Windows.
Tips and Troubleshooting
Use clear, short text in the subject and message (e.g. “A new device was enrolled with your account” and what to do if they did not enroll it). If notifications do not appear: confirm the profile is assigned to the right user groups and that enrollment was user-driven. If email is slow, remember that turning on “Show device details” can delay the email while Intune gets device info. On Windows, only email is supported for enrollment notifications. If the wrong notification is sent, check priorities when multiple profiles exist for the same platform.
Summary
To inform users of newly enrolled devices with Microsoft Intune: go to Devices → Enroll devices → Windows devices (or Android/Apple), then Create notifications. Configure Basics (name, description) and Notification settings: enable Send Push Notification (subject, message) where supported, and Send Email Notification (subject, message, optional HTML, logo, device details, company name, contact info, Company Portal link). Set scope tags and assign to user groups; use priorities if you have multiple notifications per platform. Notifications are sent only for user-driven enrollment. Configure tenant branding first so email header and footer look correct. Users get push in Company Portal (except on Windows) and email to their work account so they can spot unexpected enrollments and welcome new devices.