Intune doesn’t include a dedicated “deploy wallpaper” setting. You can still push a corporate desktop background by (1) copying the image to the device with a Win32 app, and (2) setting the desktop wallpaper with a Settings catalog policy that points to that local path.
This approach uses only Intune. No Azure Blob Storage or extra services. You package the image in an .intunewin file, deploy it so the file is copied to C:\Windows\Web\Wallpaper, then apply a configuration profile that sets the Desktop Wallpaper (User) to that path. After both apply, a restart may be needed for the wallpaper to show.
What You’ll Do
- Package your wallpaper image into an Intune Win32 (
.intunewin) file. - Add and deploy a Win32 app in Intune that copies the image to
C:\Windows\Web\Wallpaper. - Create a Settings catalog profile that sets the Desktop Wallpaper (User) to the same path and assign it to users or devices.
Step 1: Package the Wallpaper as a Win32 App
Use the Microsoft Win32 Content Prep Tool to wrap your image in an .intunewin file.
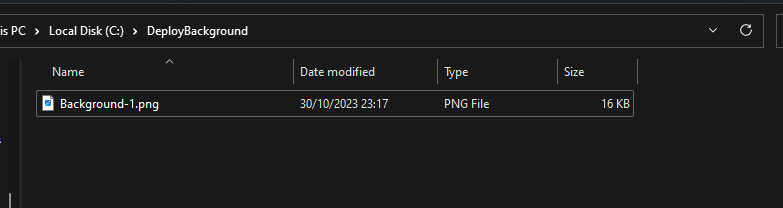
- Create a folder (e.g.
C:\DeployBackground) and put your wallpaper image in it (e.g.Background-1.png). - Create an output folder (e.g.
C:\Output).

Download and install the Microsoft Win32 Content Prep Tool (search for “Win32 Content Prep Tool” or “IntuneWinAppUtil”). Run it as Administrator.
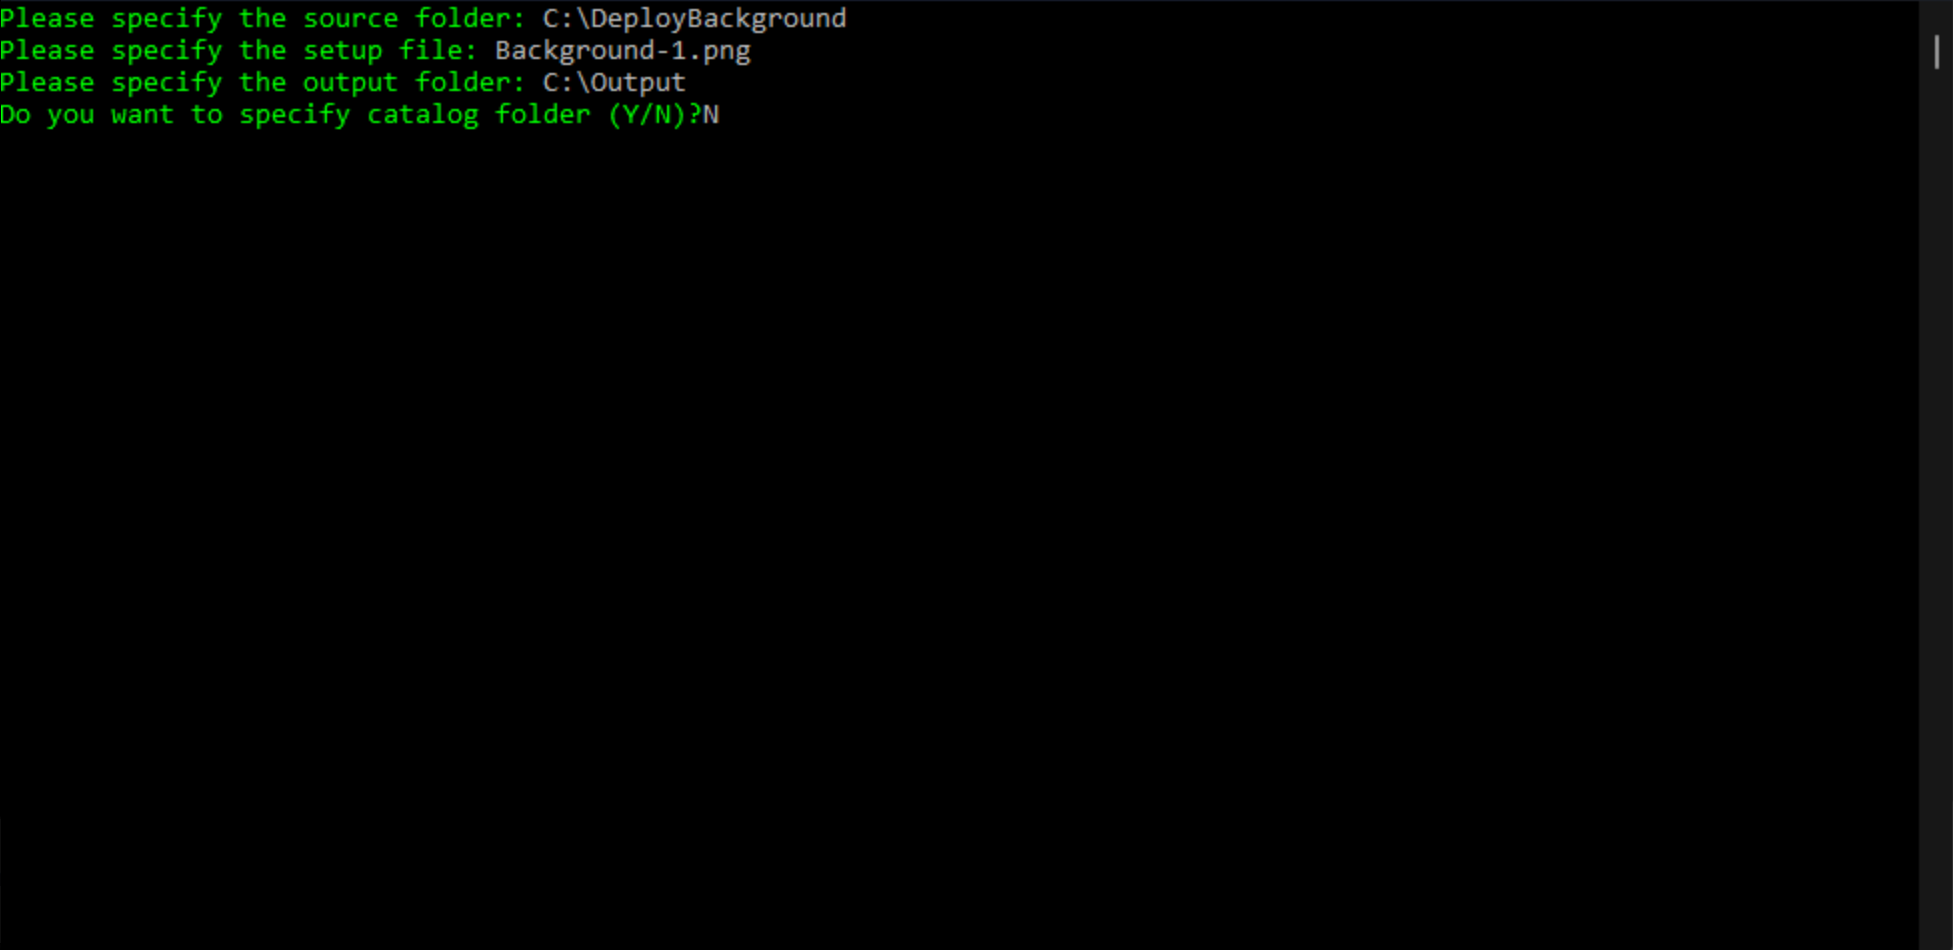
When prompted, specify:
- Source folder:
C:\DeployBackground(or your folder) - Setup file: Your image filename (e.g.
Background-1.png) - Output folder:
C:\Output - Catalog folder: No
The tool creates an .intunewin file in the output folder (e.g. Background-1.intunewin). Use this file in the next step.
Step 2: Add and Deploy the Win32 App in Intune
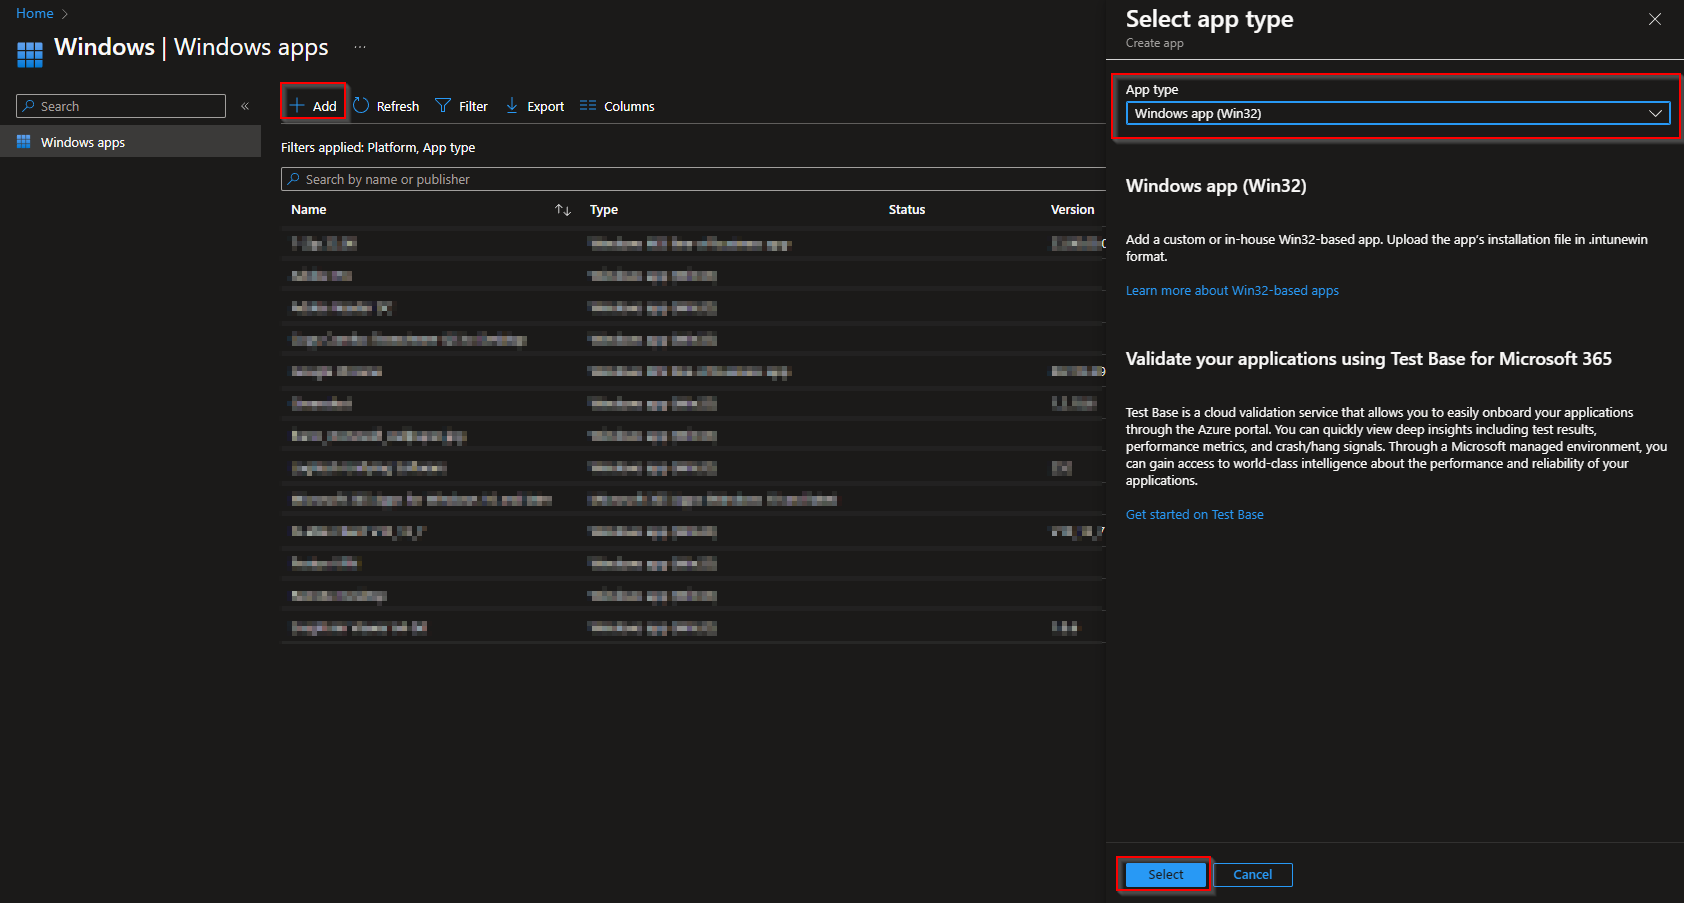
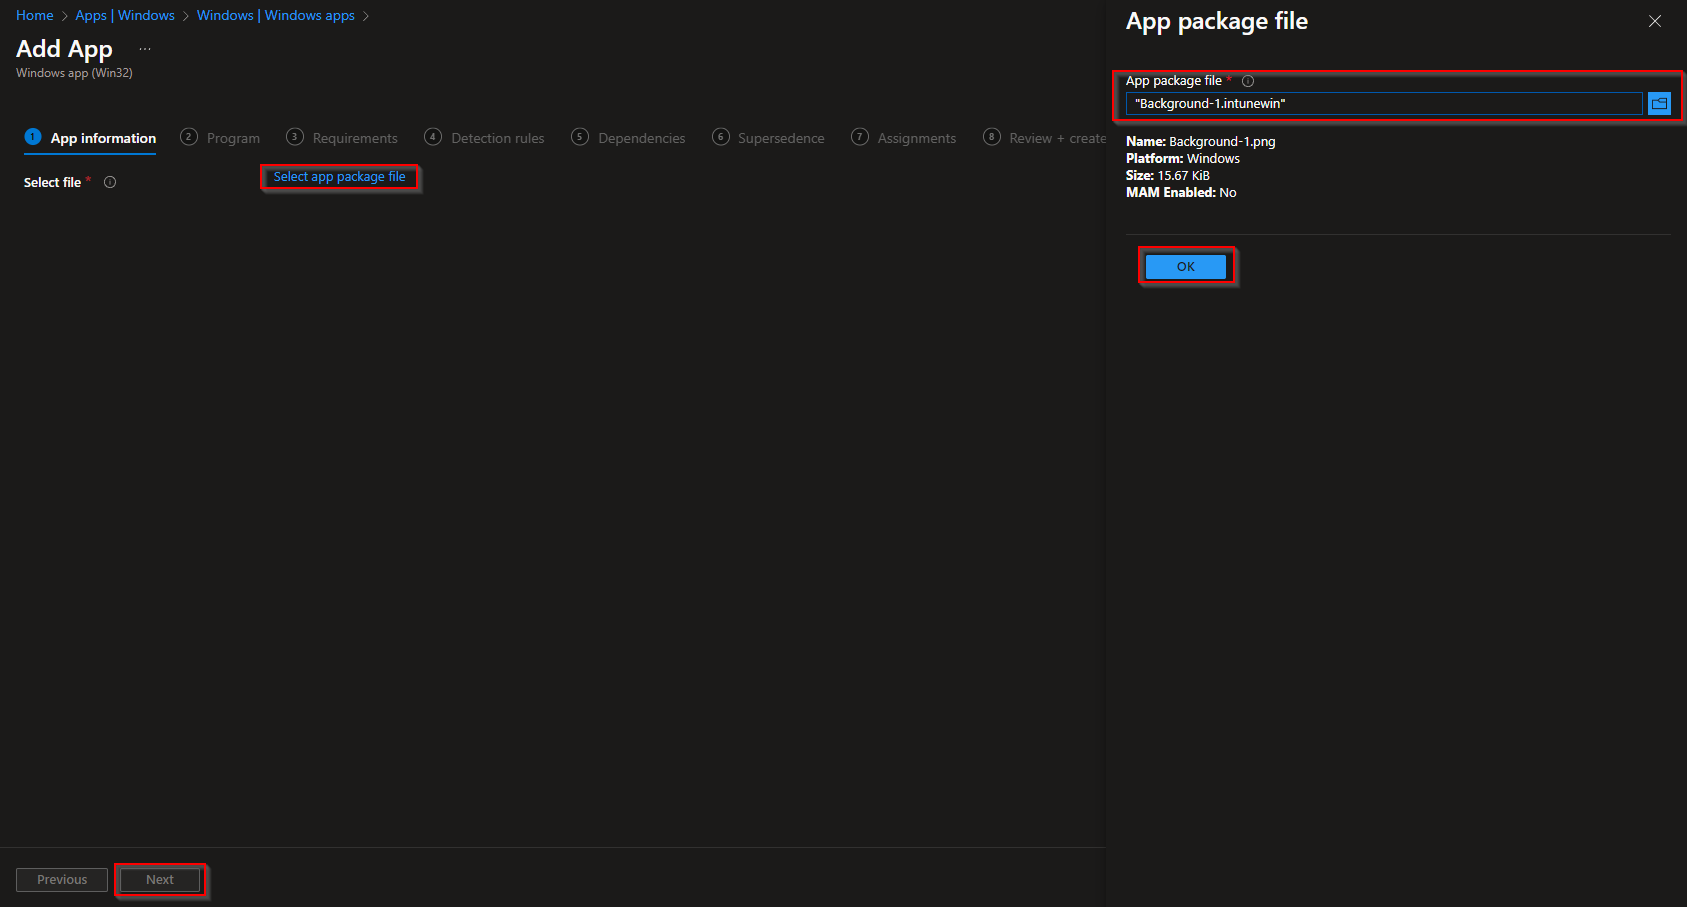
In the Microsoft Intune admin center, go to Apps → Windows → Add. Choose App type: Windows app (win32), then Select.

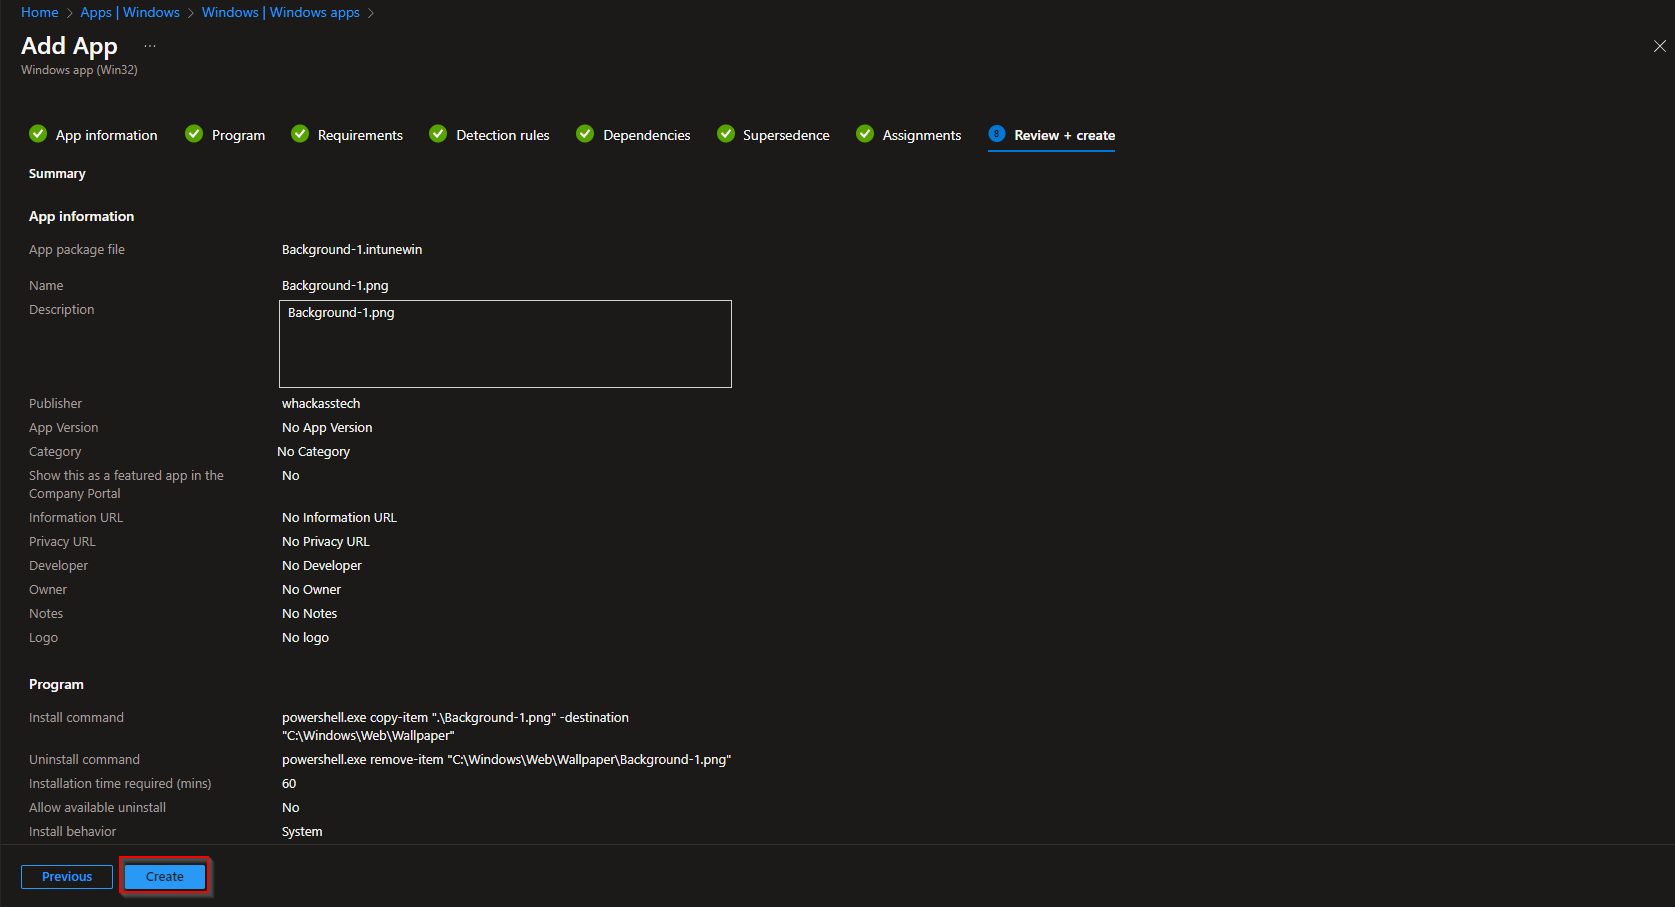
Under App package file, upload the .intunewin file from your output folder. Click OK, then Next.
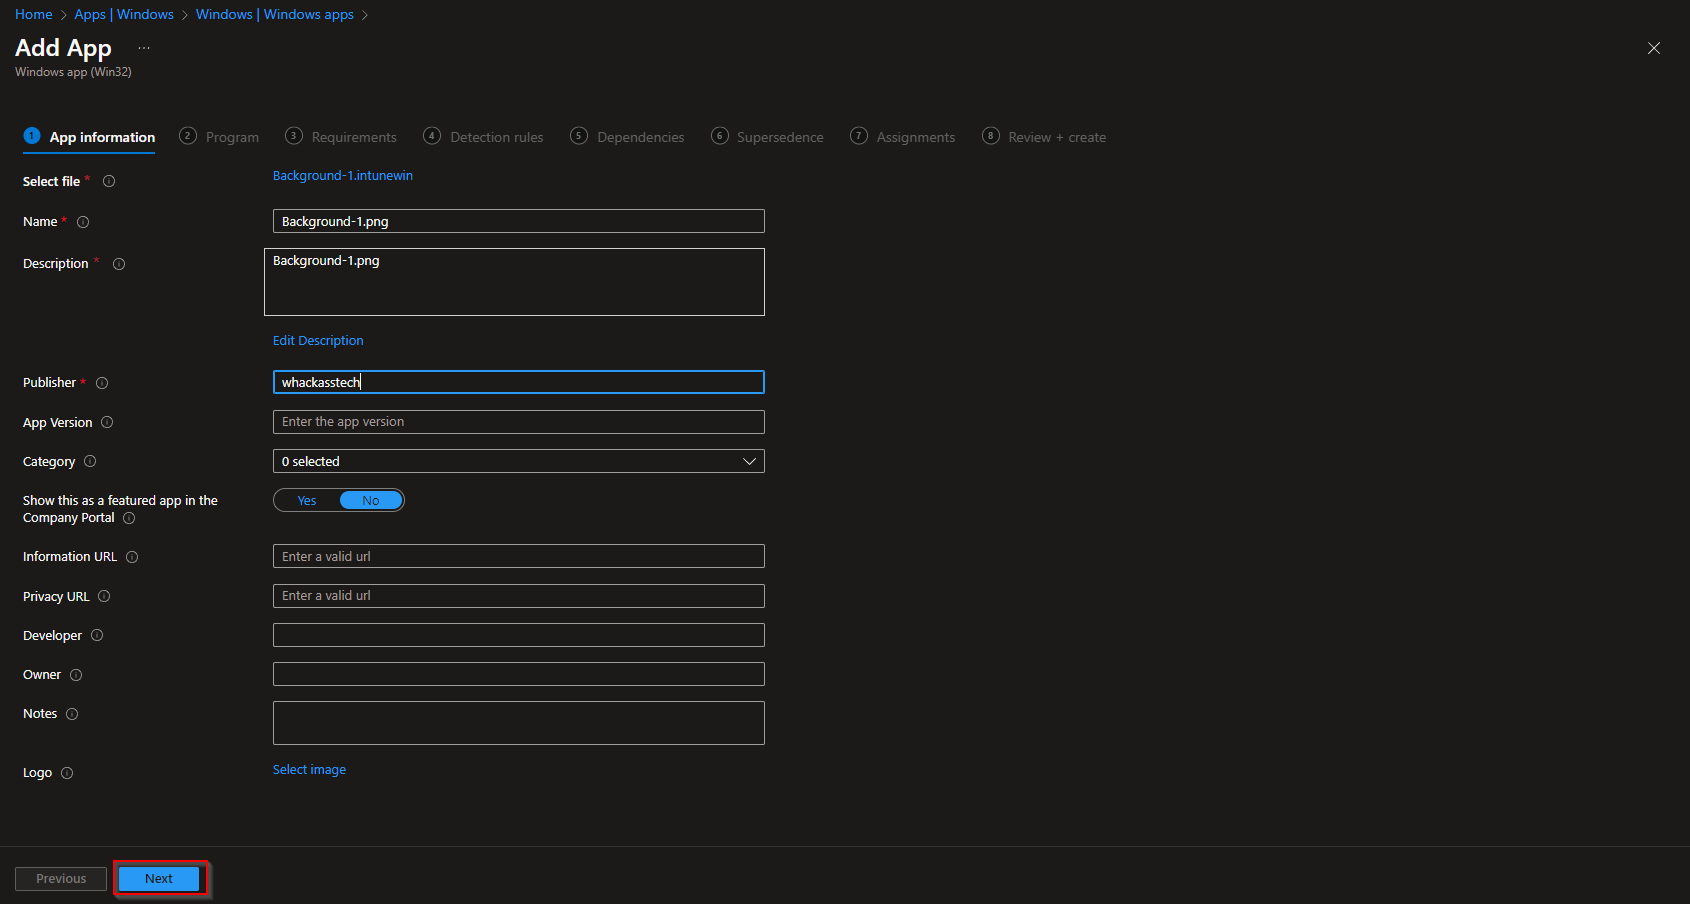
On App information, set name, description, and publisher. Click Next.
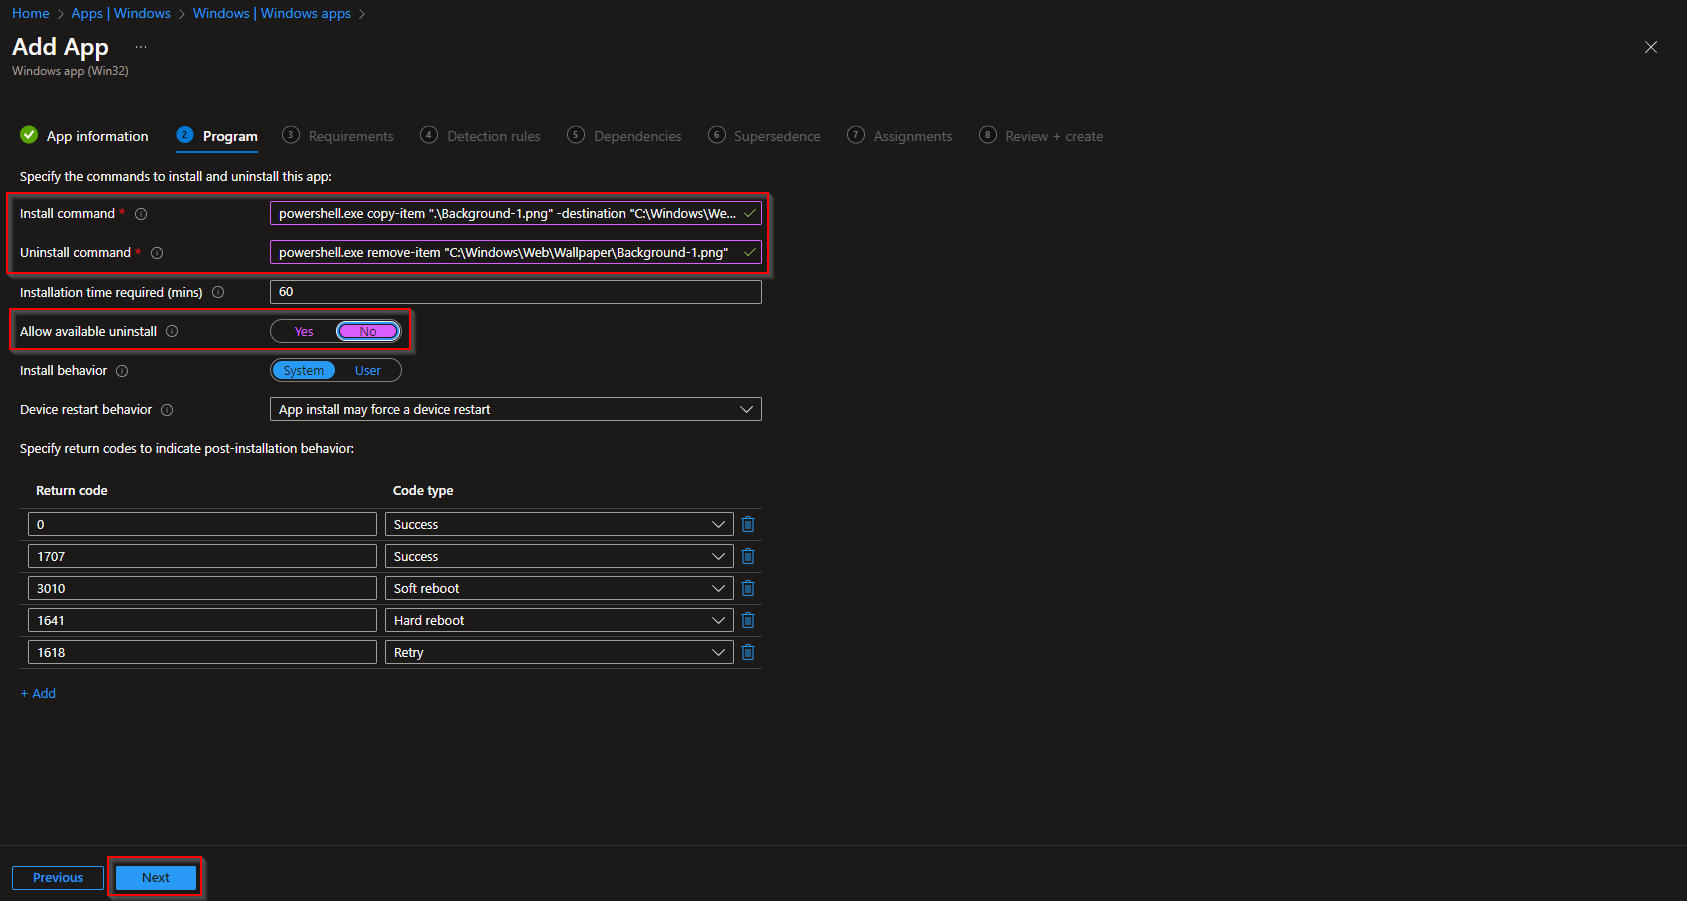
On the Program tab, set:
- Install command:
powershell.exe copy-item ".\Background-1.png" -destination "C:\Windows\Web\Wallpaper"(use your image filename) - Uninstall command:
powershell.exe remove-item "C:\Windows\Web\Wallpaper\Background-1.png"(use your image filename) - Allow available uninstall: No
- Install behavior: System
- Device restart behavior: No specific action
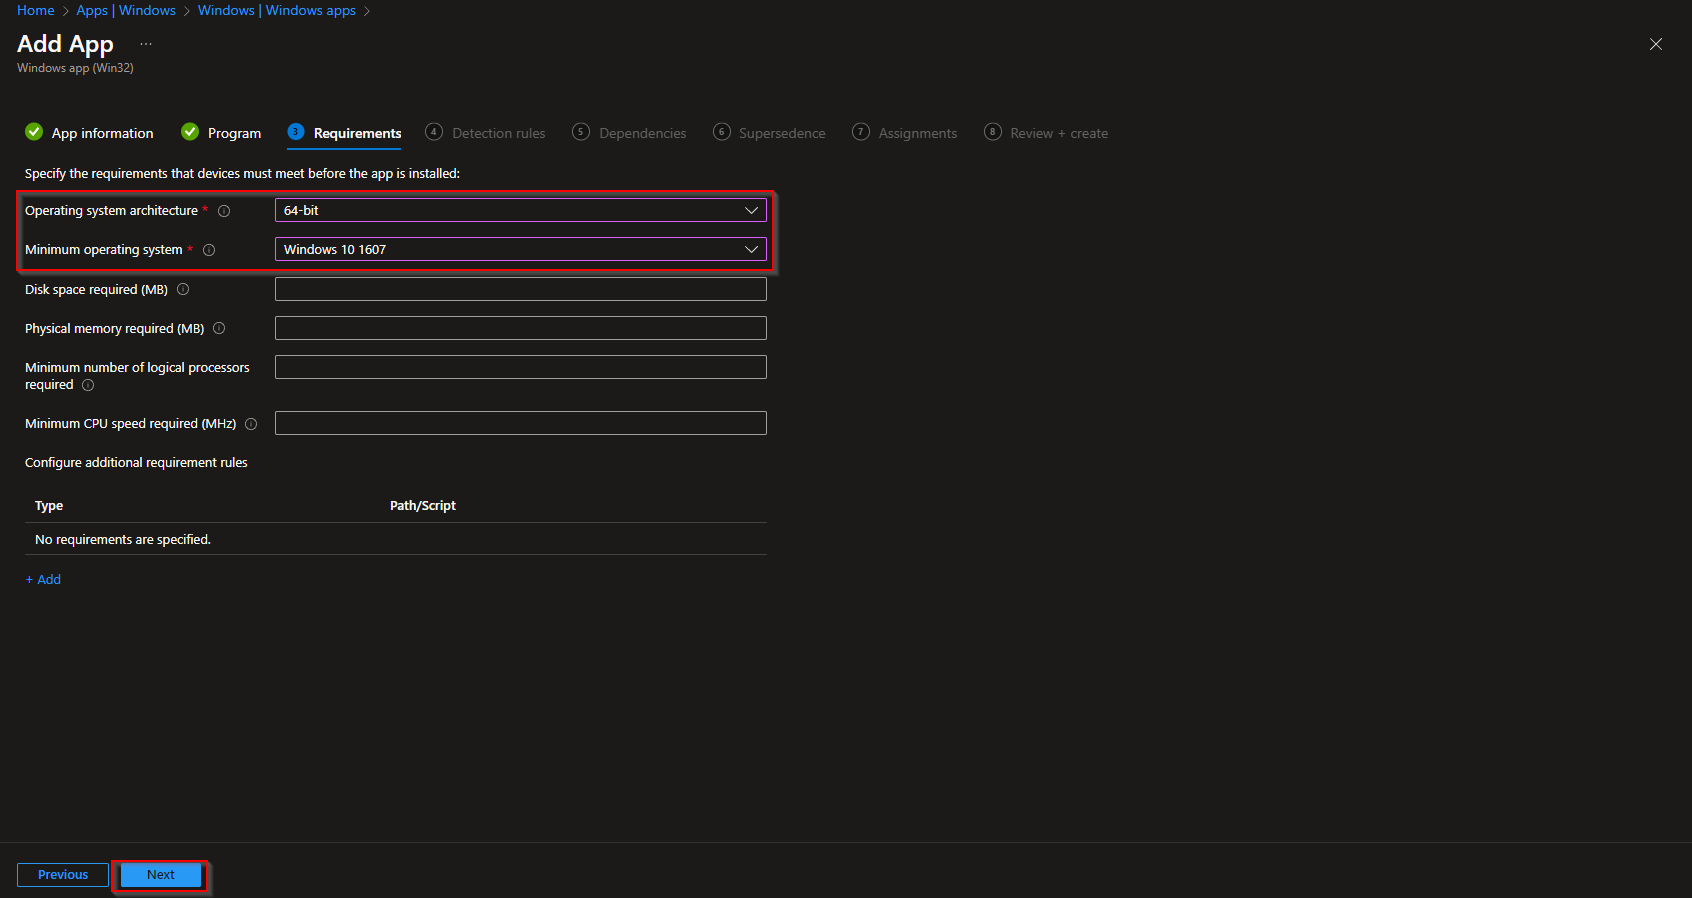
On Requirements, set minimum OS (e.g. Windows 10 1607) and architecture (e.g. 64-bit). Click Next.
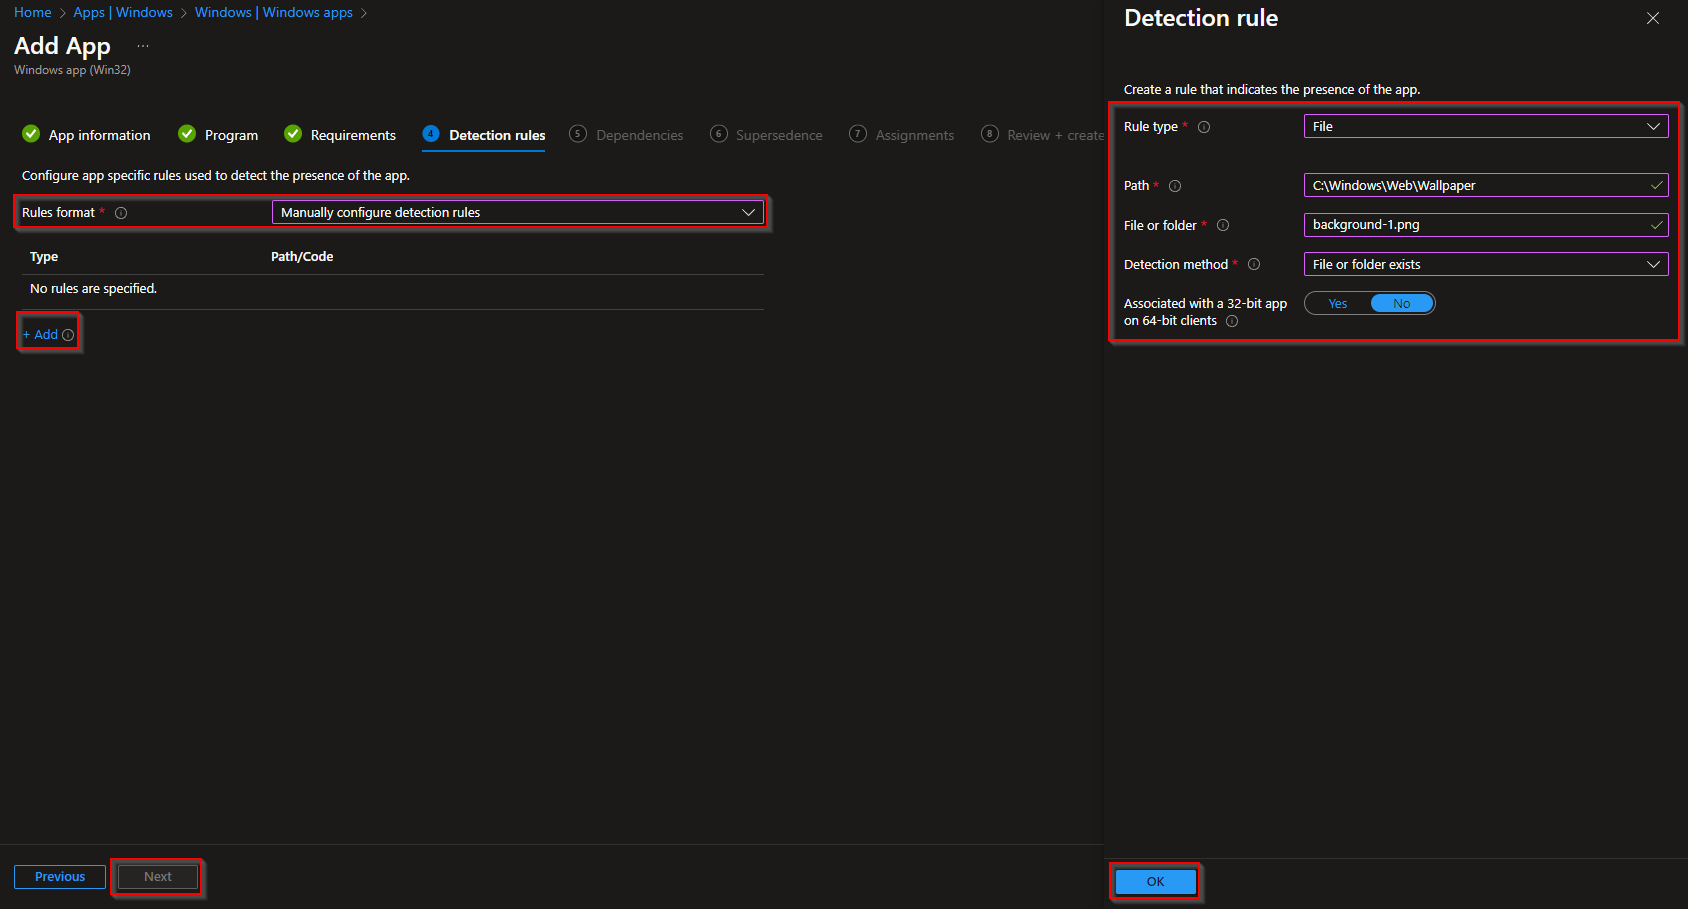
On Detection rules, add a file rule so Intune can detect when the wallpaper is present:
- Rule type: File
- Path:
C:\Windows\Web\Wallpaper - File or folder:
Background-1.png(or your image name) - Detection method: File or folder exists
- Associated with a 32-bit app on 64-bit clients: No
Skip Dependencies and Supersedence if not needed. On Assignments, add the groups (or All Users/All Devices) that should receive the wallpaper. Click Next, then Review + create → Create.
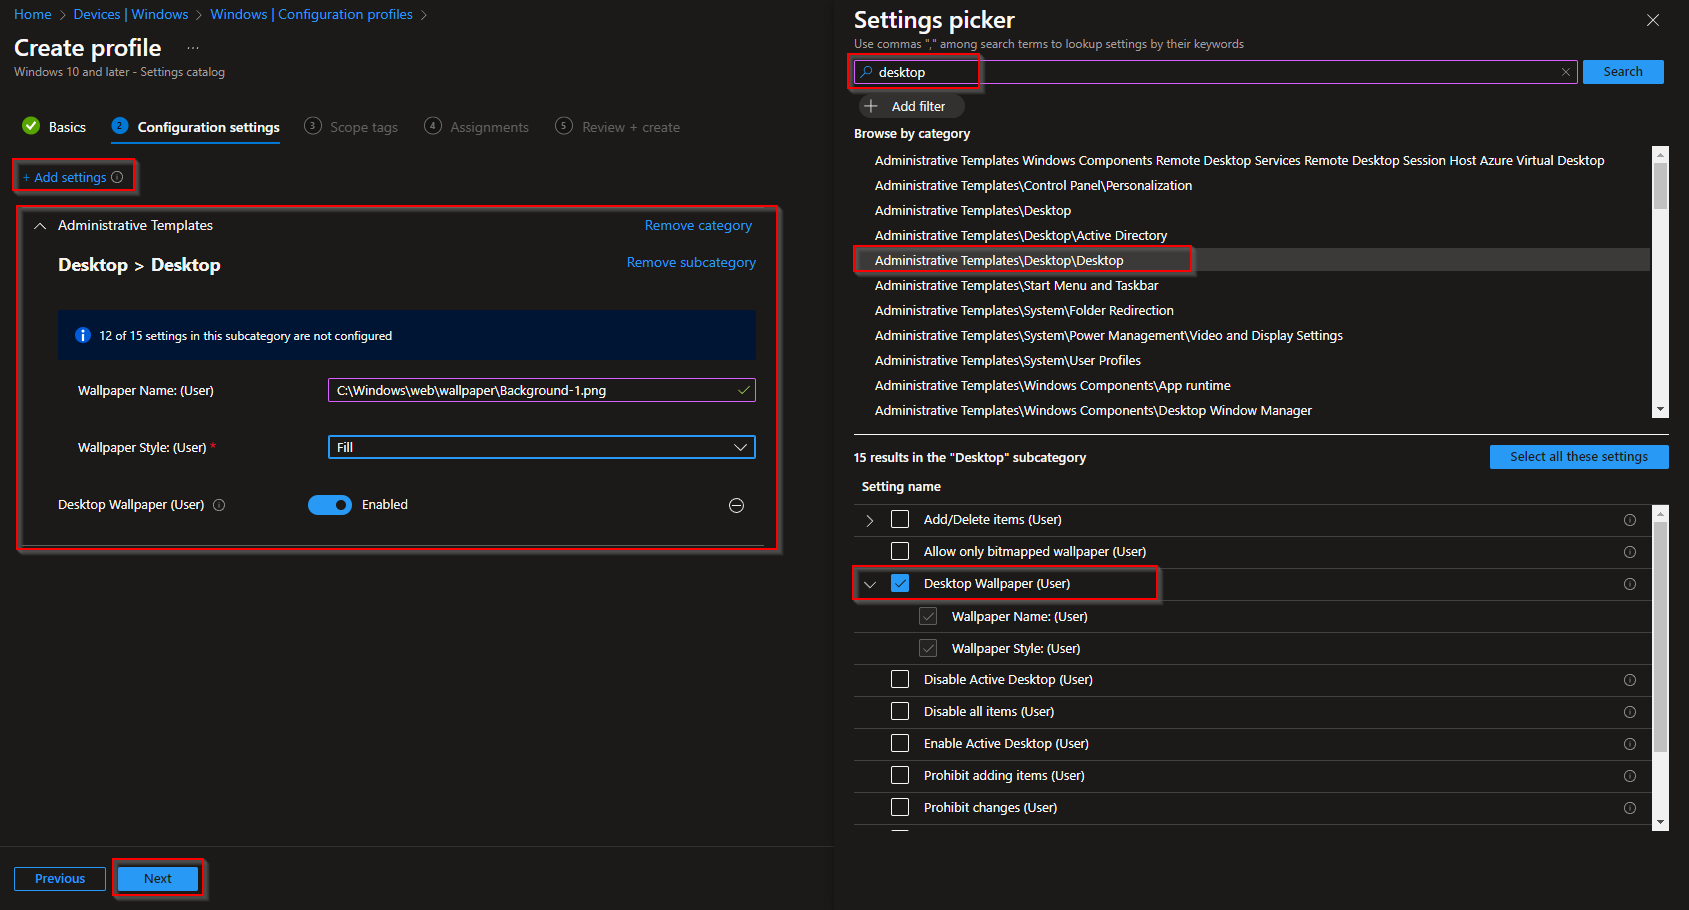
Step 3: Create a Configuration Profile for the Desktop Wallpaper
So the desktop actually uses the image, create a Settings catalog profile that sets the Desktop Wallpaper (User) to the path where the Win32 app copied the file.
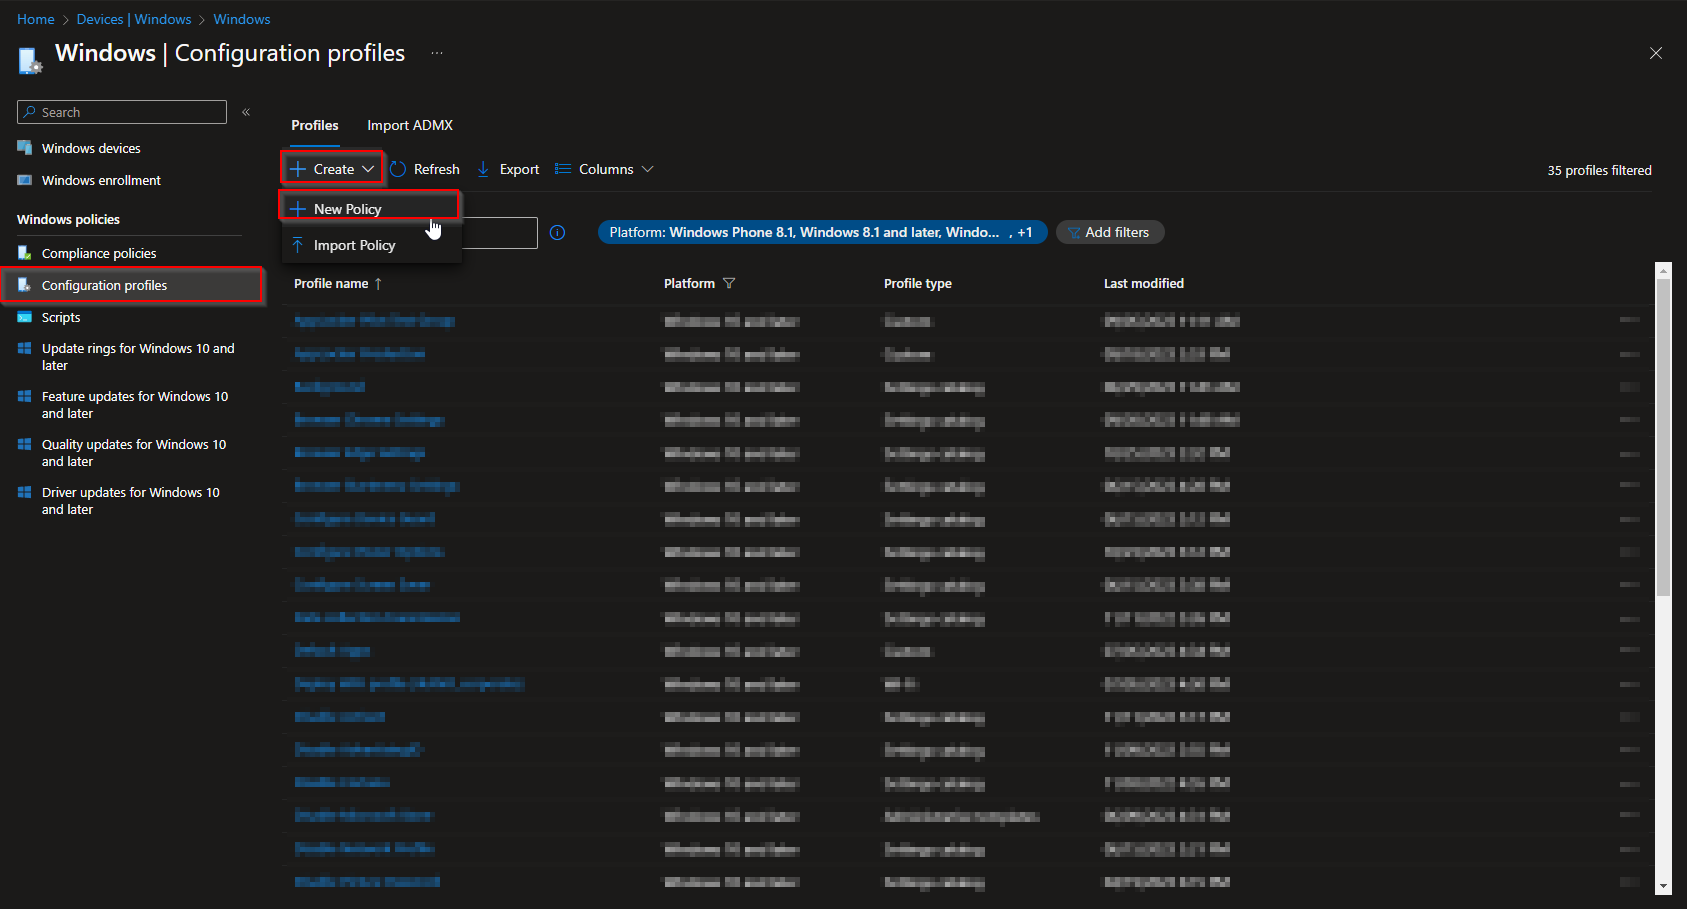
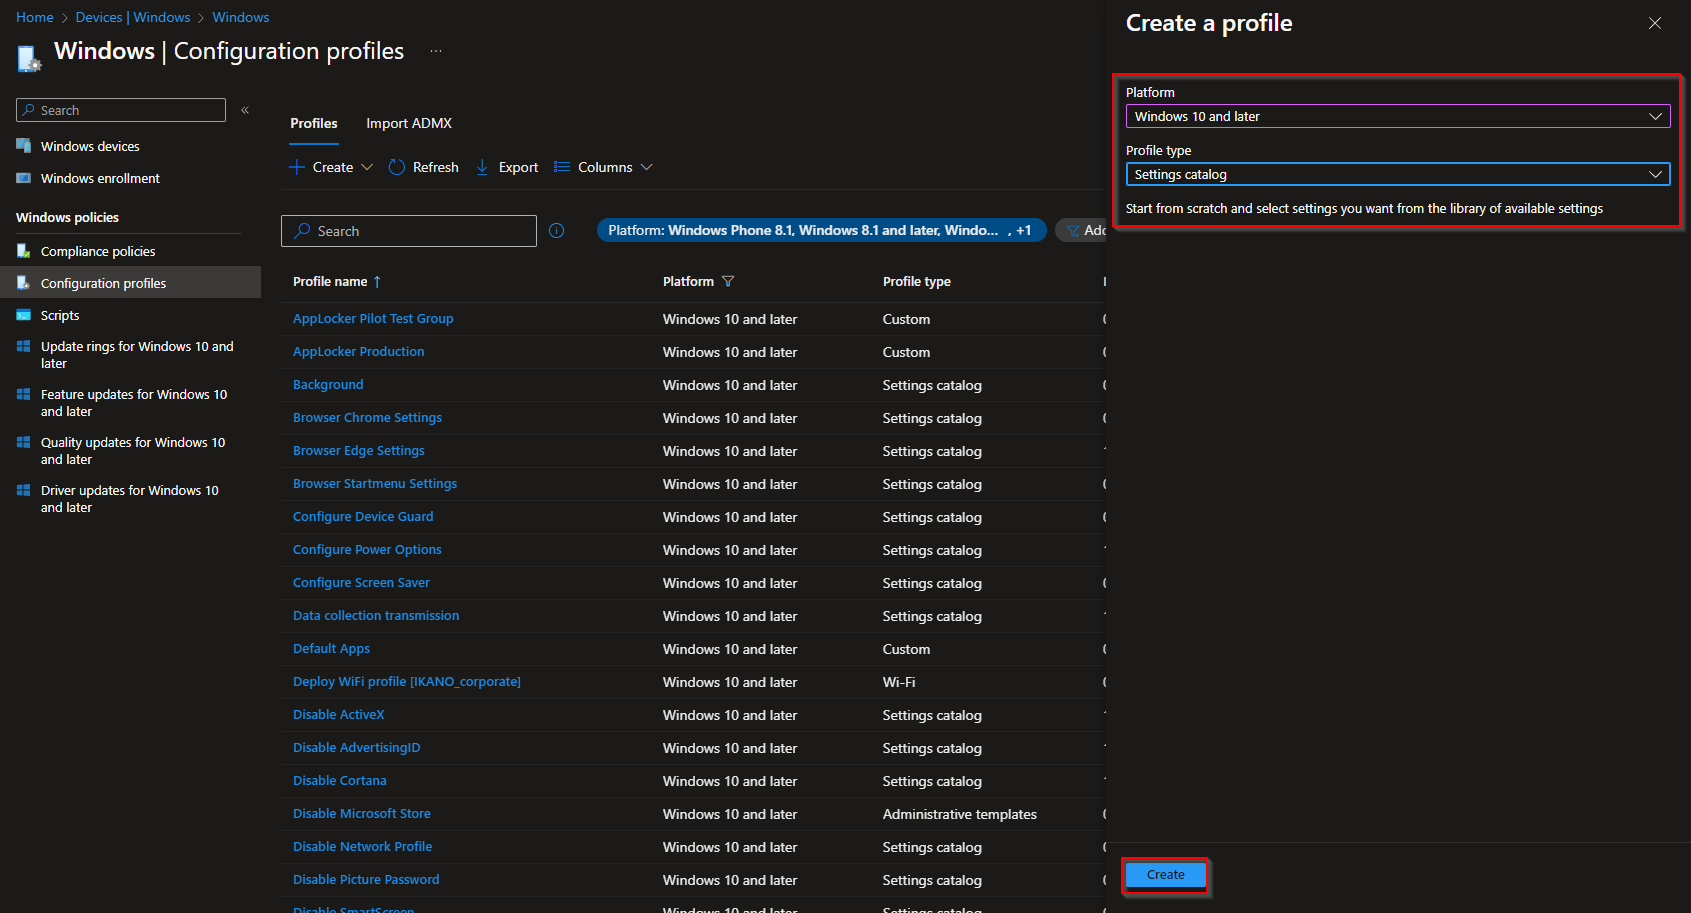
In the Intune admin center, go to Devices → Windows → Configuration profiles → Create → New policy. Set platform to Windows 10 and later and profile type to Settings catalog, then click Create.
Give the profile a name (e.g. Corporate desktop wallpaper), then click Next. On Configuration settings, click Add settings, search for Desktop, and under Administrative Templates\Desktop\Desktop select Desktop Wallpaper (User).
Configure the setting:
- Wallpaper name:
C:\Windows\web\wallpaper\Background-1.png(match the path and filename used by the Win32 app; casing can vary) - Wallpaper style: Fill (or Stretch, Center, etc., as you prefer)
Click Next, add scope tags if needed, then on Assignments assign the profile to the same users or devices that receive the Win32 app. Click Next, then Review + create → Create.
How It Applies
The Win32 app runs first and copies the image to C:\Windows\Web\Wallpaper. The configuration profile then sets the user’s desktop wallpaper to that path. In some cases the user may need to sign out and back in or restart the device for the new wallpaper to appear.
Conclusion
You can deploy a custom wallpaper with Intune by packaging the image as a Win32 app (to copy it to a local folder), then using a Settings catalog profile to set the Desktop Wallpaper (User) to that path. Keep the path and filename consistent between the install command, detection rule, and wallpaper setting, and assign both the app and the profile to the same users or devices.