Universal Print is Microsoft’s cloud printing service in Microsoft 365: printers are registered in Azure and users print without on-prem print servers. To have those printers show up automatically on Intune-managed Windows devices, you use Intune’s Printer Provisioning policy and supply the printer’s Cloud Device ID, Shared ID, and Shared Name from the Universal Print portal.
What You’ll Do
You will:
- Create an Intune configuration profile (Settings catalog) for Windows 10 and later.
- Add the Printer Provisioning setting (search for “print”), then add one or more Universal Print printers by entering Action (Install or Uninstall), Cloud Device ID, Printer Shared ID, and Printer Shared Name from the Universal Print portal.
- Assign the profile to the users or devices that should get the printers.
Ensure the printers are already shared to the right users in the Universal Print admin experience; Intune only provisions printers that users are allowed to use.
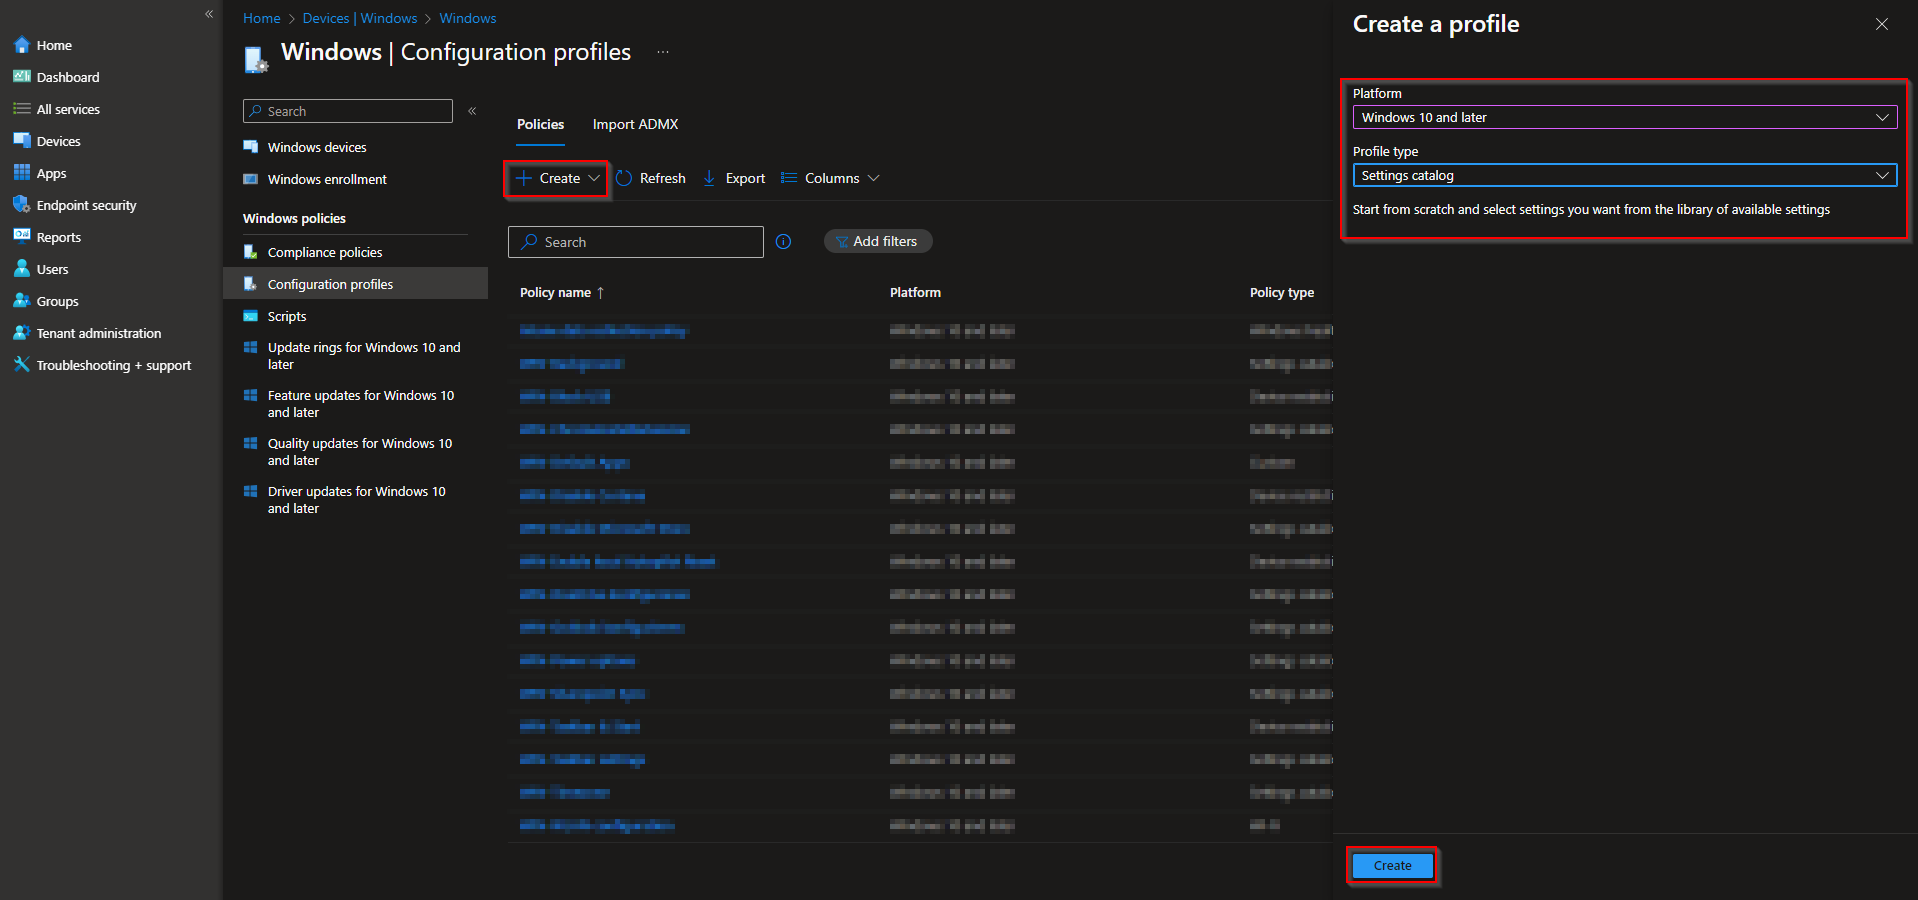
Step 1: Create a Settings Catalog Profile
In the Microsoft Intune admin center, go to Devices → Windows → Configuration profiles. Click Create → New policy.
Set Platform to Windows 10 and later and Profile type to Settings catalog. Click Create.
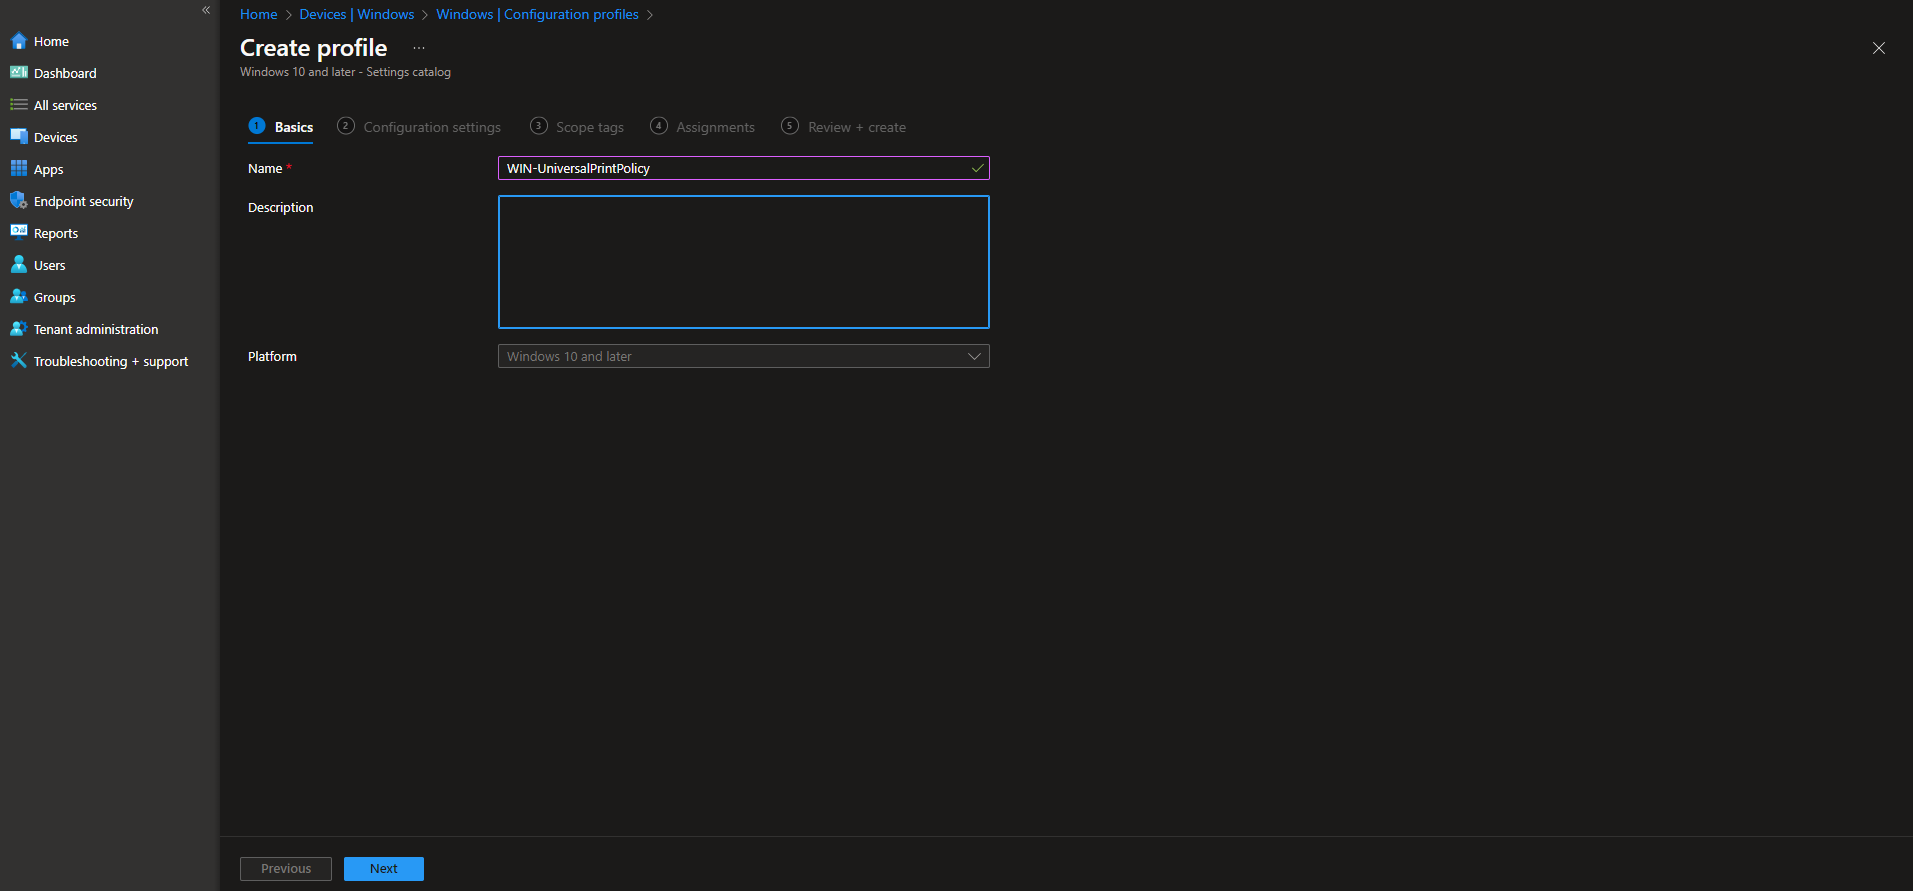
Step 2: Name the Profile
On the Basics tab, enter a Name (e.g. “Universal Print – Floor 1”) and optionally a Description. Click Next.
Step 3: Add Printer Provisioning Settings
On the Configuration settings tab, click Add settings. Search for print, then expand Printer Provisioning. Add the setting and click Add to define each printer.
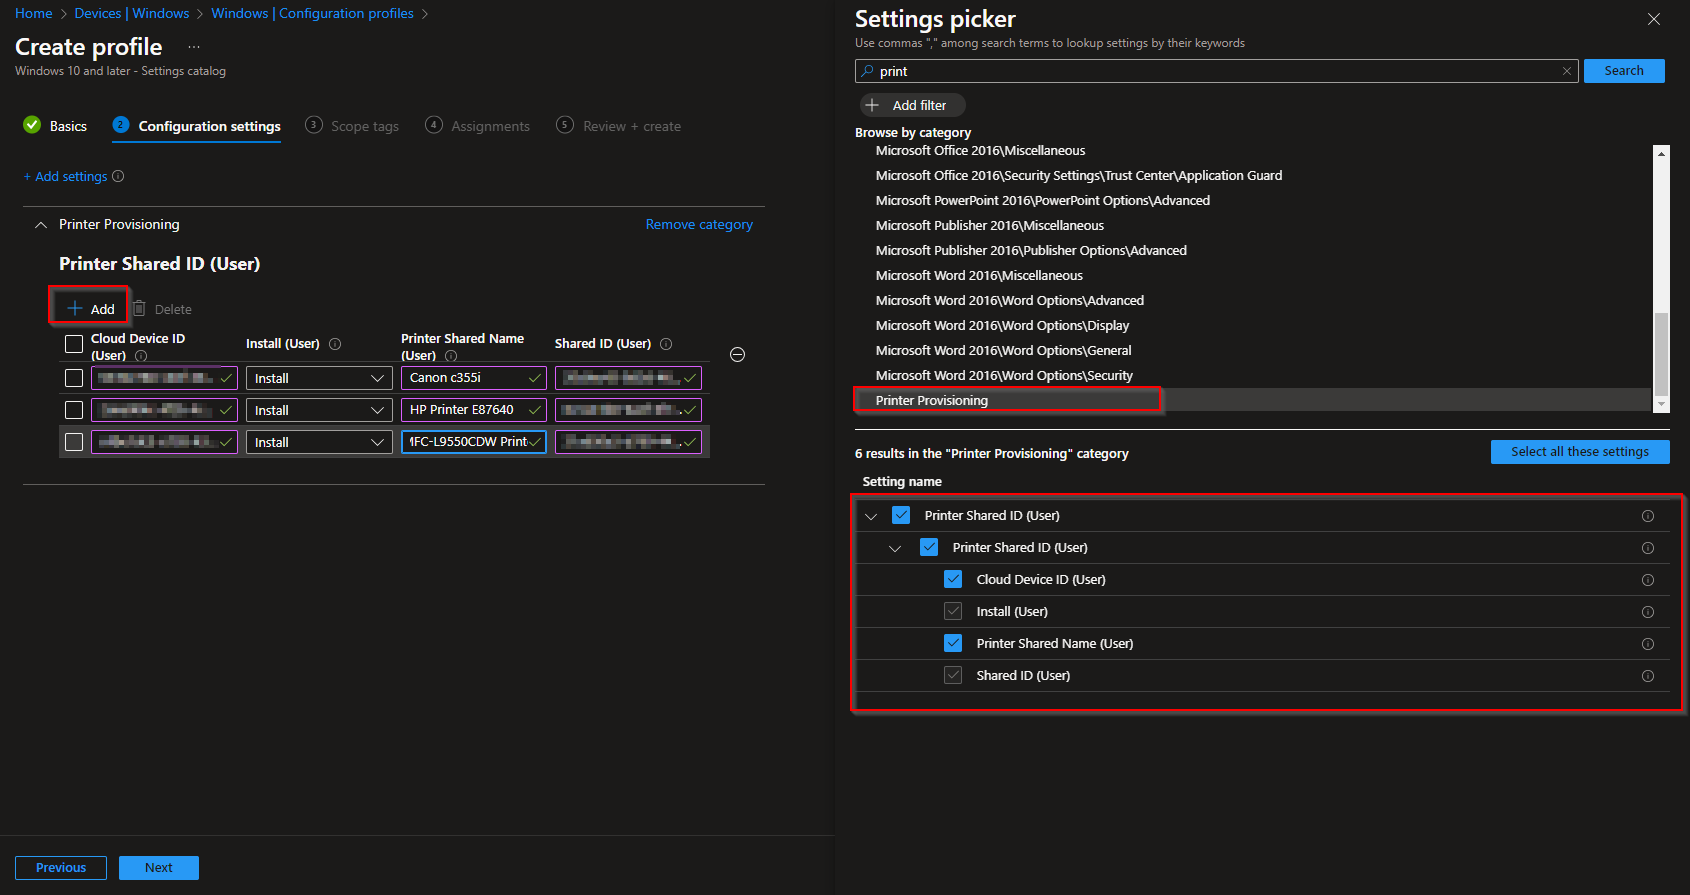
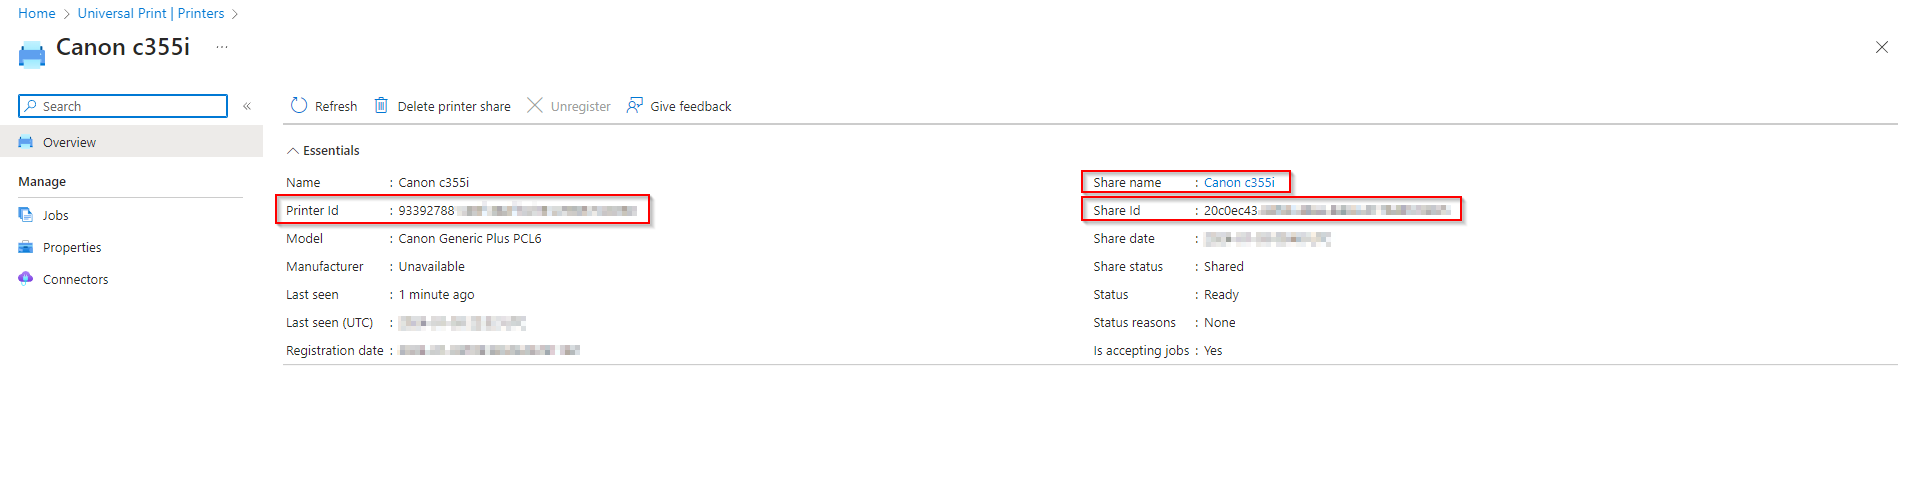
For each printer, you need values from the Universal Print portal:
- Action: Install to add the printer on the device, or Uninstall to remove it.
- Cloud Device ID: The printer’s device ID from Universal Print (registered in Microsoft Entra ID).
- Printer Shared ID: The shared printer’s ID from the Universal Print portal.
- Printer Shared Name: The display name users see (e.g. “Building A – Color”).
Enter one row per printer, then click Next.
Step 4: Scope, Assignments, and Create
On Scope tags, add tags if your tenant uses them. On Assignments, add the groups (or All Users / All Devices) that should receive the printers. On Review + create, confirm and click Create.
After the profile syncs, the Universal Print printers will install on targeted devices so users can print without manually adding them.
Wrap-up
You can deploy Universal Print printers with Intune by creating a Settings Catalog profile and configuring Printer Provisioning with the Cloud Device ID, Printer Shared ID, and Printer Shared Name from the Universal Print portal. Assign the profile to the right users or devices so cloud printers roll out automatically across your environment.