Intune does not offer a built-in setting to deploy a custom lock screen image. You can still get a corporate lock screen on Windows devices by (1) copying the image to the device with a Win32 app, and (2) pointing Windows at that image with a Settings Catalog policy. This guide walks through packaging the image as an Intune Win32 app, deploying it, then configuring the lock screen path.
What You’ll Do
- Package your lock screen image (e.g.
Background-1.png) with the Microsoft Win32 Content Prep Tool so you have an.intunewinfile. - Add the package in Intune as a Win32 app with an install command that copies the image to
C:\Windows\Web\Wallpaper, and assign it to users or devices. - Create a Settings Catalog profile that enables Force a specific default lock screen and logon image and sets the path to that image (e.g.
C:\Windows\Web\Wallpaper\Background-1.png), then assign the profile.
Use the same image filename in the Win32 app, detection rule, and configuration profile. If your image has a different name, substitute it everywhere below.
Step 1: Create the Win32 Package
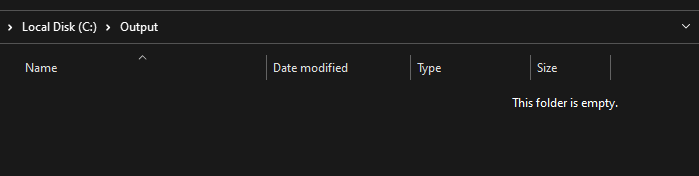
Create two folders: one for the source (e.g. C:\DeployBackground) and one for the output (e.g. C:\Output).

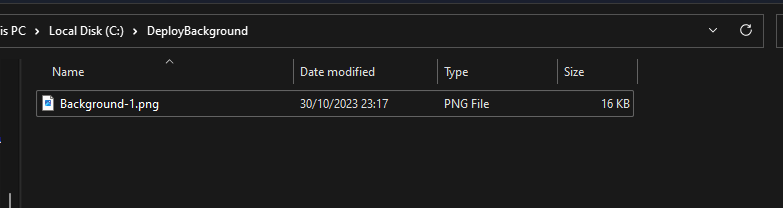
Copy your lock screen image into the source folder (e.g. C:\DeployBackground\Background-1.png). Use a short, consistent name; you will reference it in the install command, detection rule, and policy.
Download the Microsoft Win32 Content Prep Tool (IntuneWinAppUtil) from GitHub.
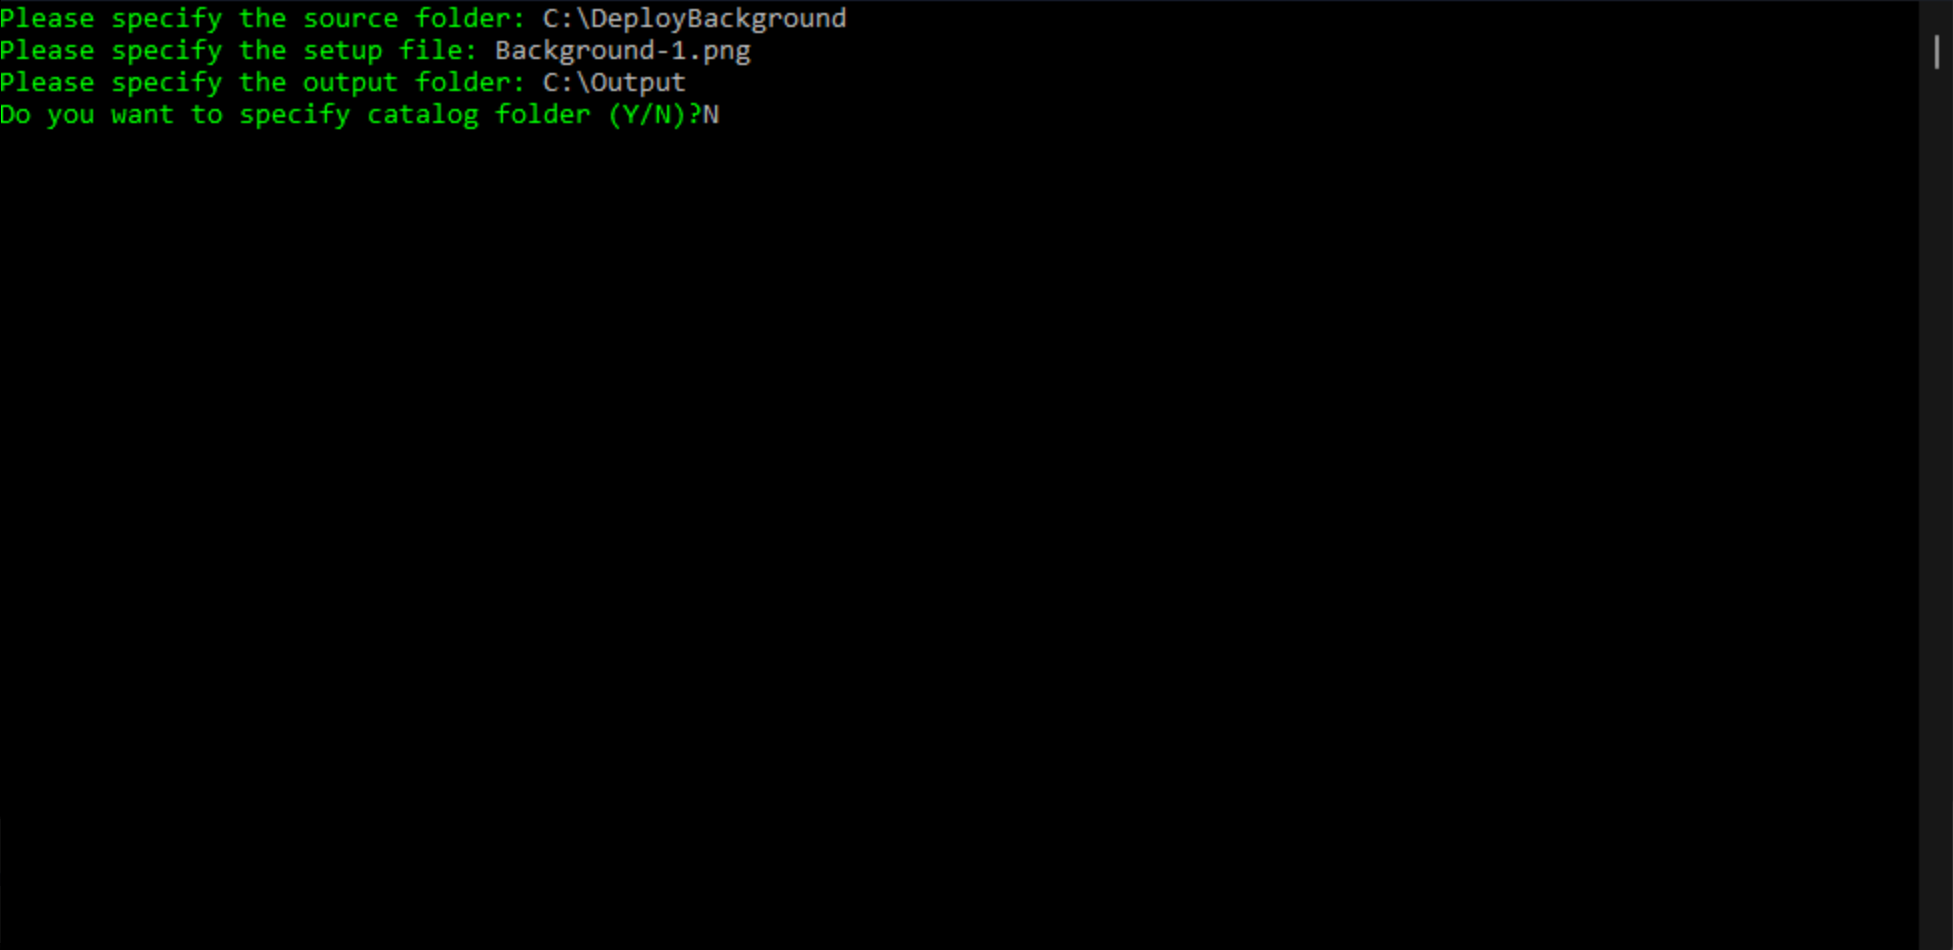
Run the tool with administrator rights. When prompted:
- Source folder:
C:\DeployBackground - Setup file:
Background-1.png(or your image filename) - Output folder:
C:\Output - Catalog folder: N
The tool creates an .intunewin file in the output folder. Keep this file for the next step.

Step 2: Add and Deploy the Win32 App
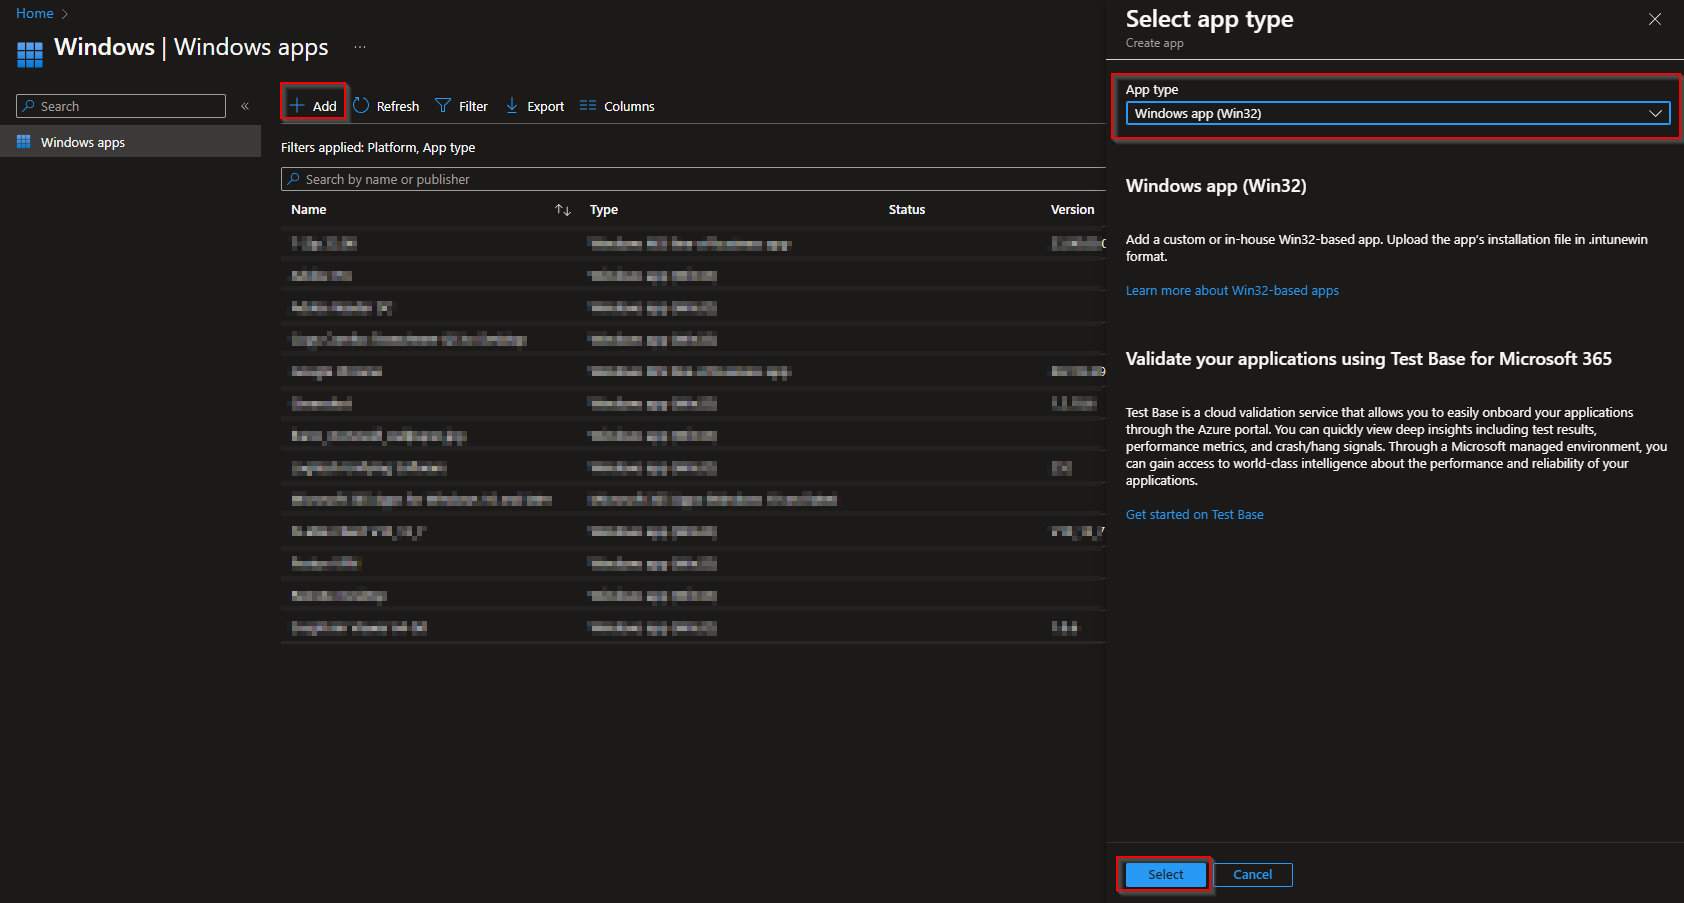
In the Microsoft Intune admin center, go to Apps → Windows → Add. Choose Windows app (win32) and click Select.
Under App package file, click Select app package file and upload the .intunewin file from C:\Output. Click OK.
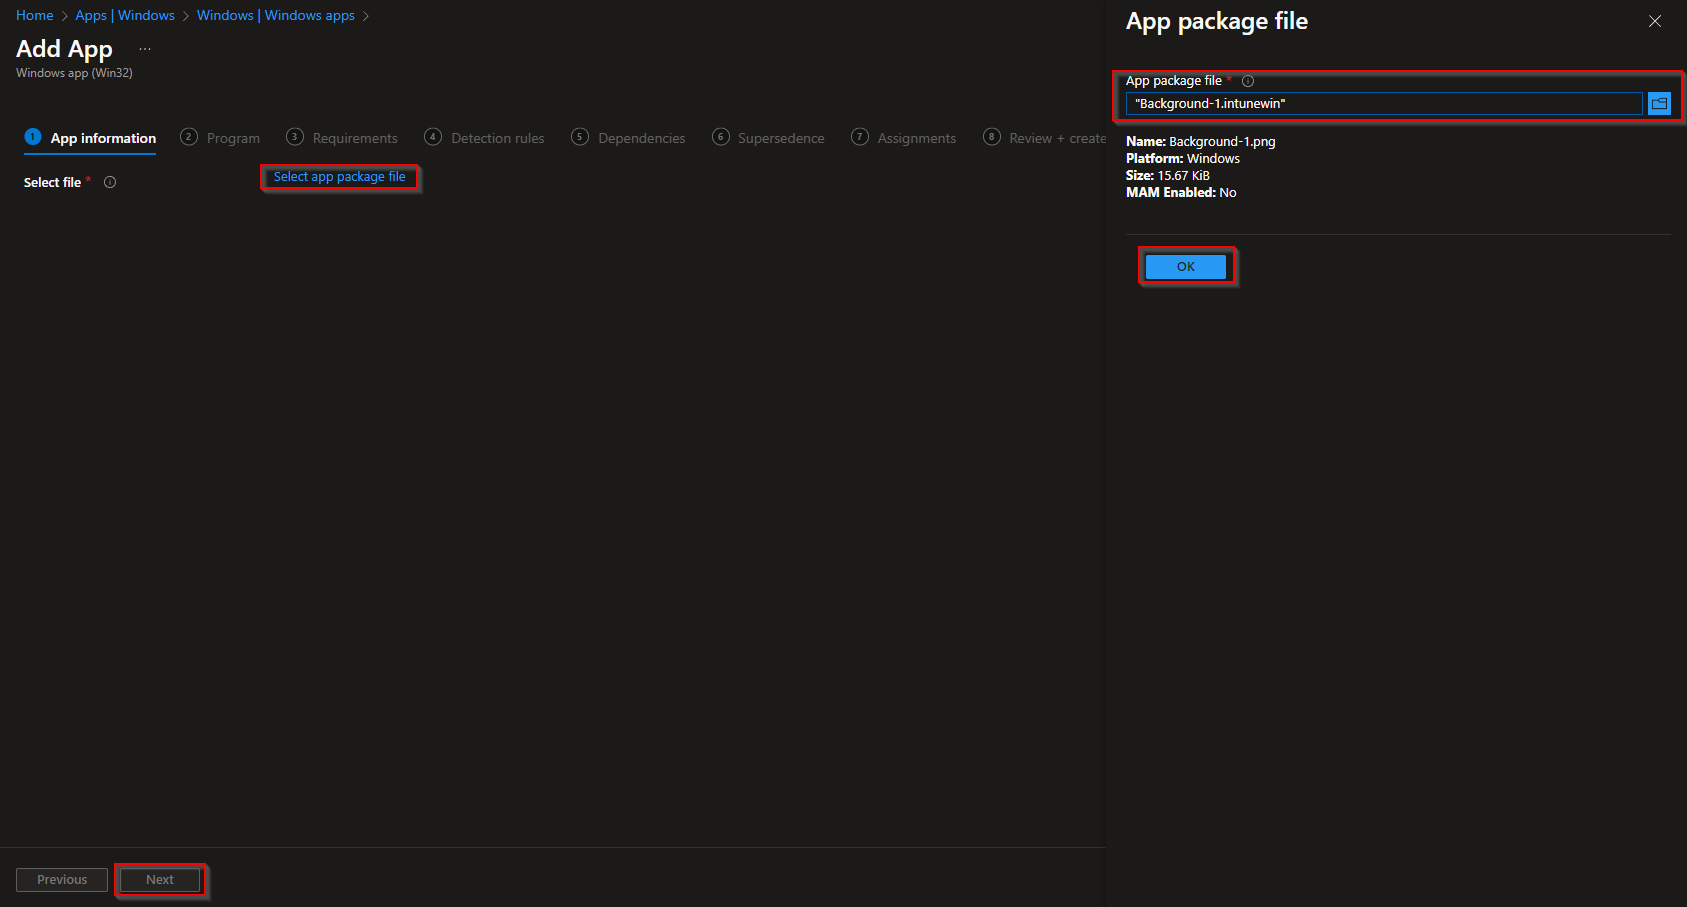
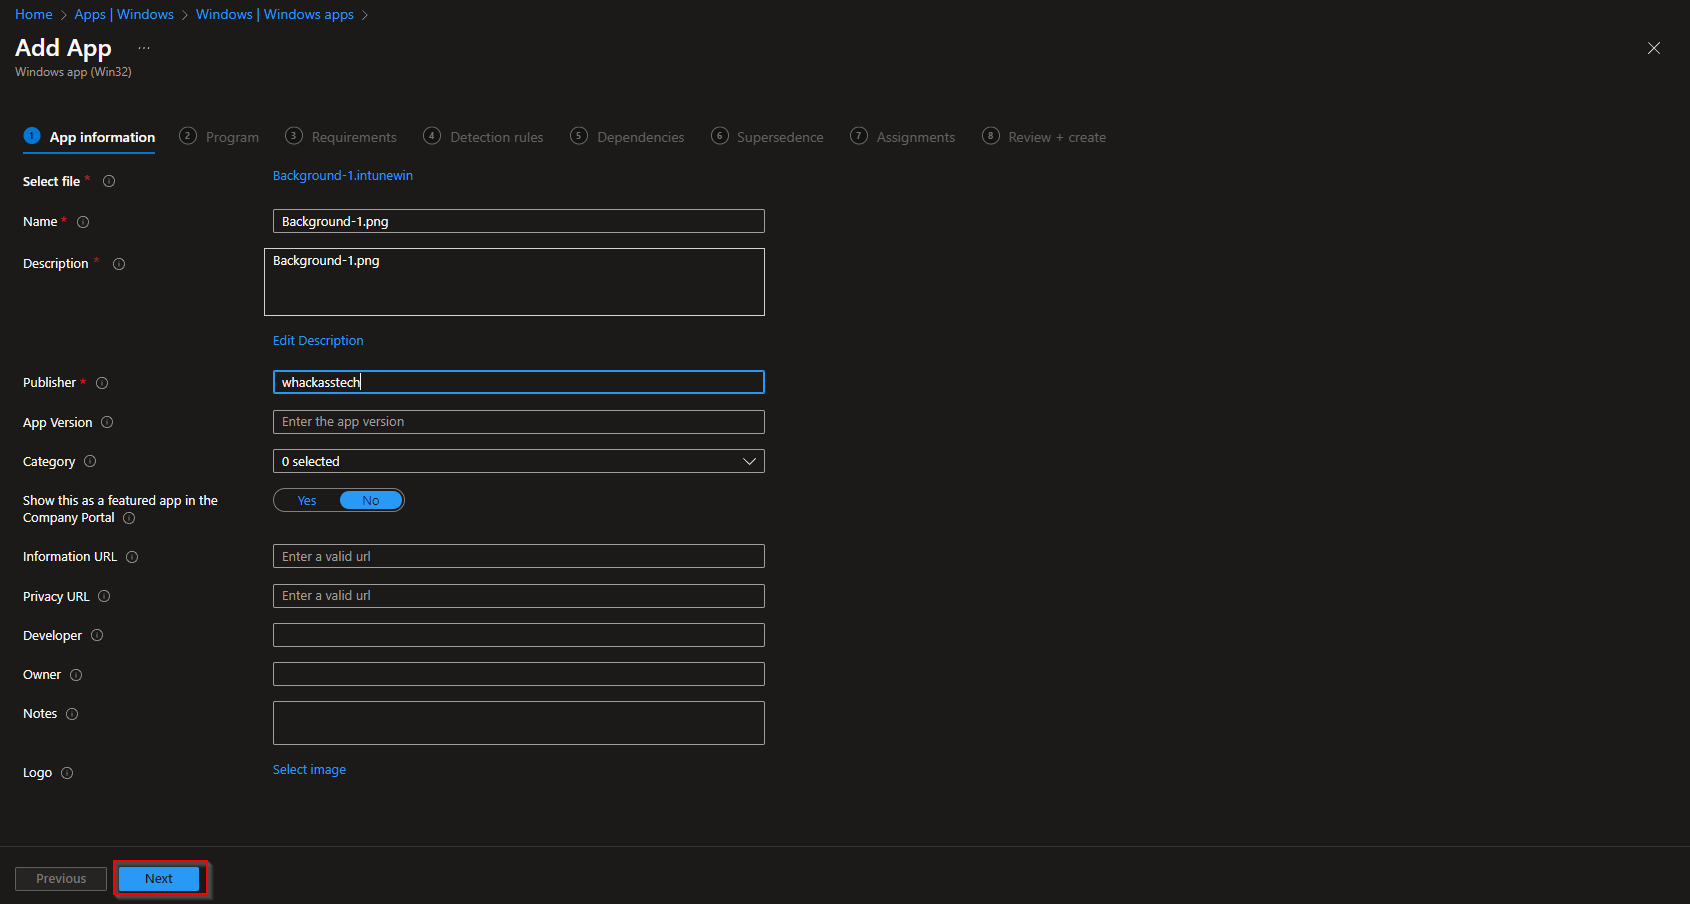
On App information, set name, description, and Publisher. Click Next.
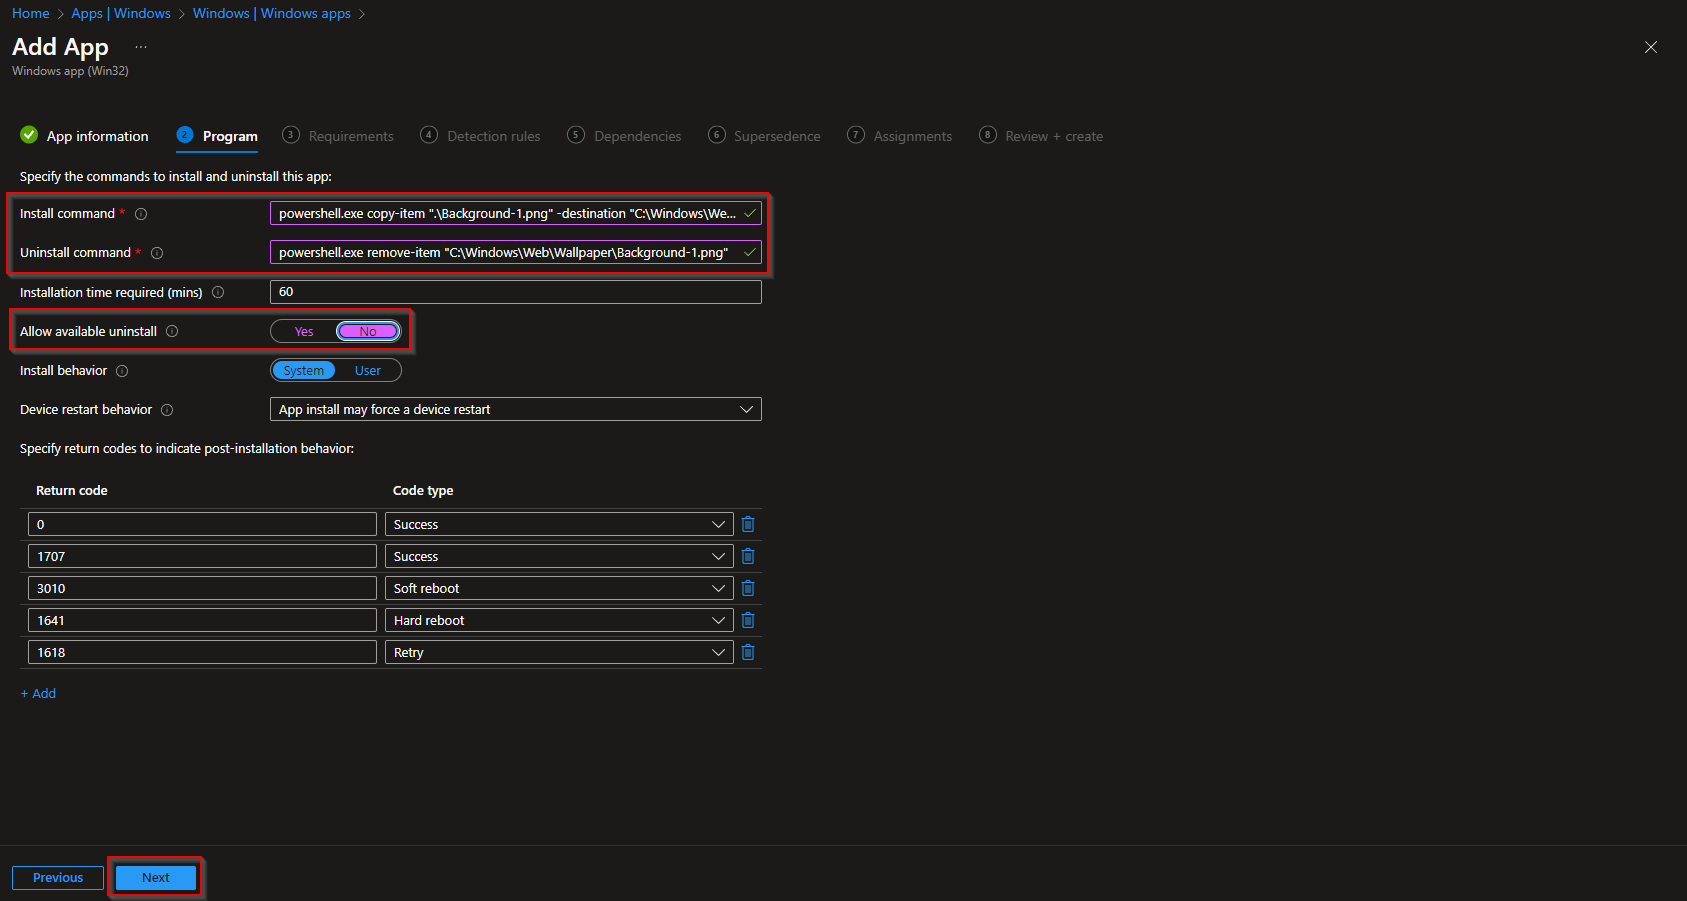
On Program, set:
- Install command:
powershell.exe -ExecutionPolicy Bypass -Command "Copy-Item '.\Background-1.png' -Destination 'C:\Windows\Web\Wallpaper'" - Uninstall command:
powershell.exe -ExecutionPolicy Bypass -Command "Remove-Item 'C:\Windows\Web\Wallpaper\Background-1.png' -ErrorAction SilentlyContinue" - Install behavior: System
Use your actual image filename in both commands. Click Next.
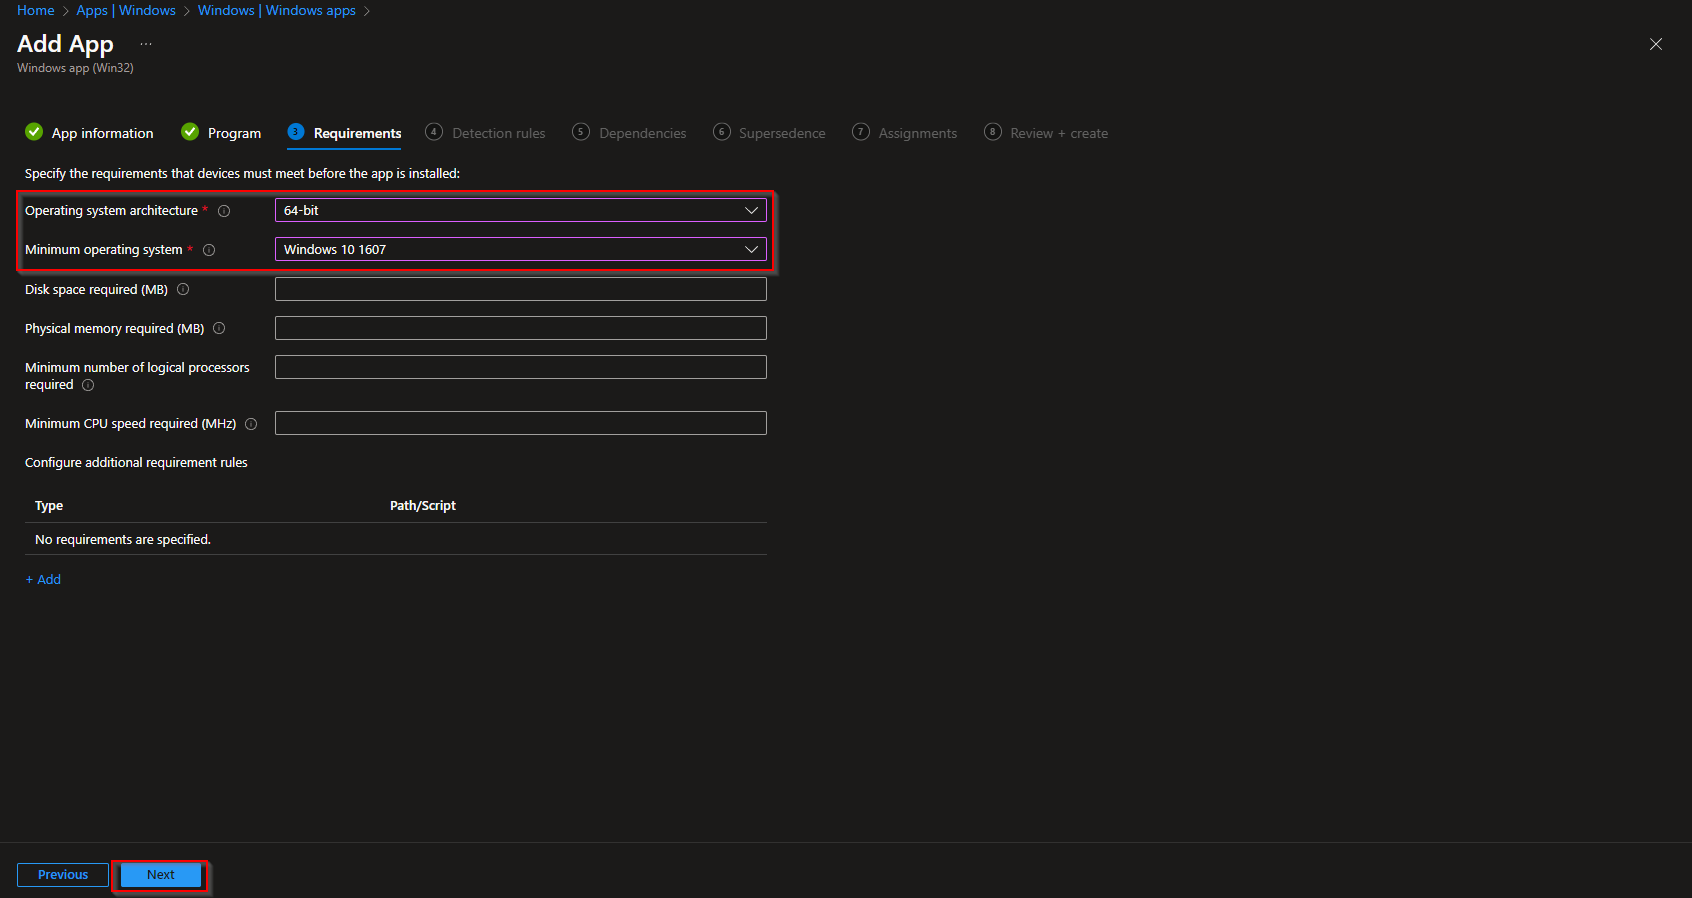
On Requirements, set minimum OS (e.g. Windows 10 1607) and architecture (e.g. 64-bit). Click Next.
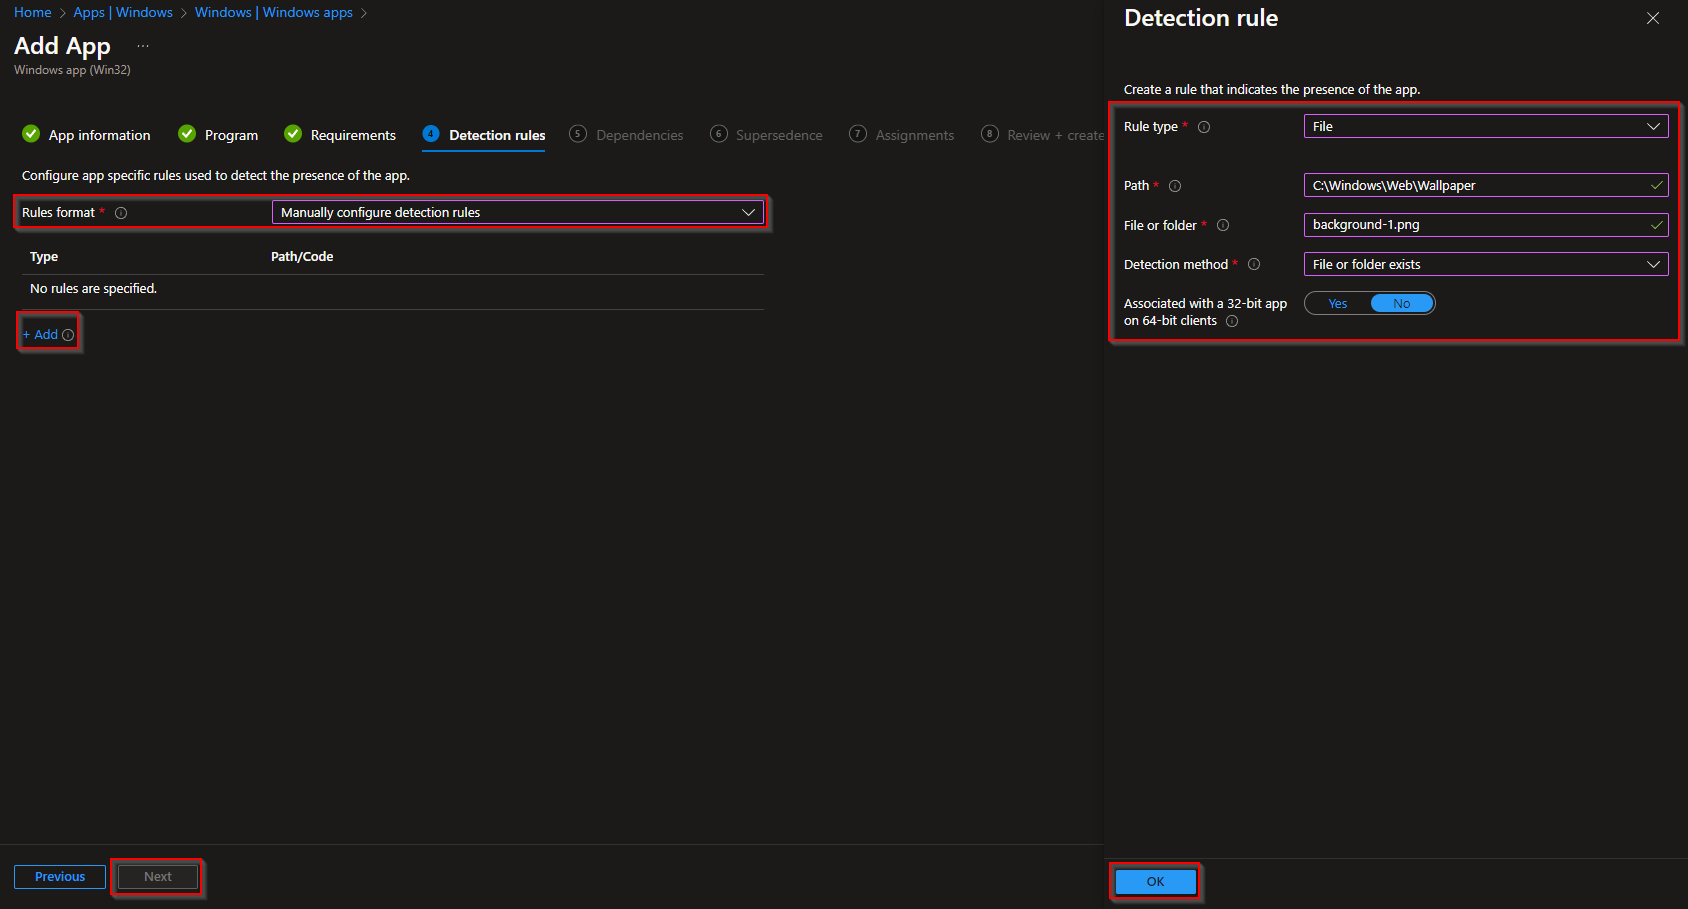
On Detection rules, add a rule: Rule type File, Path C:\Windows\Web\Wallpaper, File or folder Background-1.png, Detection method File or folder exists. Click OK then Next. Skip Dependencies and Supersedence if not needed.
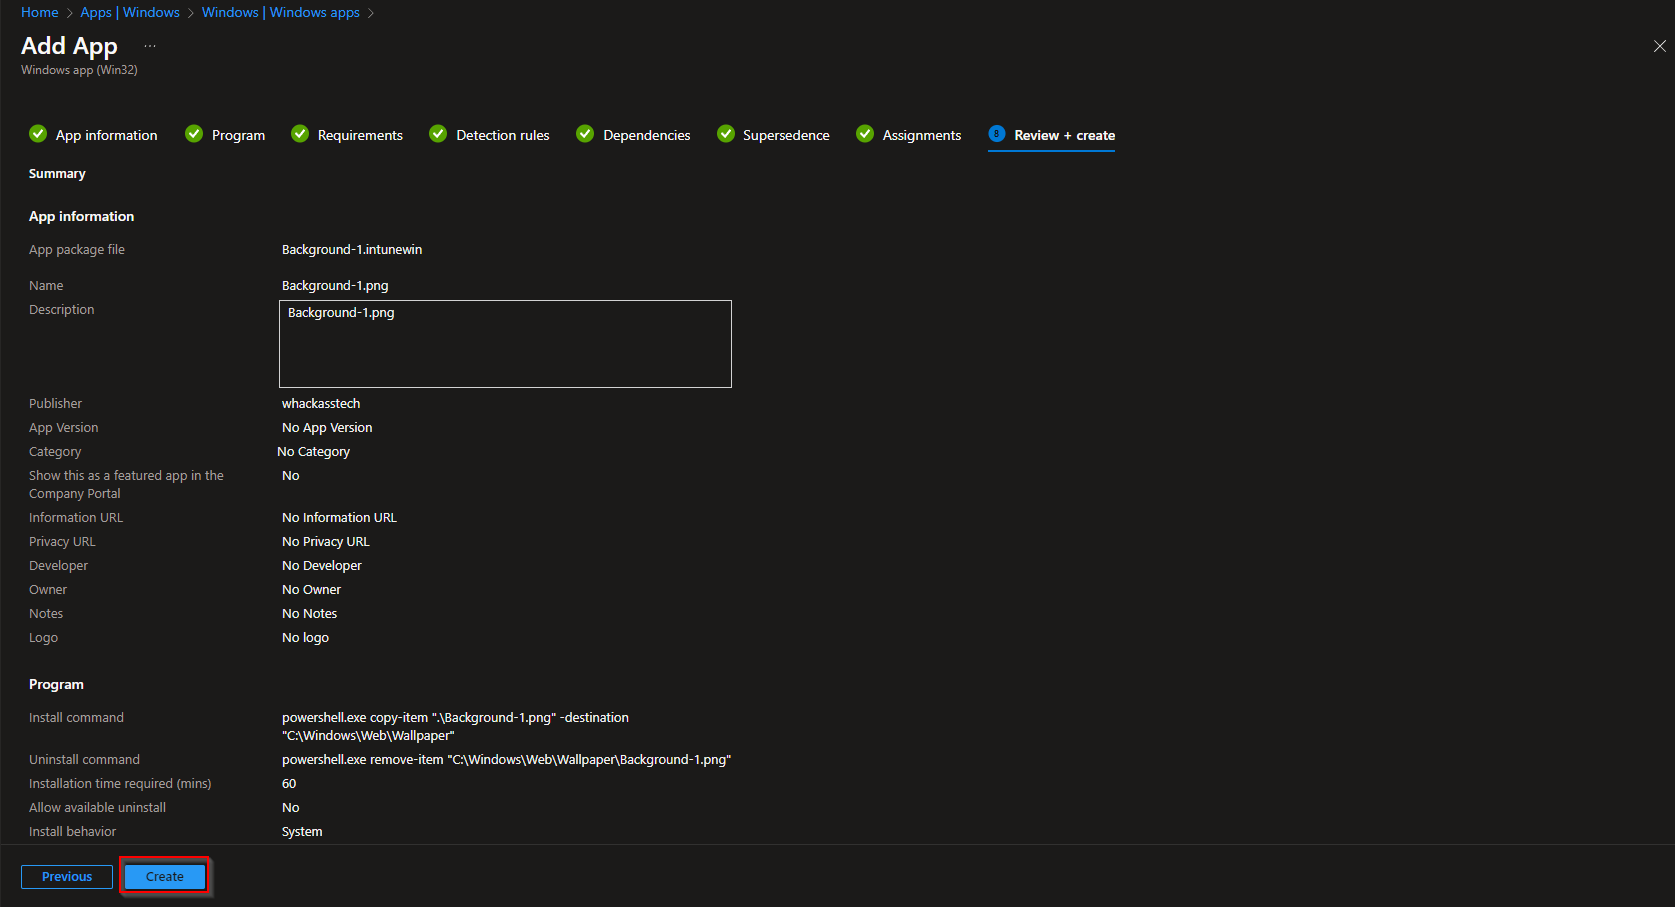
On Assignments, assign the app to the groups (or All Users/Devices) that should get the lock screen. Click Next, then Review + create → Create.

Step 3: Create the Lock Screen Configuration Profile
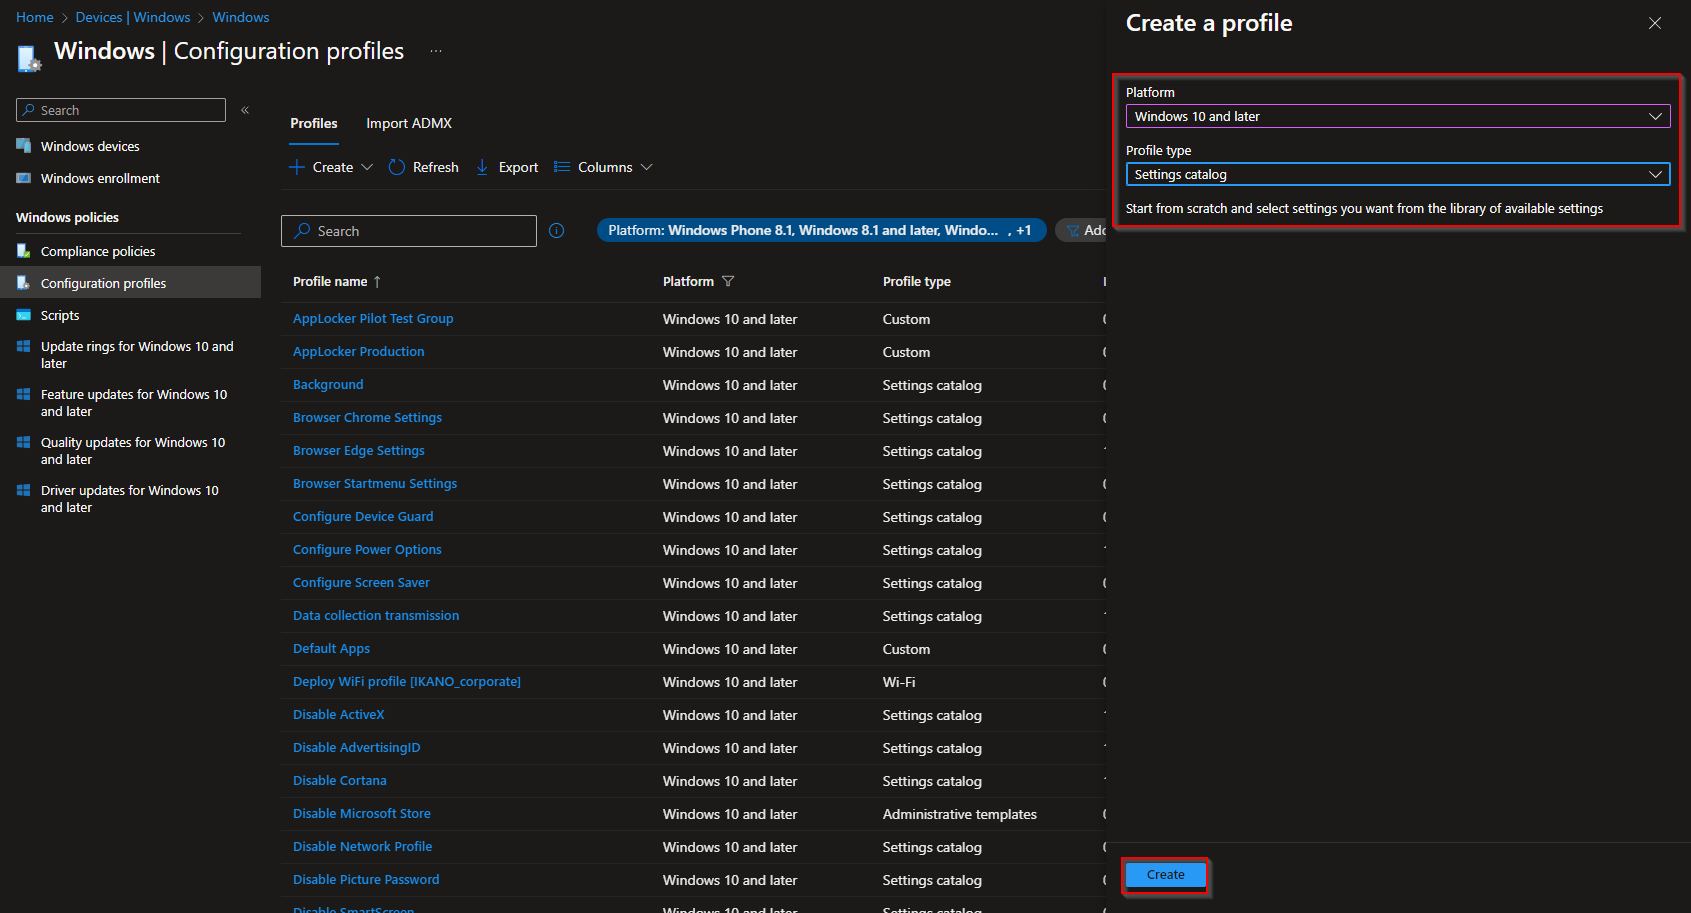
Go to Devices → Windows → Configuration profiles. Click Create → New policy. Set Platform to Windows 10 and later and Profile type to Settings catalog. Click Create.
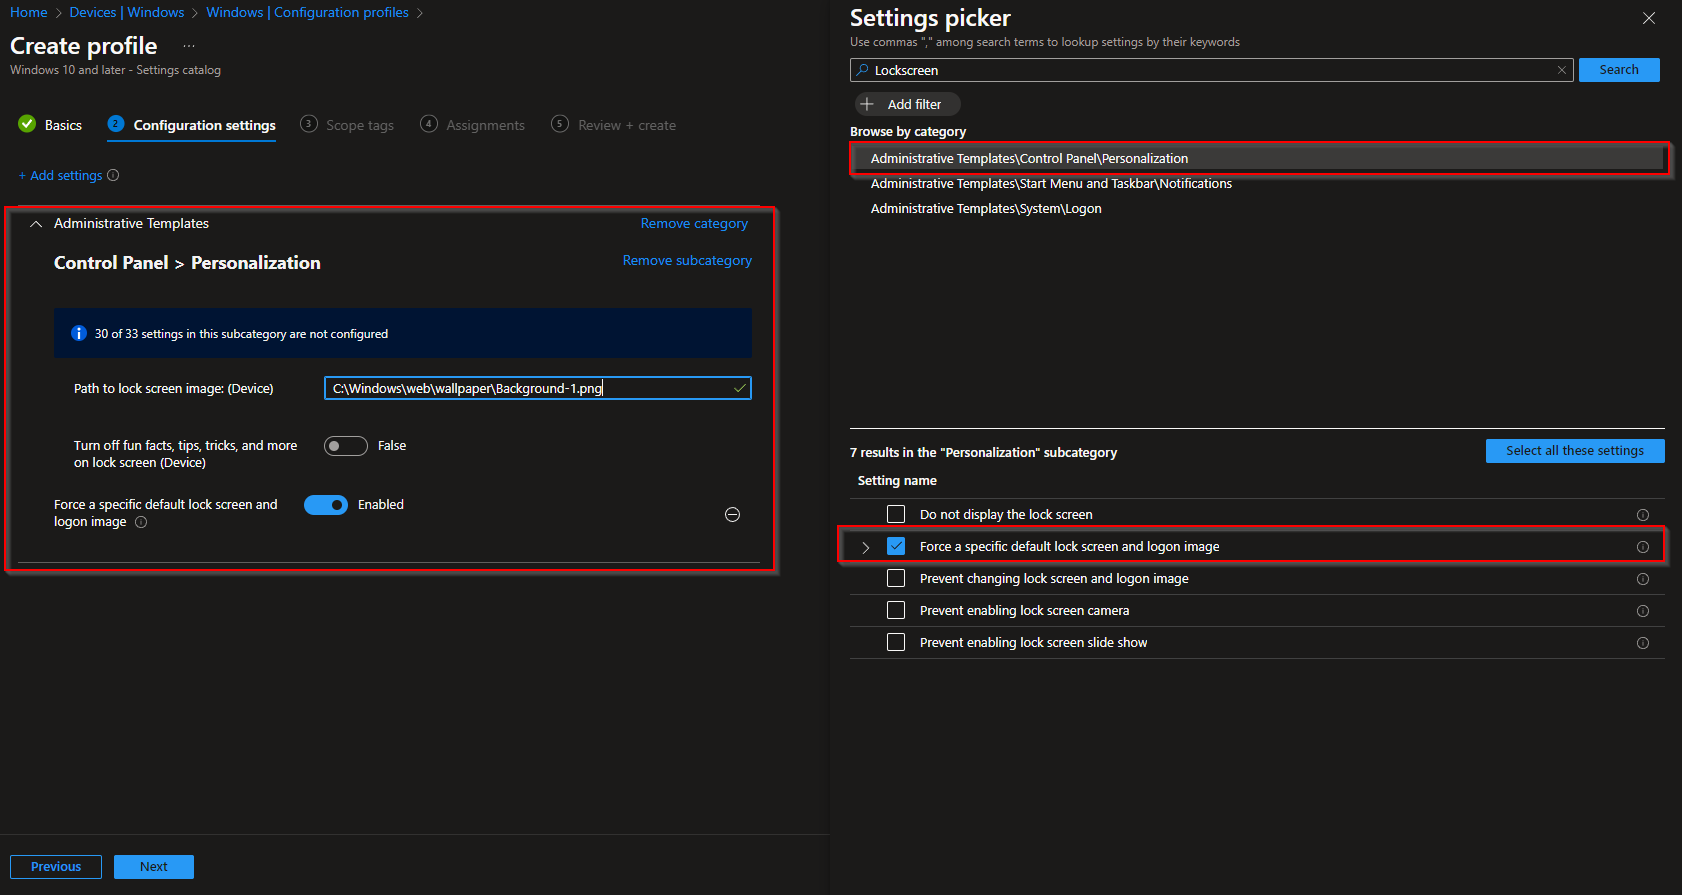
On Basics, enter a name (e.g. “Lock screen image”) and click Next. On Configuration settings, click Add settings. Search for Desktop or lock screen, then expand Administrative Templates → Control Panel → Personalization. Add Force a specific default lock screen and logon image, enable it, and set Path to lock screen image to C:\Windows\Web\Wallpaper\Background-1.png (or your image name). Click Next.
Set Scope tags and Assignments (same users/devices as the Win32 app so the image is present when the policy applies). On Review + create, click Create.
The Win32 app copies the image to C:\Windows\Web\Wallpaper; the configuration profile tells Windows to use that file as the lock screen. Ensure the app is assigned so it installs before or with the profile.
Wrap-up
You can deploy a custom lock screen with Intune by (1) packaging the image with the Win32 Content Prep Tool, (2) deploying it as a Win32 app that copies the file to C:\Windows\Web\Wallpaper, and (3) creating a Settings Catalog profile that enables Force a specific default lock screen and logon image with that path. Use the same image filename in the install command, detection rule, and policy path so the lock screen applies consistently.