Multi-factor unlock (MFU) in Windows requires users to use two different Windows Hello for Business credential types when unlocking the device. For example PIN plus fingerprint, or fingerprint plus a trusted signal (e.g. phone proximity via Bluetooth). With Microsoft Intune you configure MFU using a Custom configuration profile and three OMA-URI settings: one for the first unlock factor (Group A), one for the second (Group B), and one for signal rules (e.g. Bluetooth). This guide walks through creating the profile and the three OMA-URI entries.
What Is Multi-Factor Unlock?
Multi-factor unlock adds a second authentication factor at lock screen. Users must satisfy two distinct Windows Hello for Business credential providers. For example:
- PIN . Something you know.
- Fingerprint or Facial recognition . Biometrics.
- Trusted signal . Phone proximity (Bluetooth) or network location.
You define which providers are allowed for the “first” factor (Group A) and which for the “second” (Group B). The user picks one from each group at unlock. Signal rules (e.g. Bluetooth) define when a trusted device counts as the second factor.
User Experience
At unlock, the user completes two steps. E.g. fingerprint then PIN, or fingerprint with phone nearby (Bluetooth). Using a trusted phone as the second factor is often the smoothest: the user uses biometrics on the PC and the phone is verified in the background. PIN as the second factor is also common and still stronger than a single factor. For full details and signal rule options (e.g. Wi‑Fi, network location), see Multi-factor unlock on Microsoft Learn.
What You’ll Configure
You will create one Custom configuration profile for Windows 10 and later and add three OMA-URI settings:
- First unlock factor (Group A) . Allowed credential provider GUIDs for the first factor (e.g. PIN, fingerprint, facial).
- Second unlock factor (Group B) . Allowed credential provider GUIDs for the second factor (e.g. PIN, trusted signal).
- Signal rules (Plugins) . XML that defines when a trusted signal (e.g. Bluetooth) is valid for unlock.
Then assign the profile to the users or devices that should use MFU.
Credential Provider GUIDs
Use these GUIDs in the OMA-URI values (comma-separated for multiple):
- PIN .
{D6886603-9D2F-4EB2-B667-1971041FA96B} - Fingerprint .
{BEC09223-B018-416D-A0AC-523971B639F5} - Facial recognition .
{8AF662BF-65A0-4D0A-A540-A338A999D36F} - Trusted signal (phone proximity, network location) .
{27FBDB57-B613-4AF2-9D7E-4FA7A66C21AD}
Step 1: Create a Custom Configuration Profile
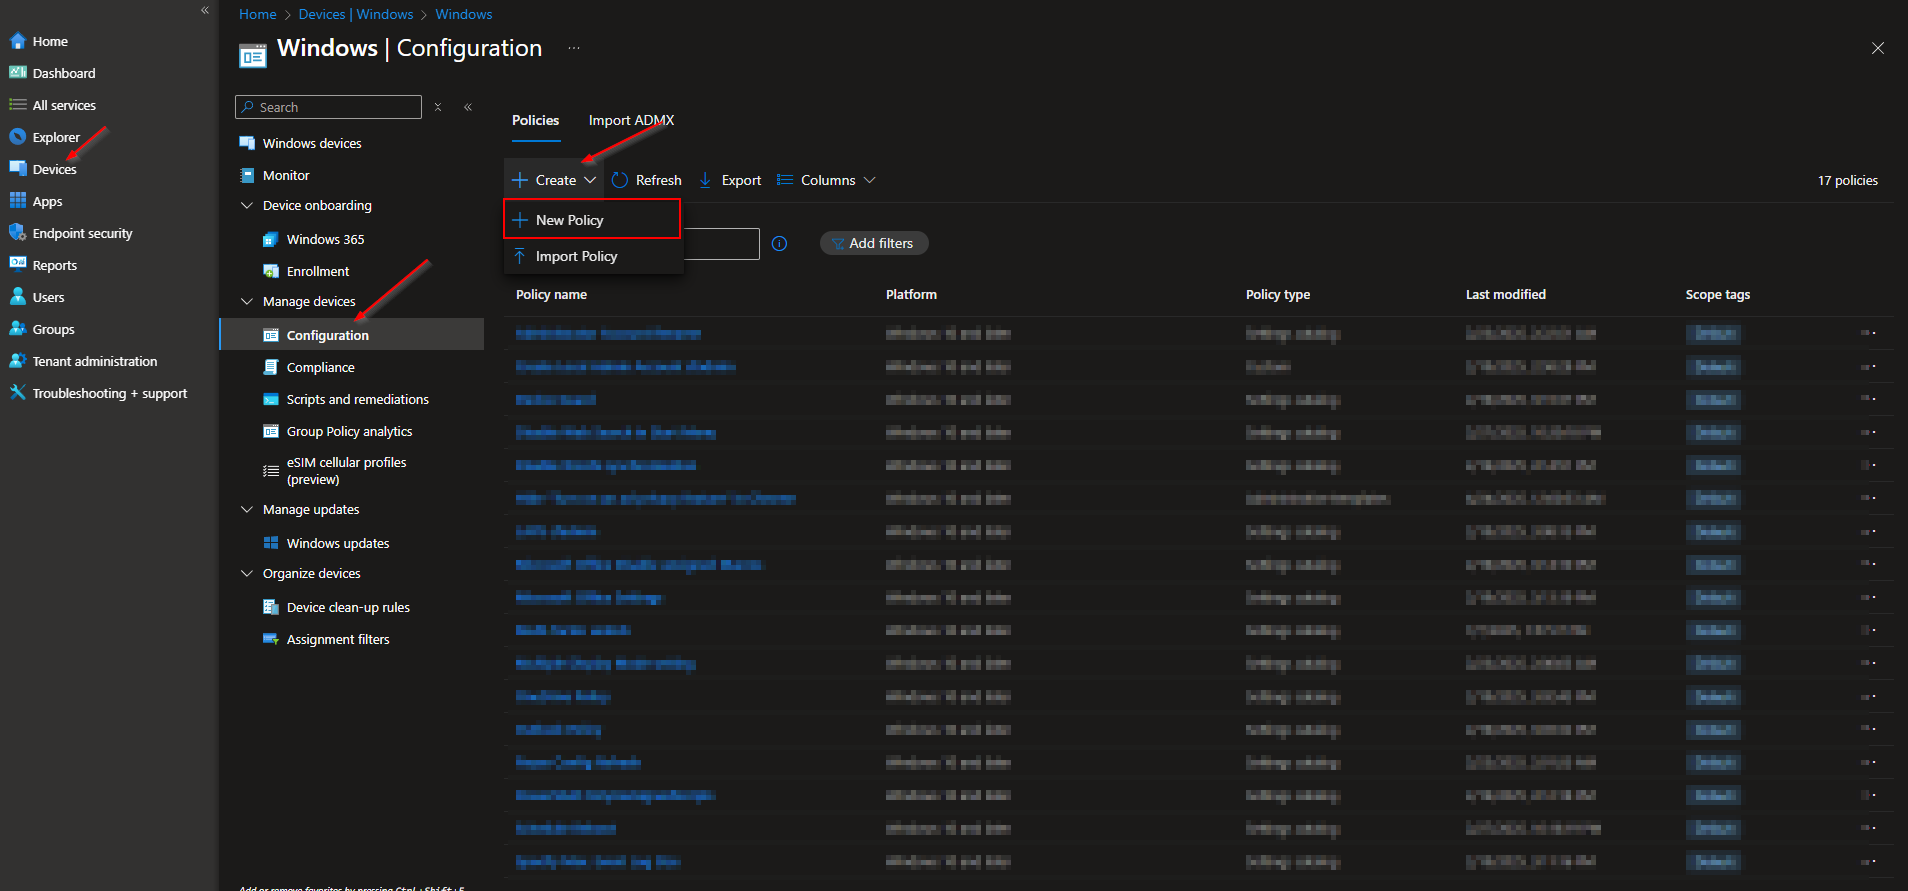
In the Microsoft Intune admin center, go to Devices → Windows → Configuration profiles. Click Create → New policy. Set Platform to Windows 10 and later, Profile type to Templates, and choose Custom. Click Create.
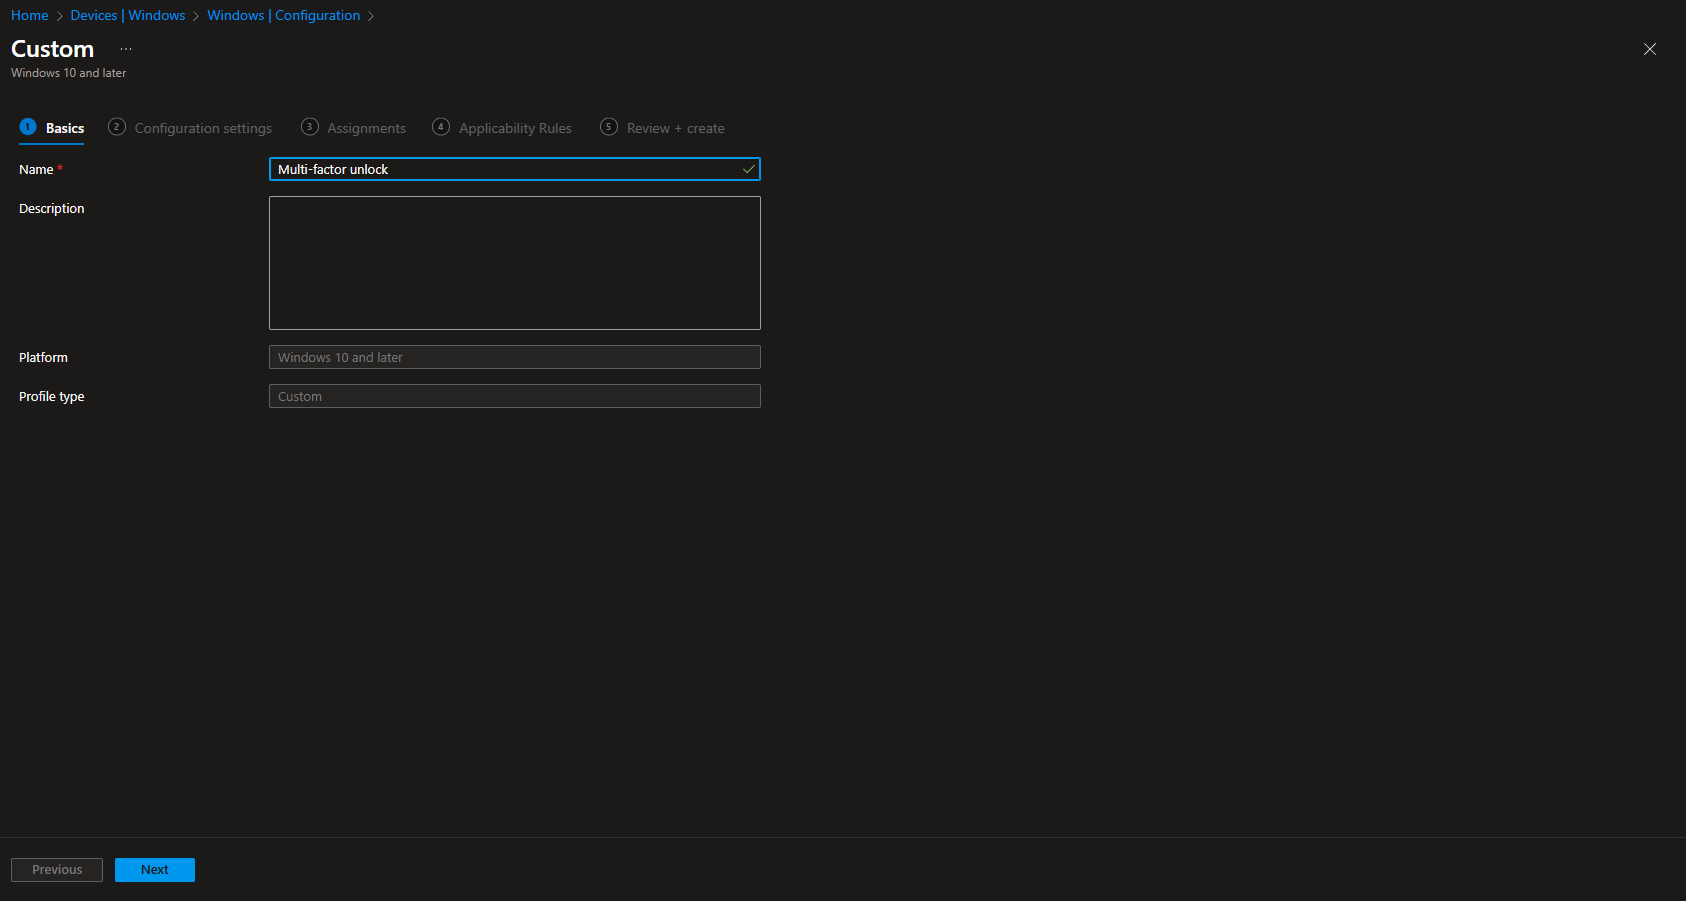
On Basics, enter a Name (e.g. “Multi-factor unlock”) and optionally a Description. Click Next.
Step 2: Add the Three OMA-URI Settings
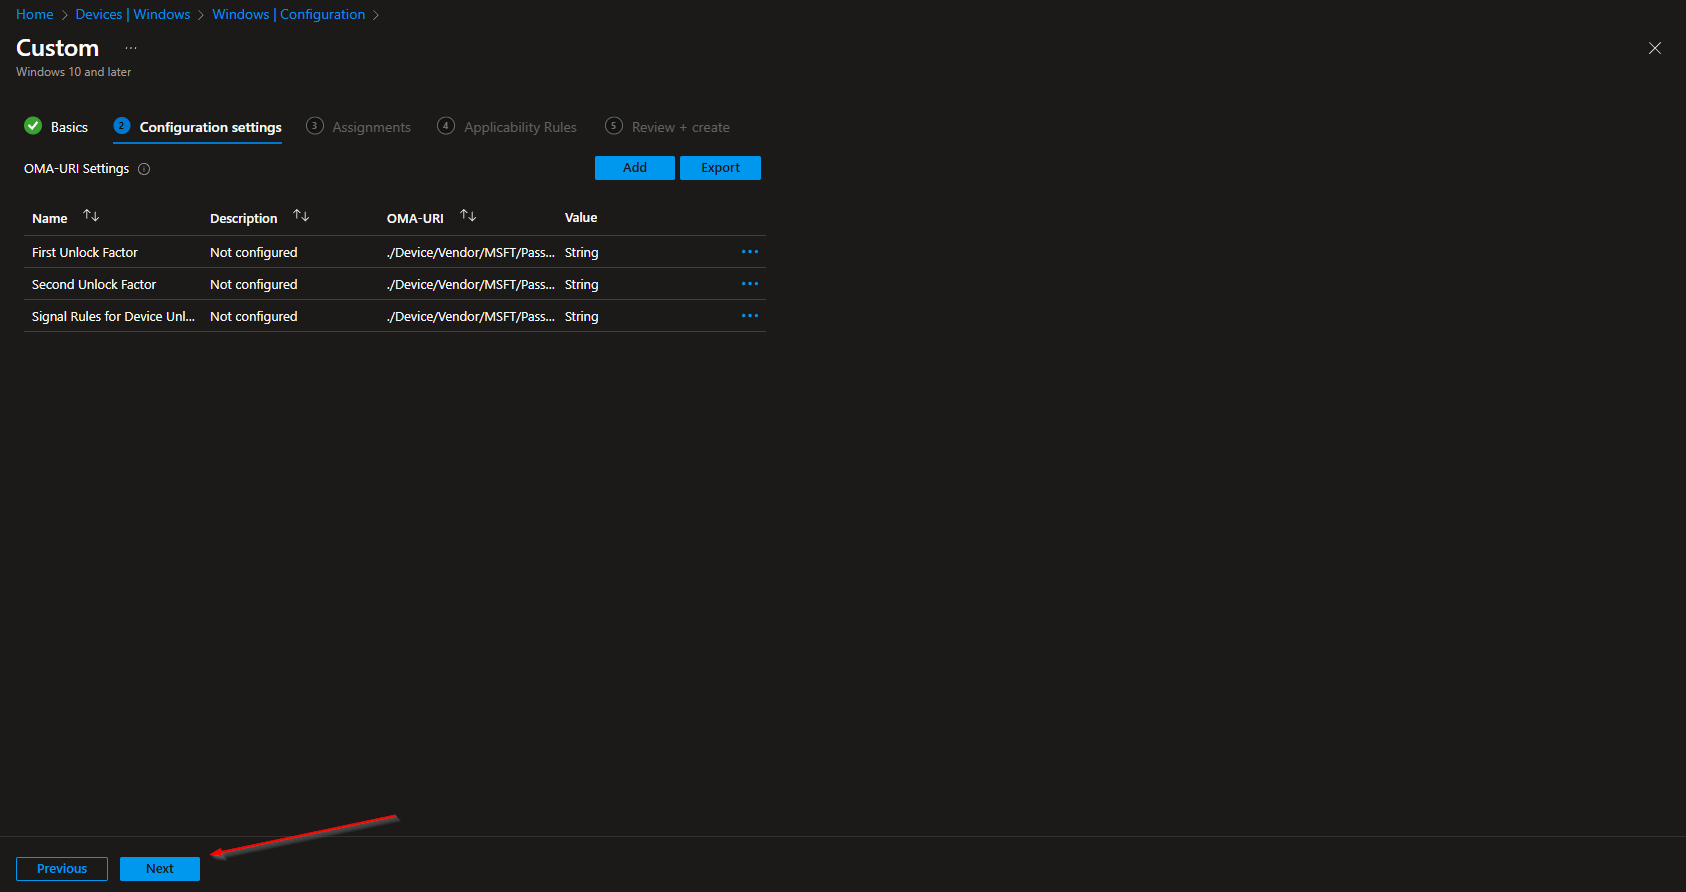
On Configuration settings, add three OMA-URI entries.
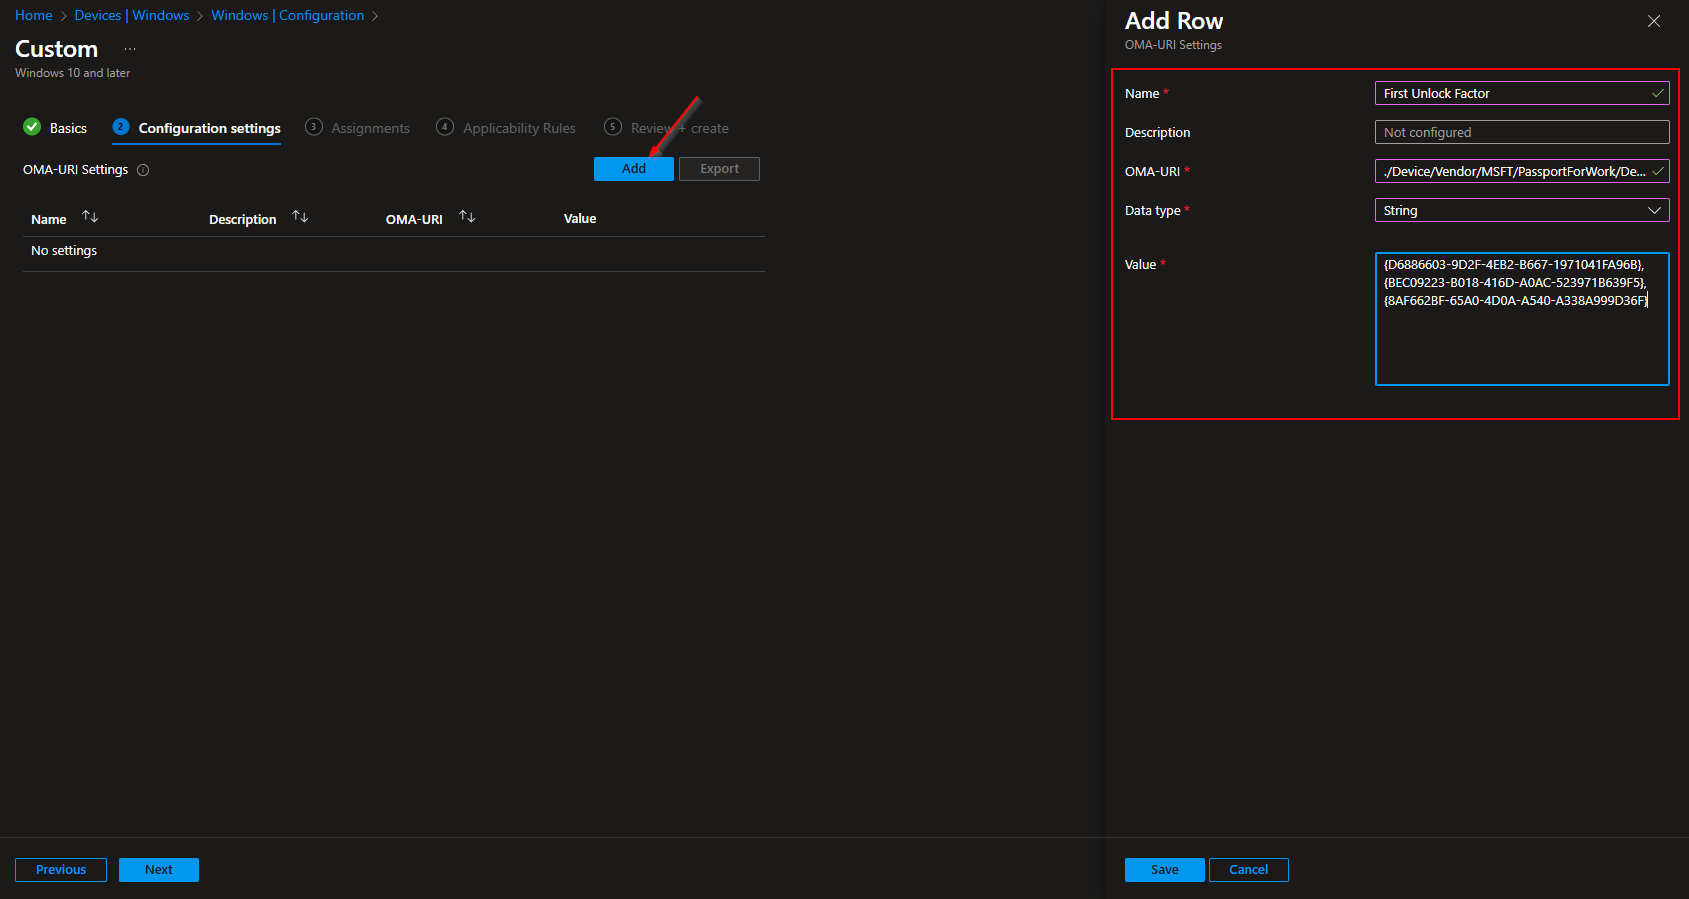
First unlock factor (Group A)
Click Add. Set Name to e.g. “First unlock factor”, OMA-URI to ./Device/Vendor/MSFT/PassportForWork/DeviceUnlock/GroupA, Data type to String, and Value to a comma-separated list of GUIDs for the first factor. Example (PIN, fingerprint, facial):
{D6886603-9D2F-4EB2-B667-1971041FA96B},{BEC09223-B018-416D-A0AC-523971B639F5},{8AF662BF-65A0-4D0A-A540-A338A999D36F}

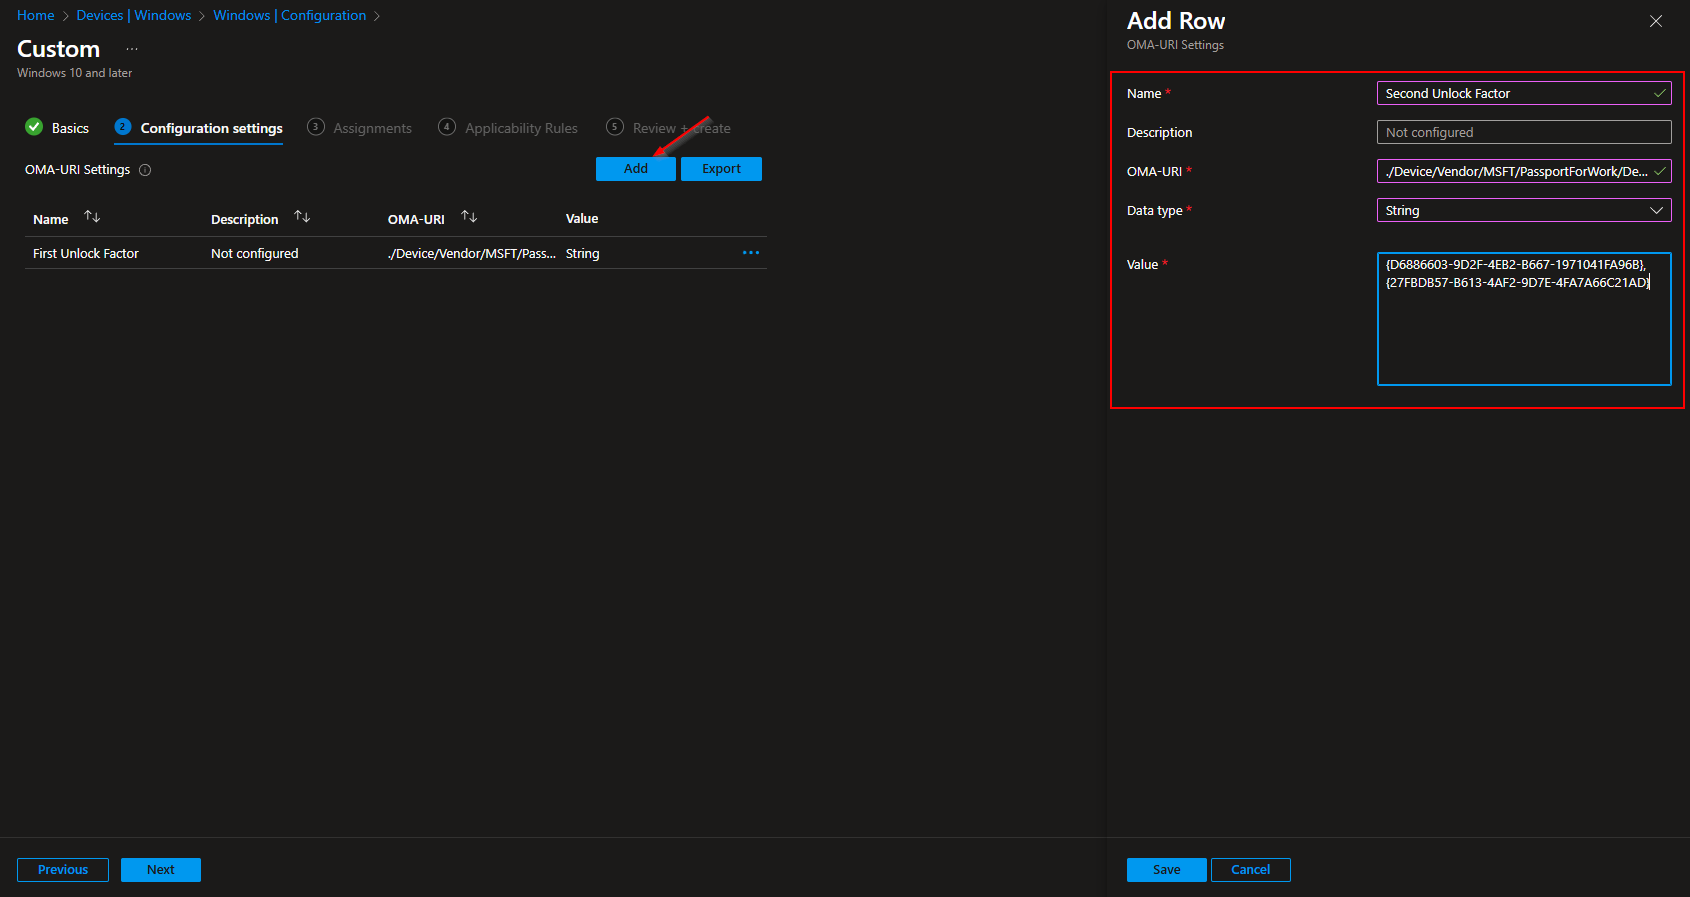
Second unlock factor (Group B)
Click Add again. Set Name to e.g. “Second unlock factor”, OMA-URI to ./Device/Vendor/MSFT/PassportForWork/DeviceUnlock/GroupB, Data type to String, and Value to the GUIDs allowed for the second factor. Example (PIN and trusted signal):
{D6886603-9D2F-4EB2-B667-1971041FA96B},{27FBDB57-B613-4AF2-9D7E-4FA7A66C21AD}
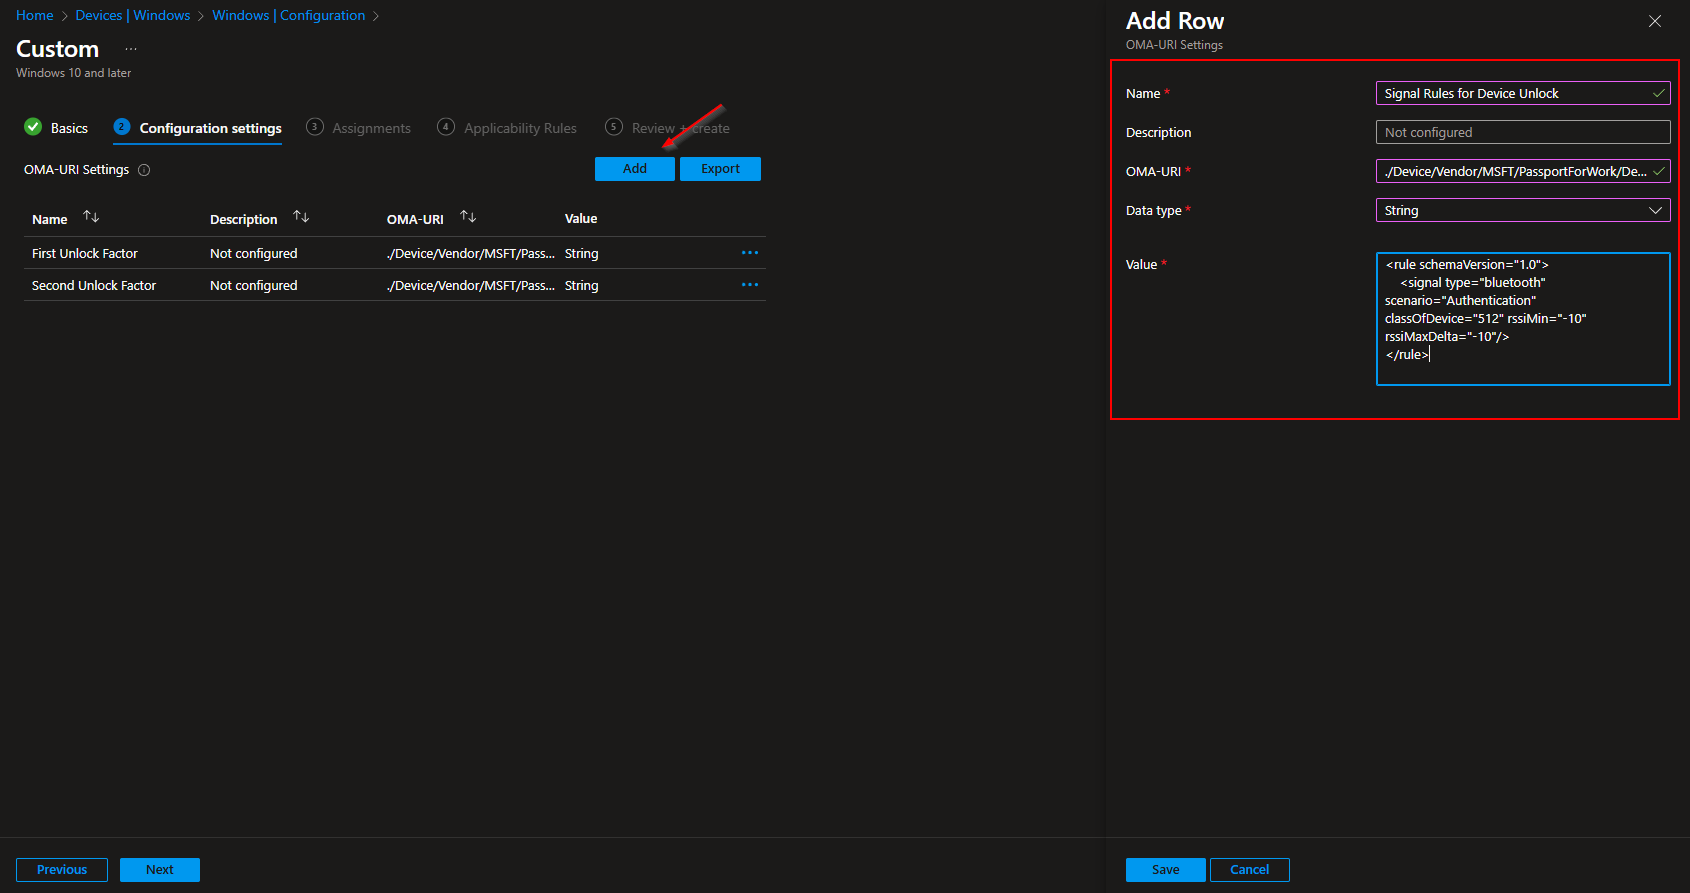
Signal rules (Plugins)
Click Add again. Set Name to e.g. “Signal rules for device unlock”, OMA-URI to ./Device/Vendor/MSFT/PassportForWork/DeviceUnlock/Plugins, Data type to String, and Value to the signal rule XML. Example for Bluetooth:
<rule schemaVersion="1.0"> <signal type="bluetooth" scenario="Authentication" classOfDevice="512" rssiMin="-10" rssiMaxDelta="-10"/> </rule>
Adjust the XML per Microsoft Learn if you use Wi‑Fi or network location. Click Next.
Set scope tags if your tenant uses them. On Assignments, add the groups (or All Users / All Devices) that should use multi-factor unlock. Click Next, then Review + create, and Create.
After the profile syncs to targeted devices, users will need two factors from the configured groups when unlocking. Ensure Windows Hello for Business is enabled and users have set up the factors you allow (e.g. PIN and fingerprint, or phone for trusted signal).
Wrap-up
You can configure multi-factor unlock with Microsoft Intune by creating a Custom configuration profile for Windows 10 and later and adding three OMA-URI settings: GroupA (first unlock factor GUIDs), GroupB (second unlock factor GUIDs), and Plugins (signal rule XML for Bluetooth, Wi‑Fi, or network). Use the credential provider GUIDs for PIN, fingerprint, facial recognition, and trusted signal as needed. Assign the profile to the users or devices where you want MFU enforced. For signal rule syntax and options, see the Multi-factor unlock documentation on Microsoft Learn.