Windows assigns each user on a device a unique, resettable identifier called the Windows Advertising ID. Apps and advertising networks can use this ID to tie together data they collect and deliver personalized or “relevant” ads across apps. On corporate devices, that kind of tracking is often unwanted: it can build detailed profiles of app usage and, in high-security environments, increase the risk that device usage patterns are exposed or profiled by third parties.
With Microsoft Intune, you can enforce a single privacy standard across all managed devices using the Disable Advertising ID setting in a Settings catalog profile. When you enable this policy, the advertising ID is turned off so apps cannot use it for experiences across apps. This post walks through creating that profile so you control the Windows Advertising ID for enhanced privacy.
Why Turn Off the Advertising ID?
Even when tracking is anonymous, using the advertising ID for ad targeting is a privacy concern. Organizations often want to limit data collection on corporate-owned devices and protect employee data. Turning off the advertising ID:
- Stops apps from using the ID for cross-app advertising and personalization.
- Reduces the ability of ad networks to build detailed profiles of app usage on managed devices.
- Can reduce background activity related to ad tracking and communication with ad servers, freeing a small amount of bandwidth and system resources.
Deploying the setting via Intune ensures every managed device gets the same policy without relying on users to find and change the option manually.
Create a Configuration Profile
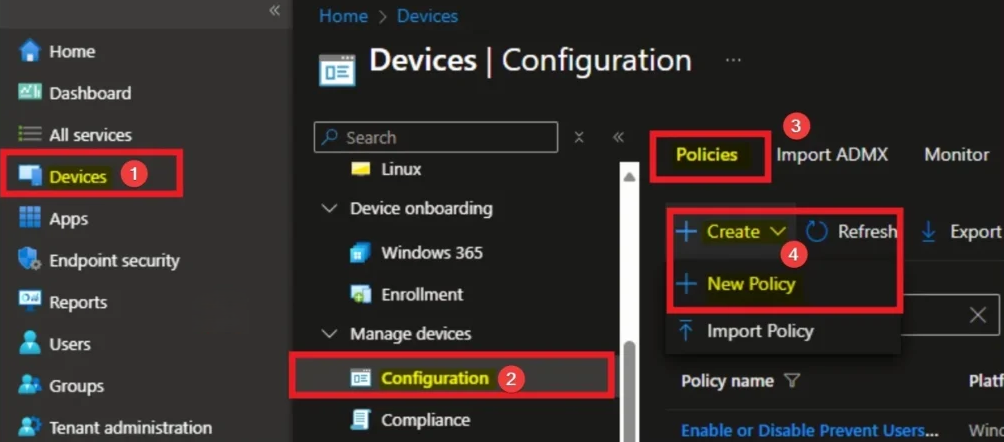
In the Microsoft Intune admin center, sign in and go to Devices → Configuration. Click Create → New policy.
Choose Platform and Profile Type
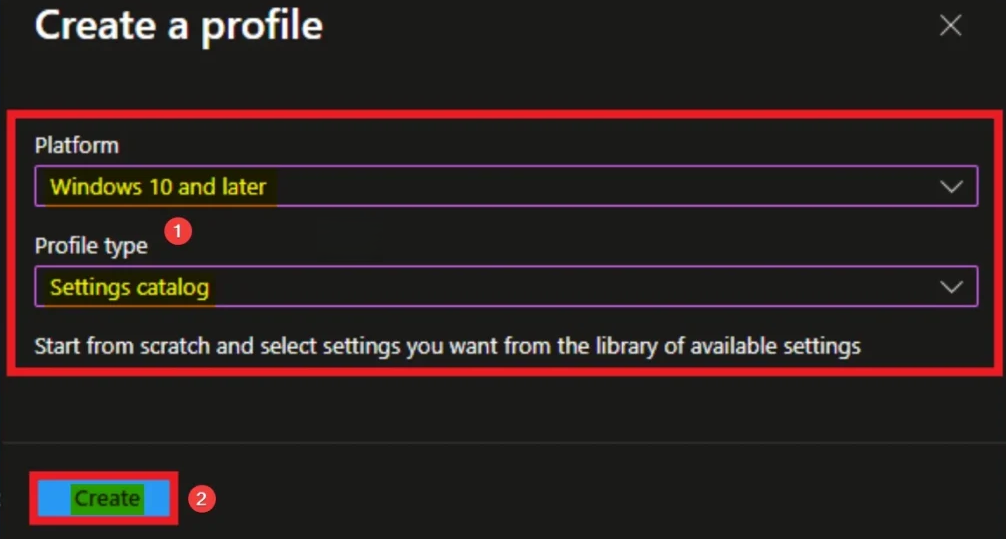
Select Windows 10 and later as the platform and Settings catalog as the profile type. The Settings catalog lets you pick the Disable Advertising ID setting without custom OMA-URI. Click Create to open the wizard.
Basics: Name and Description
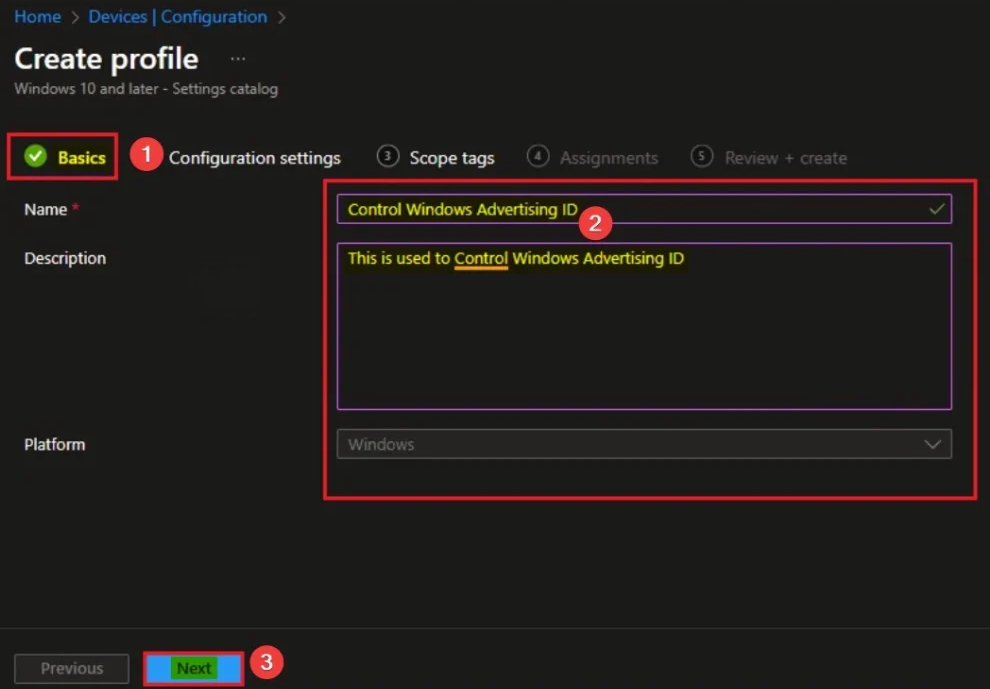
On Basics, give the profile a name (e.g. “Disable Windows Advertising ID – Enhanced Privacy”) and an optional description so other admins know the purpose. Click Next.
Add the Disable Advertising ID Setting
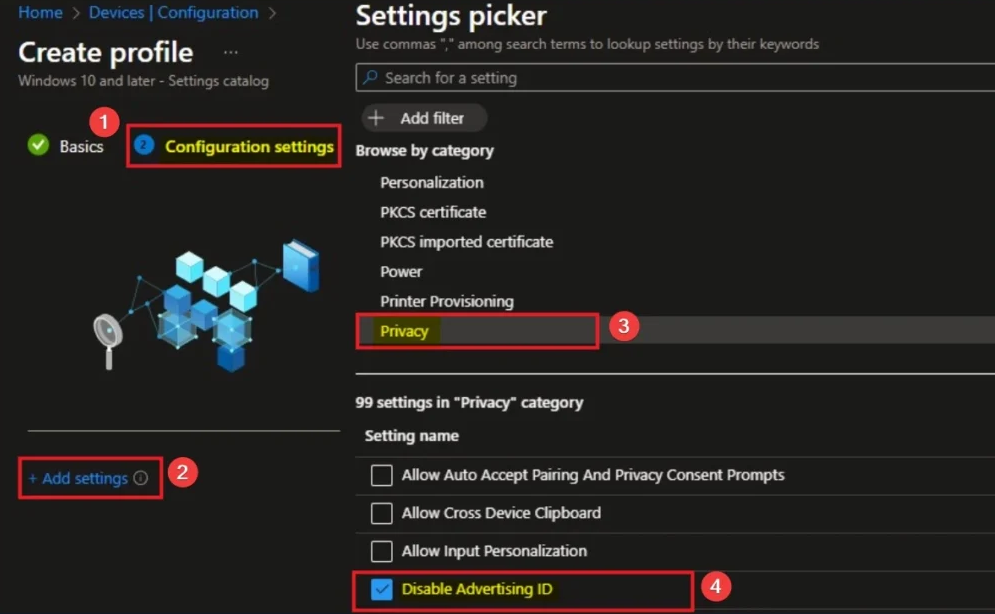
On Configuration settings, click Add settings. In the settings picker, browse by Category, open Privacy, and locate Disable Advertising Id (or the equivalent “Disable Advertising ID” / “Disable Advertising Id Policy” option in your tenant). Add it to the profile.
Adding the Privacy > Disable Advertising Id setting from the Settings catalog.
Set the Value to Turn Off the Advertising ID
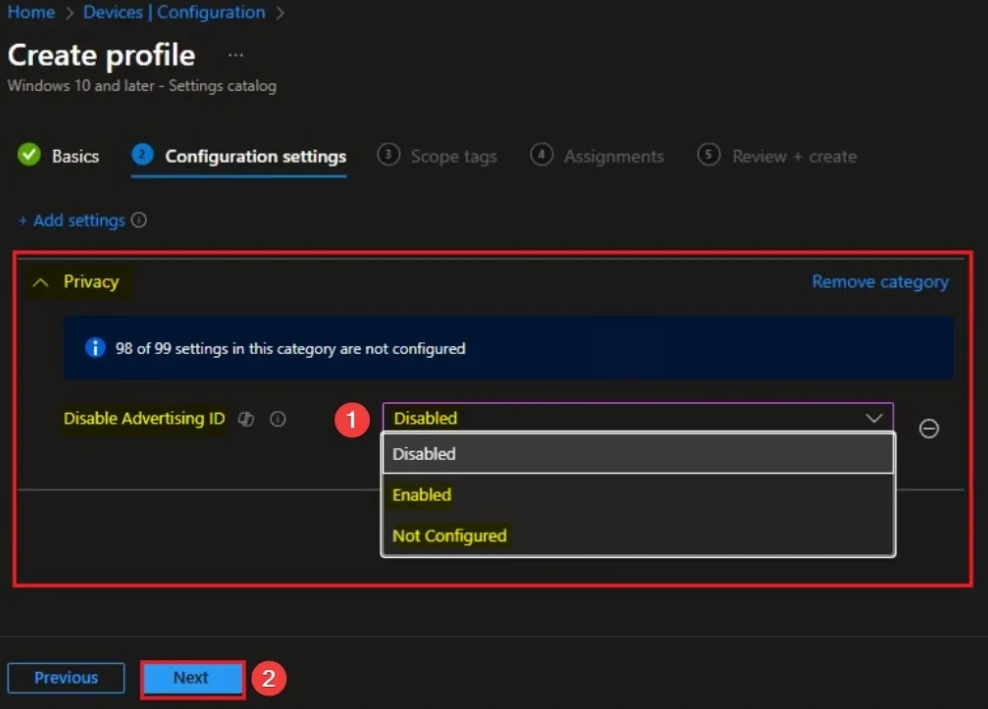
To turn off the advertising ID for enhanced privacy, set Disable Advertising Id to Enabled. When this policy is enabled, the advertising ID is turned off and apps cannot use it for experiences across apps. If you set it to Disabled or leave it not configured, users can control whether apps use the advertising ID (per-device setting). Click Next.
Scope Tags and Assignments
On Scope tags, add tags if required; otherwise leave default and click Next. On Assignments, add the groups that should receive this profile (e.g. all Windows devices or specific departments). Click Next.
Review and Create
On Review + create, confirm the name, the Disable Advertising Id value (Enabled = advertising ID off), scope tags, and assignments. Click Create to save. The profile will deploy to assigned devices on their next sync.
Verify Deployment
Under Devices → Configuration, open the profile and check per-device status (Succeeded, Error, Conflict, etc.). To test sooner, trigger a sync from the Company Portal on a device. Once applied, the Windows Advertising ID is turned off on those devices, and apps cannot use it for cross-app advertising. Giving you consistent, enhanced privacy across your managed fleet.
Summary
Control the Windows Advertising ID for enhanced privacy in Intune with a Settings catalog profile: add the Disable Advertising Id setting under Privacy and set it to Enabled so the advertising ID is turned off. Assign the profile to your groups, create, and verify in Configuration status. Managed devices will then adhere to the same corporate privacy standard without relying on users to change the setting manually.